

Step 1: Enable SCIM in Vikat
Open your Okta provider
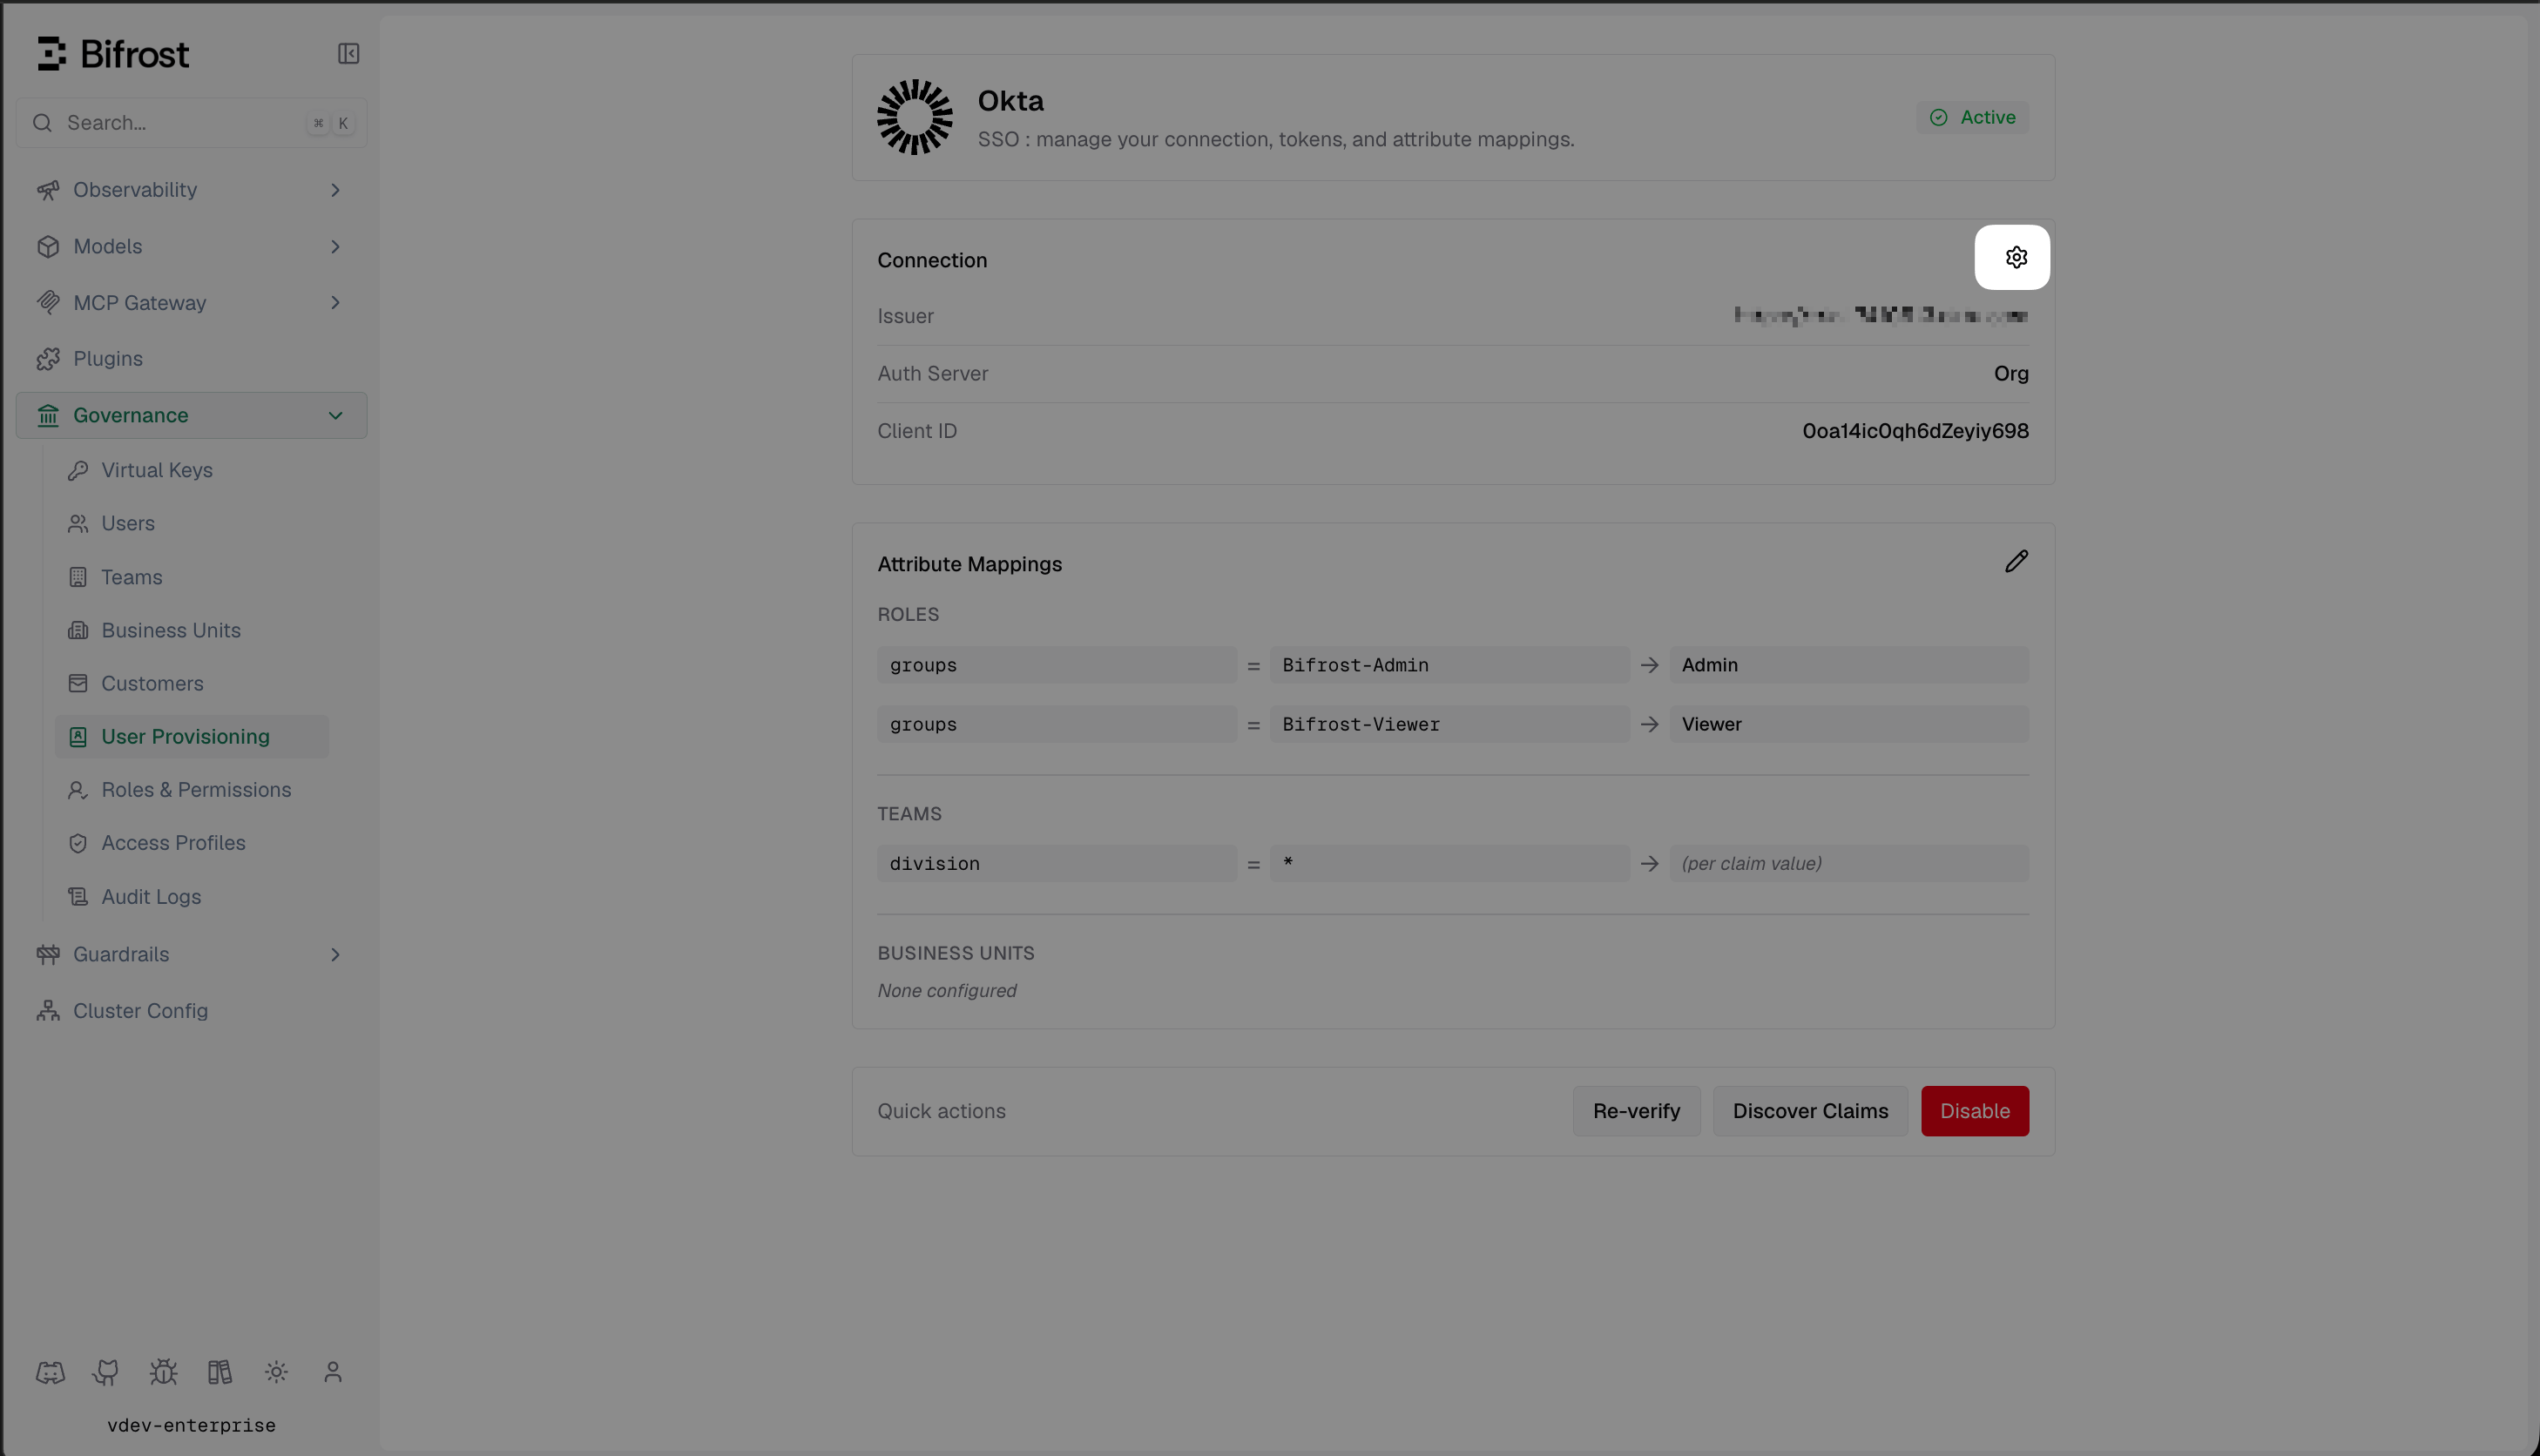
The Okta provider dashboard showing your connection details and attribute mappings.
Enable SCIM provisioning
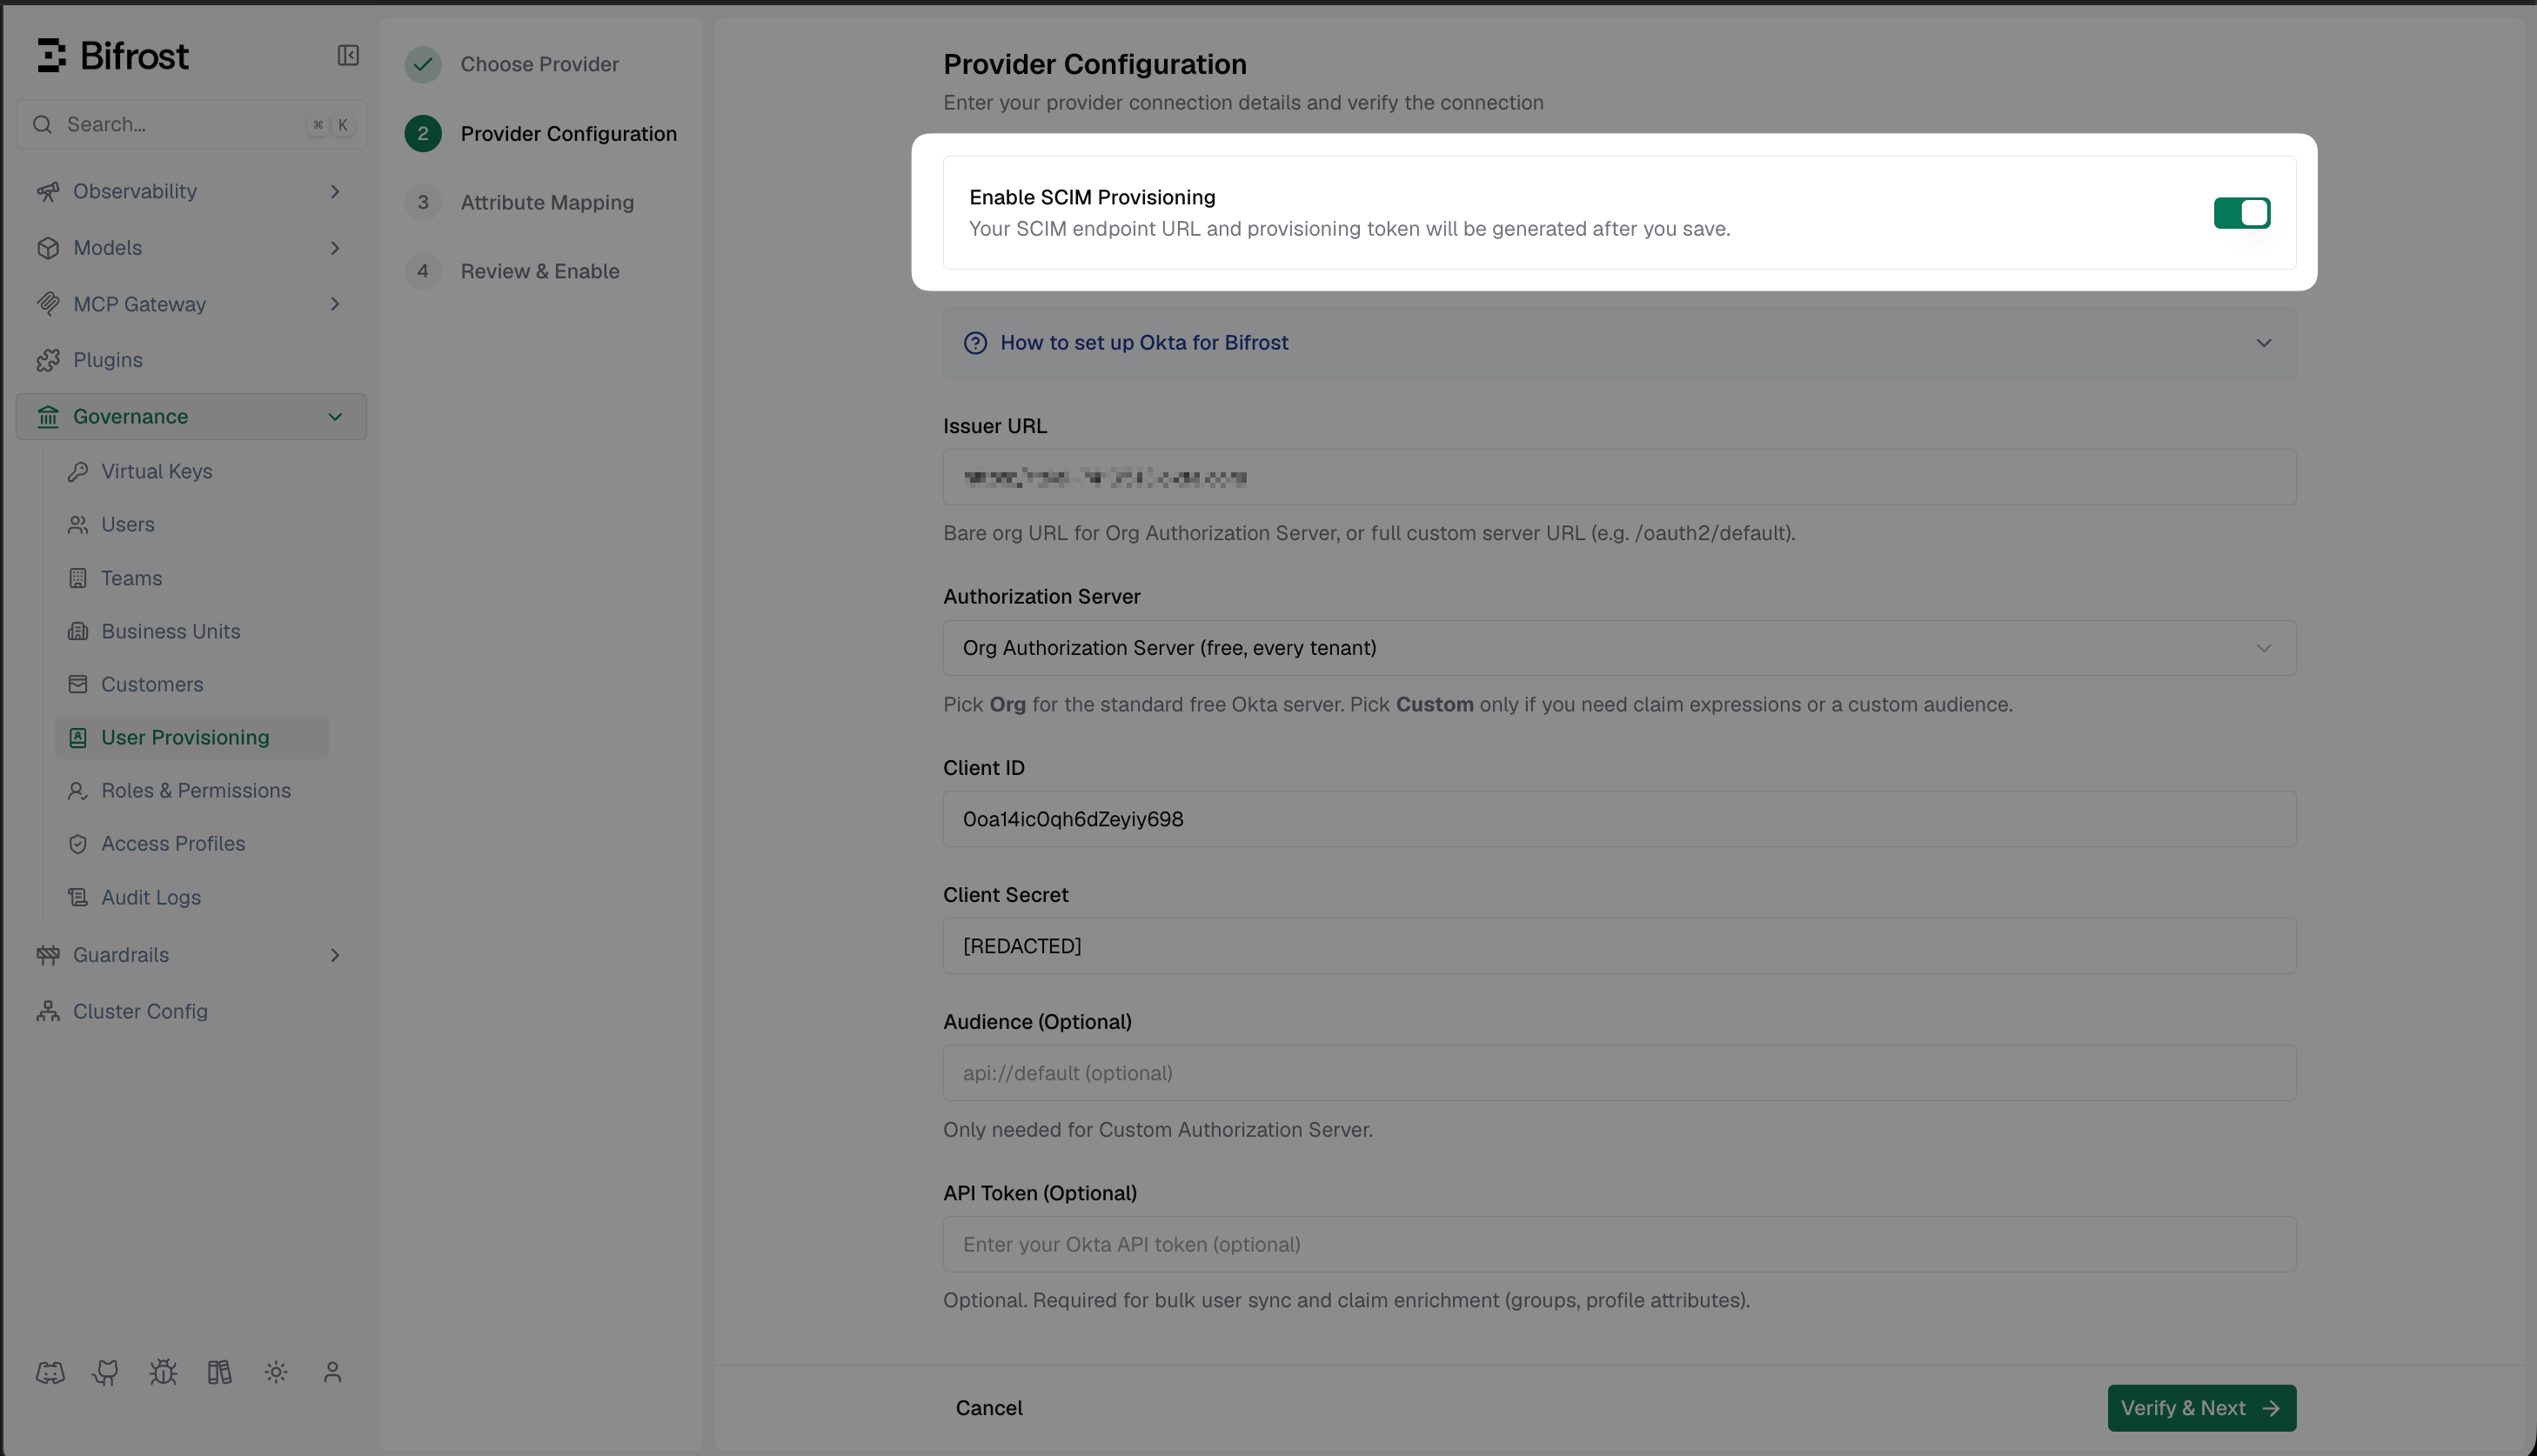
Enable SCIM Provisioning in Provider Configuration — the SCIM endpoint URL and token are generated after saving.
Copy the SCIM credentials
- SCIM Endpoint URL — the base URL Okta will send provisioning requests to
- Provisioning Token — the bearer token Okta uses to authenticate
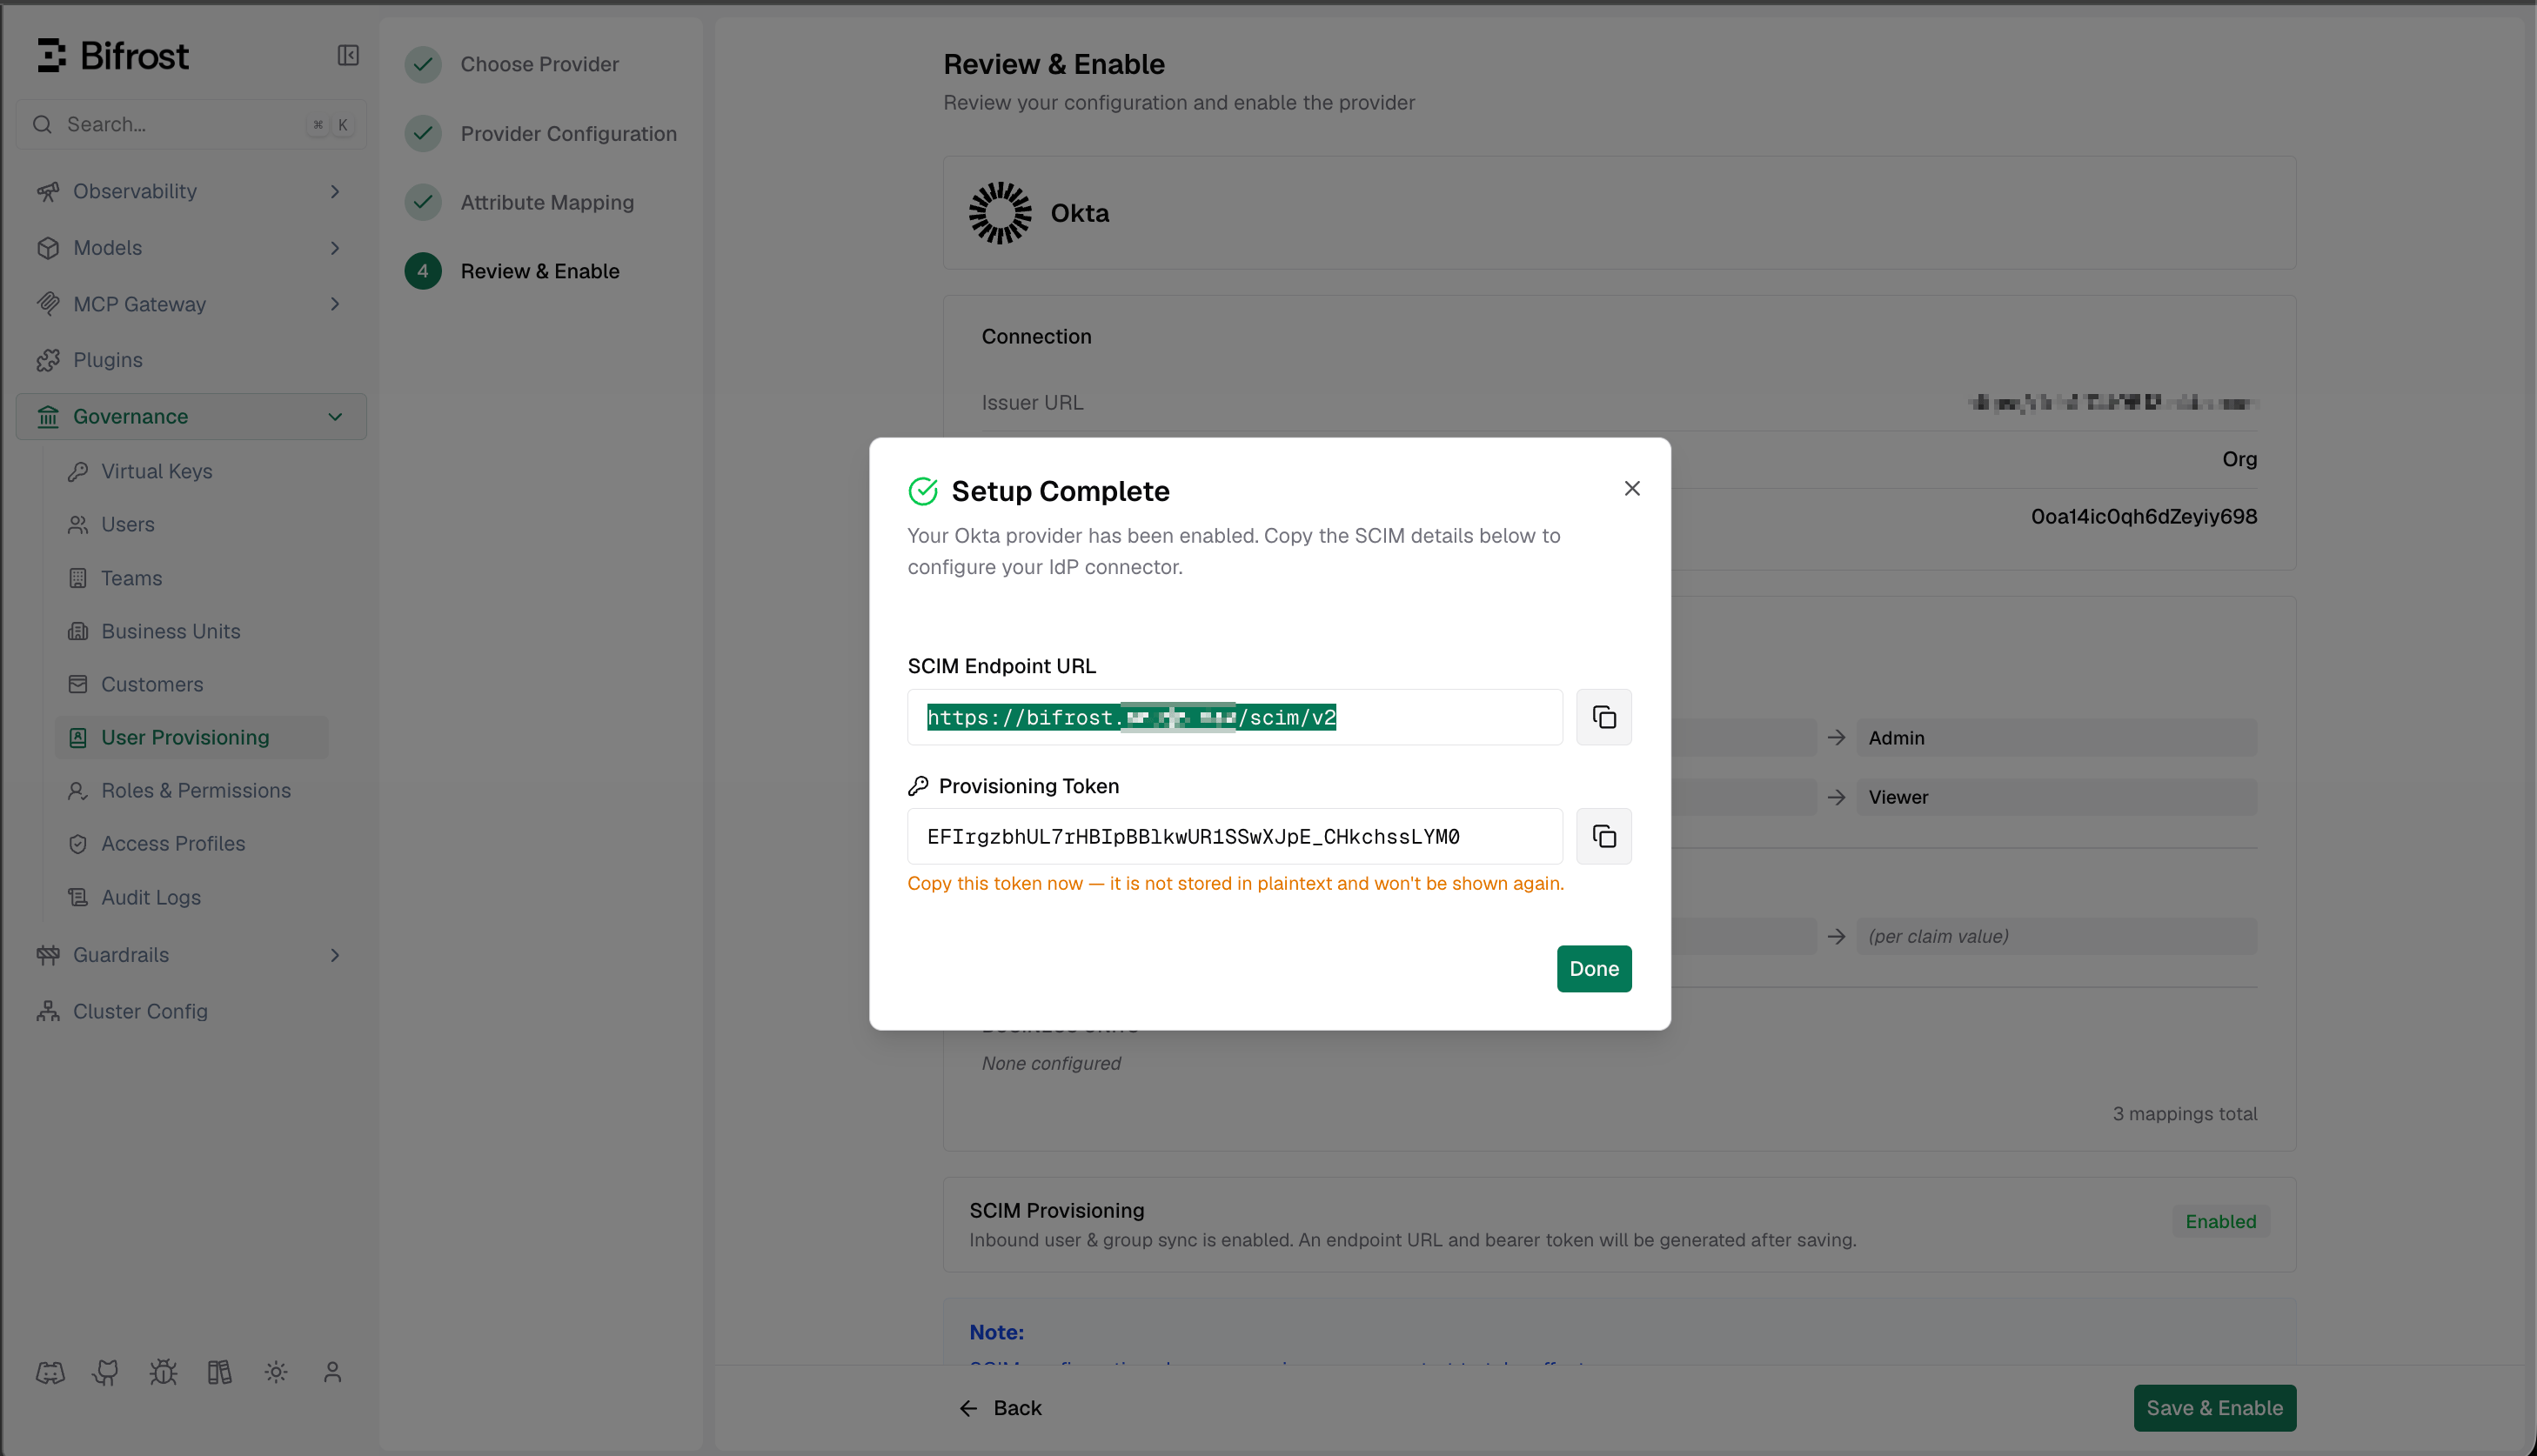
Setup Complete dialog showing the SCIM Endpoint URL and Provisioning Token.
Step 2: Create a SCIM App in Okta
Browse the App Catalog
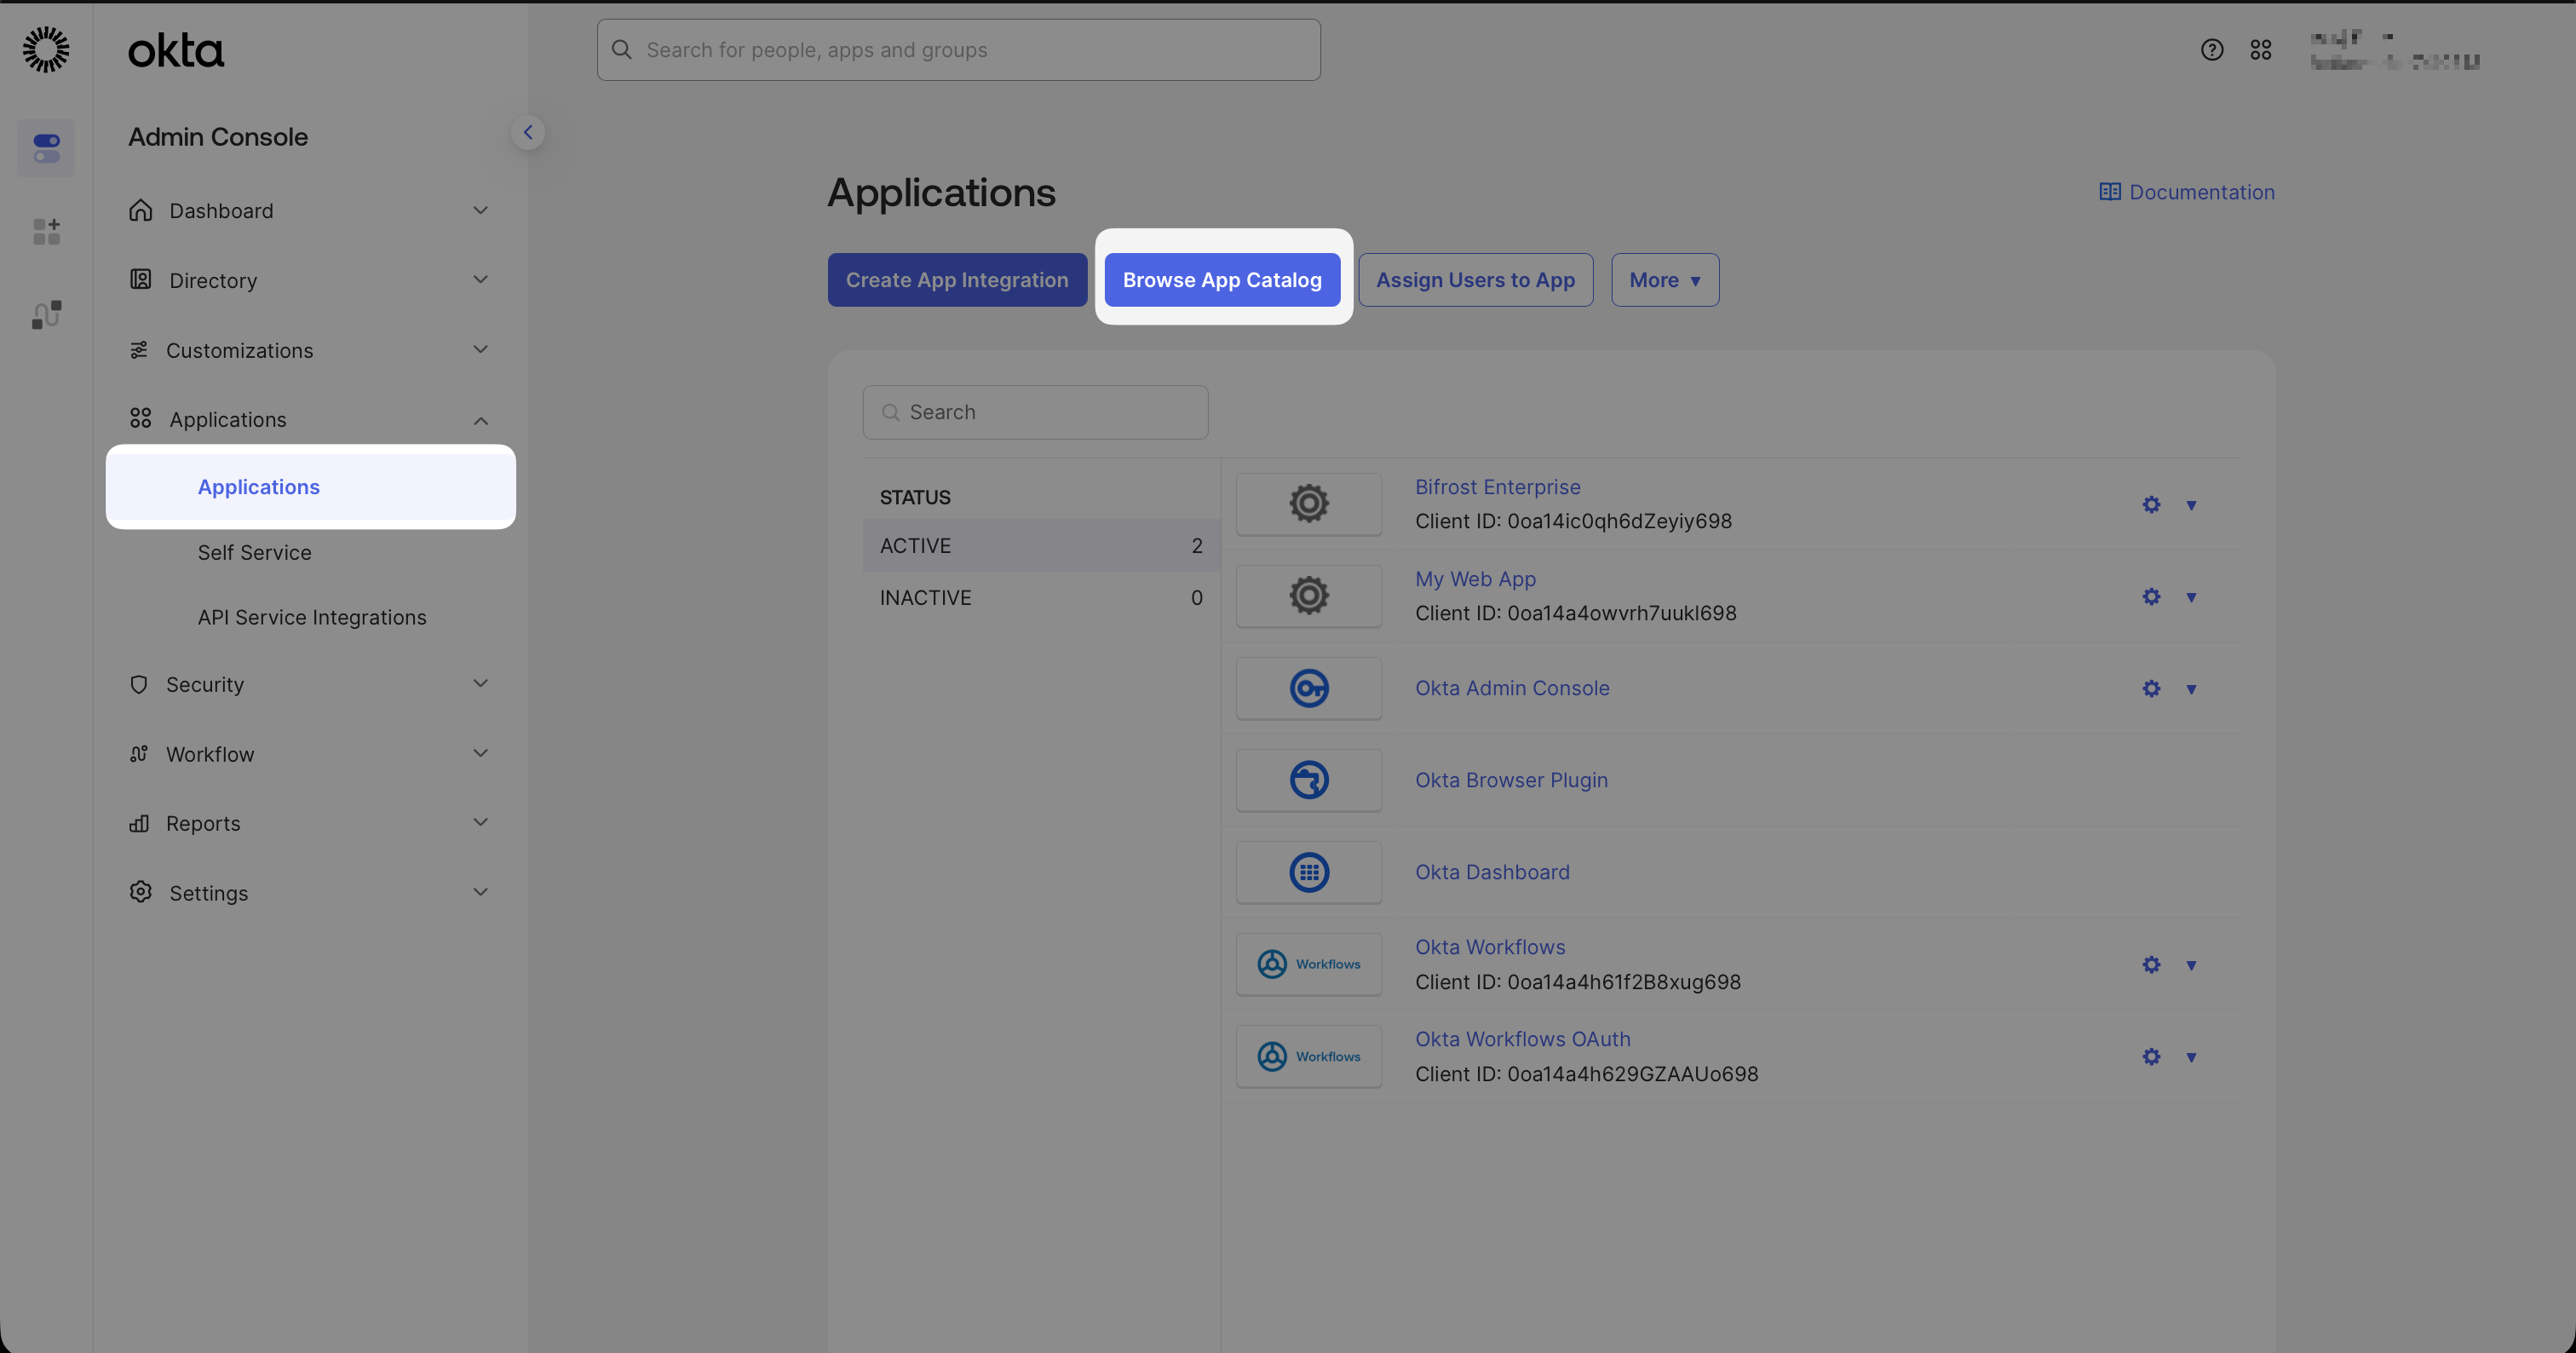
Click Browse App Catalog from the Applications page.
Add the SCIM 2.0 Test App
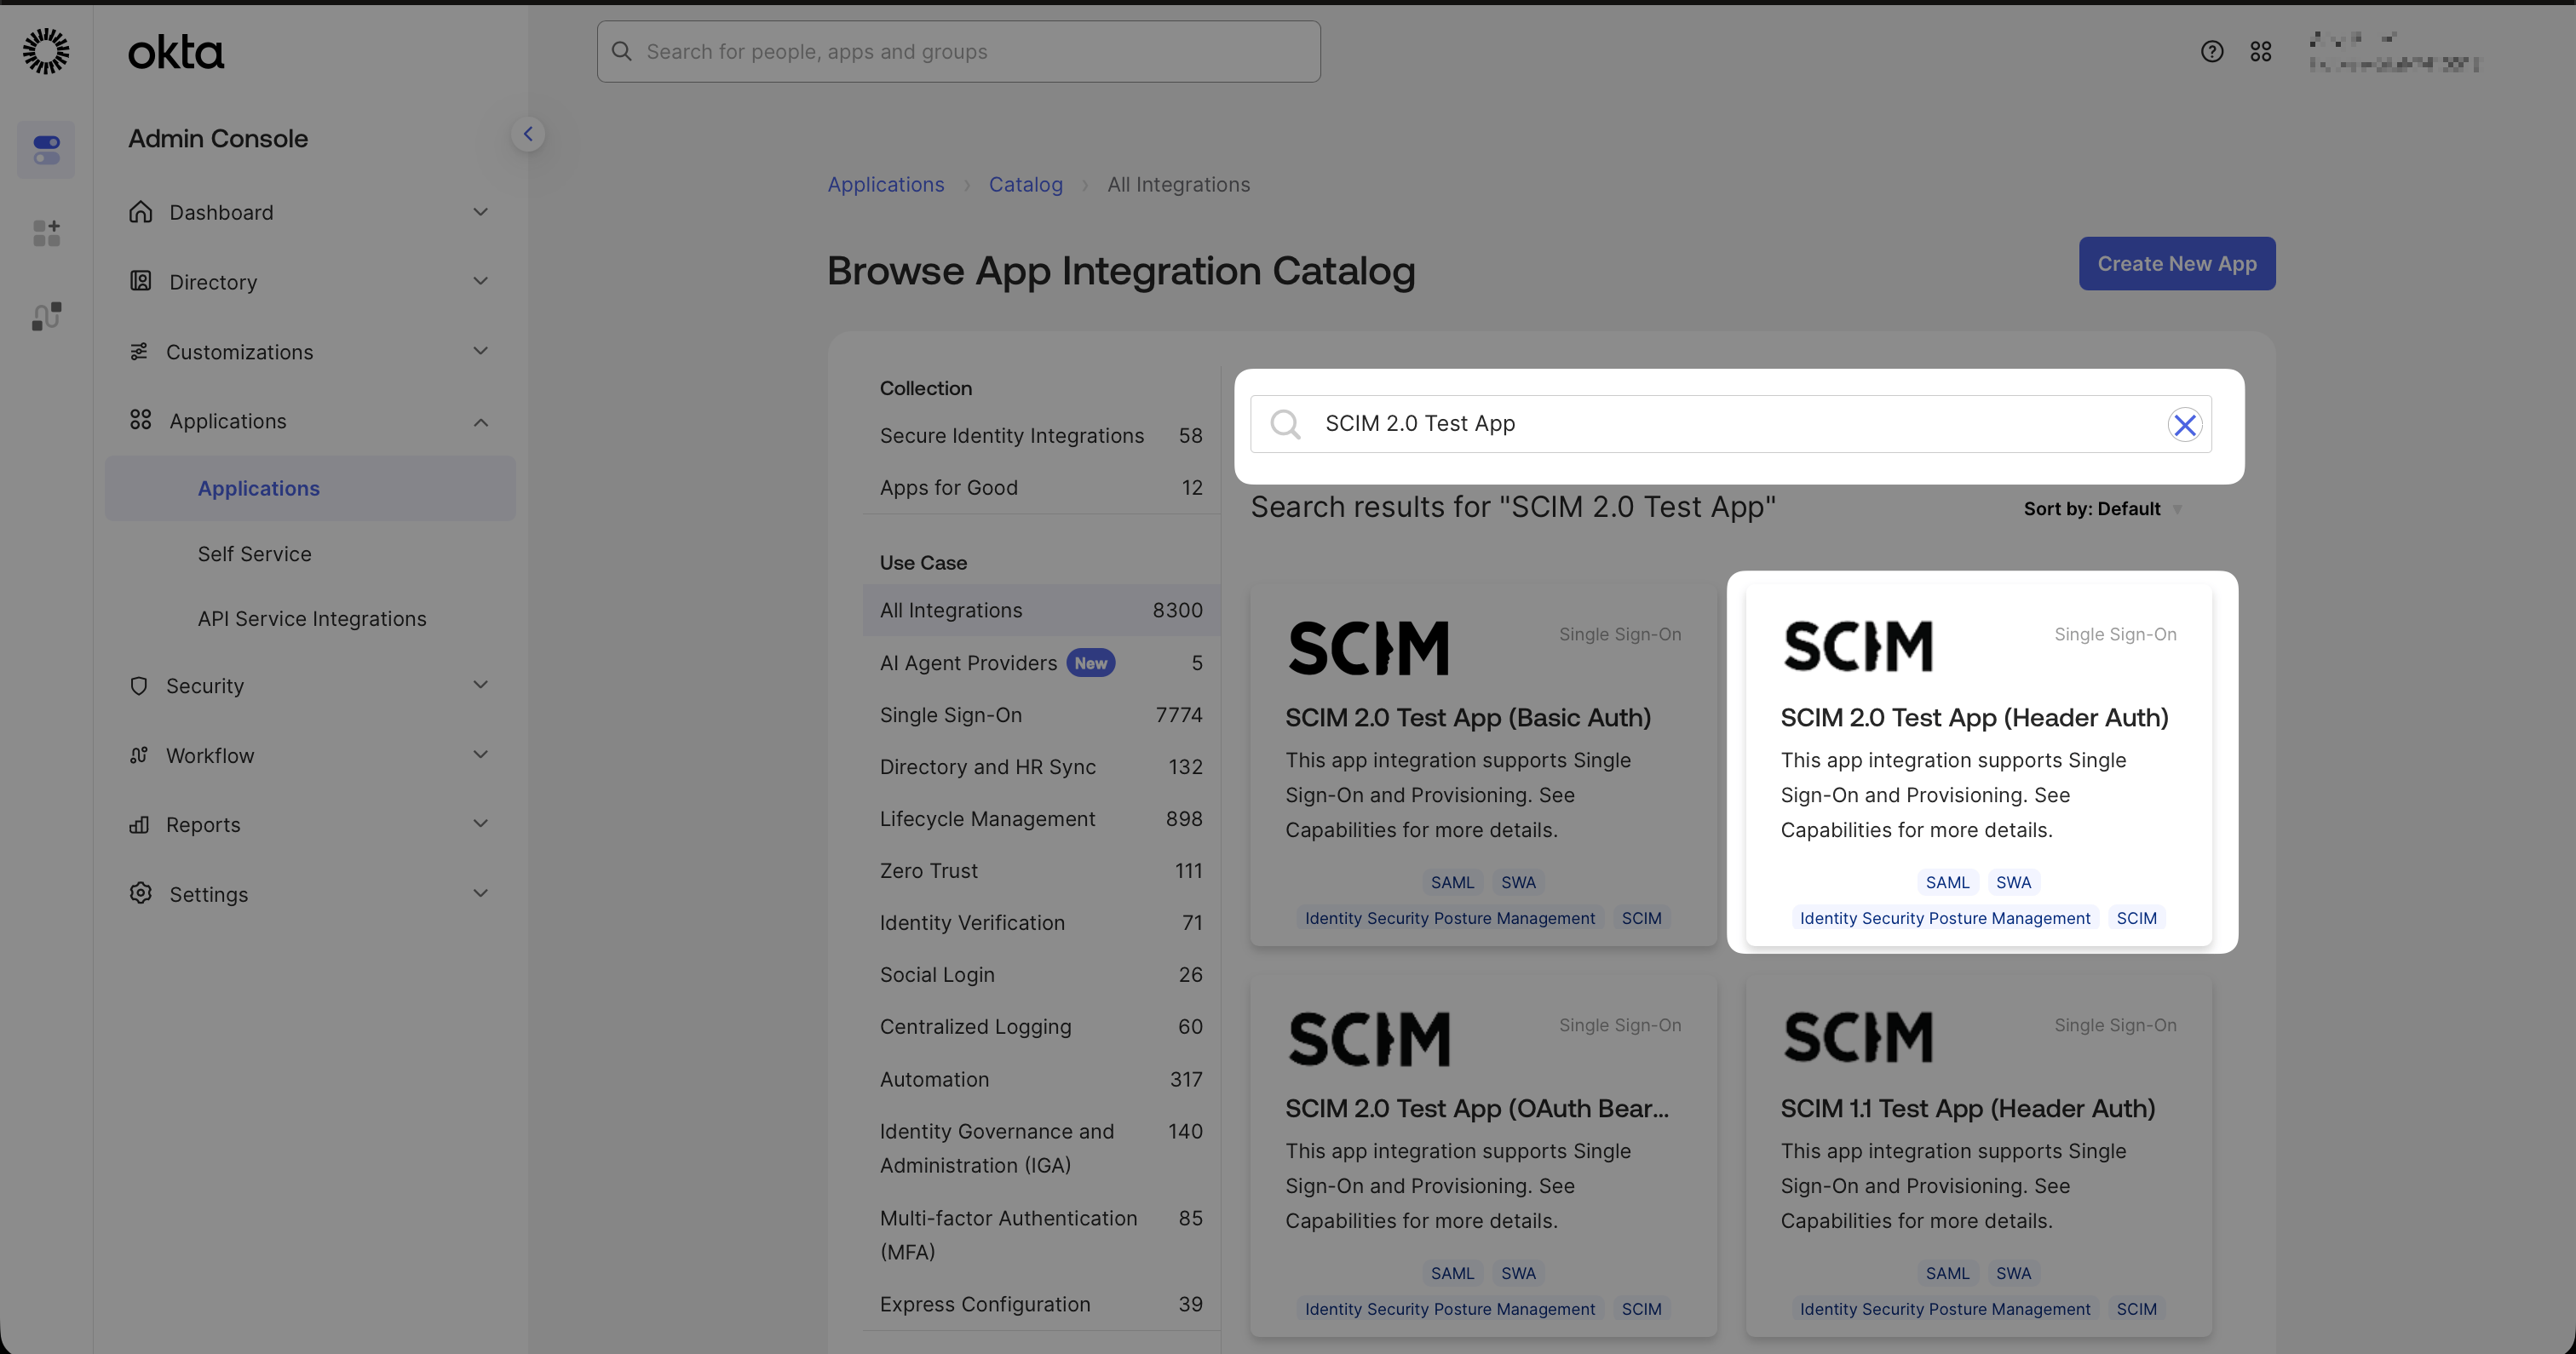
Select SCIM 2.0 Test App (Header Auth) from the catalog.
Vikat SCIM (or any label you prefer). On the sign-on options screen, skip everything and click Done — this app is used for SCIM provisioning only, not authentication.Step 3: Configure the SCIM App
Connect the app to Vikat
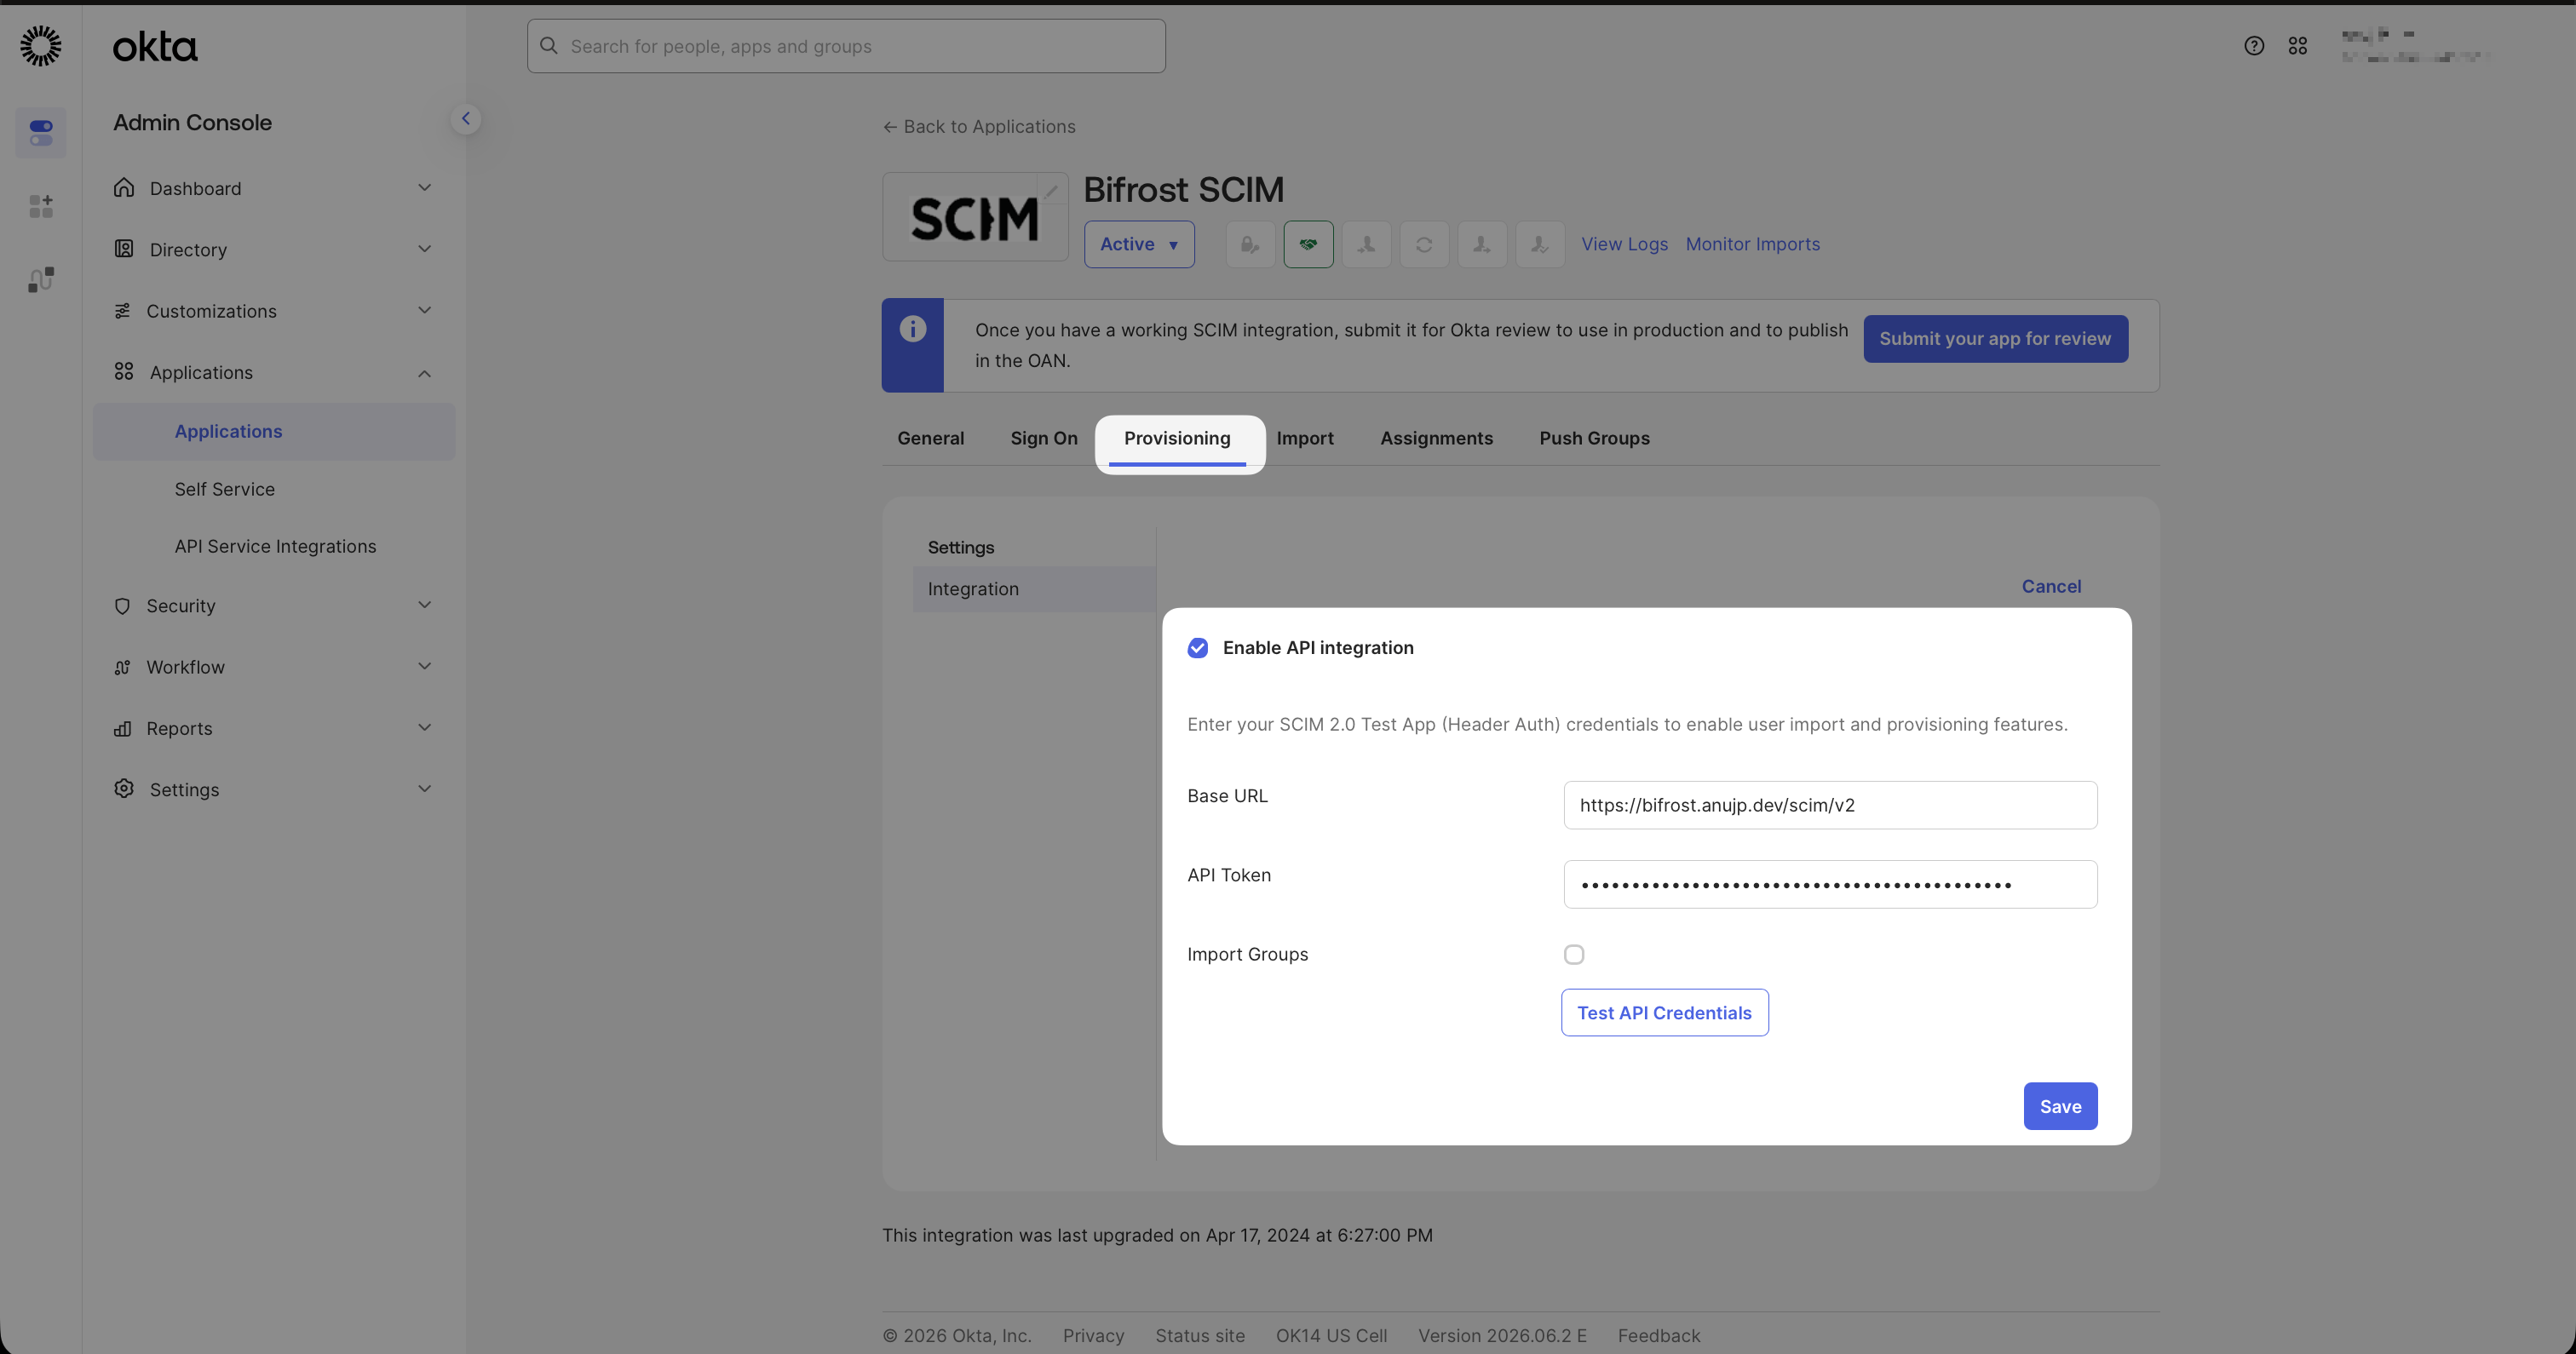
Enter the SCIM Endpoint URL and Provisioning Token from Vikat to connect the app.
Enable provisioning actions
- Create Users
- Update User Attributes
- Deactivate Users
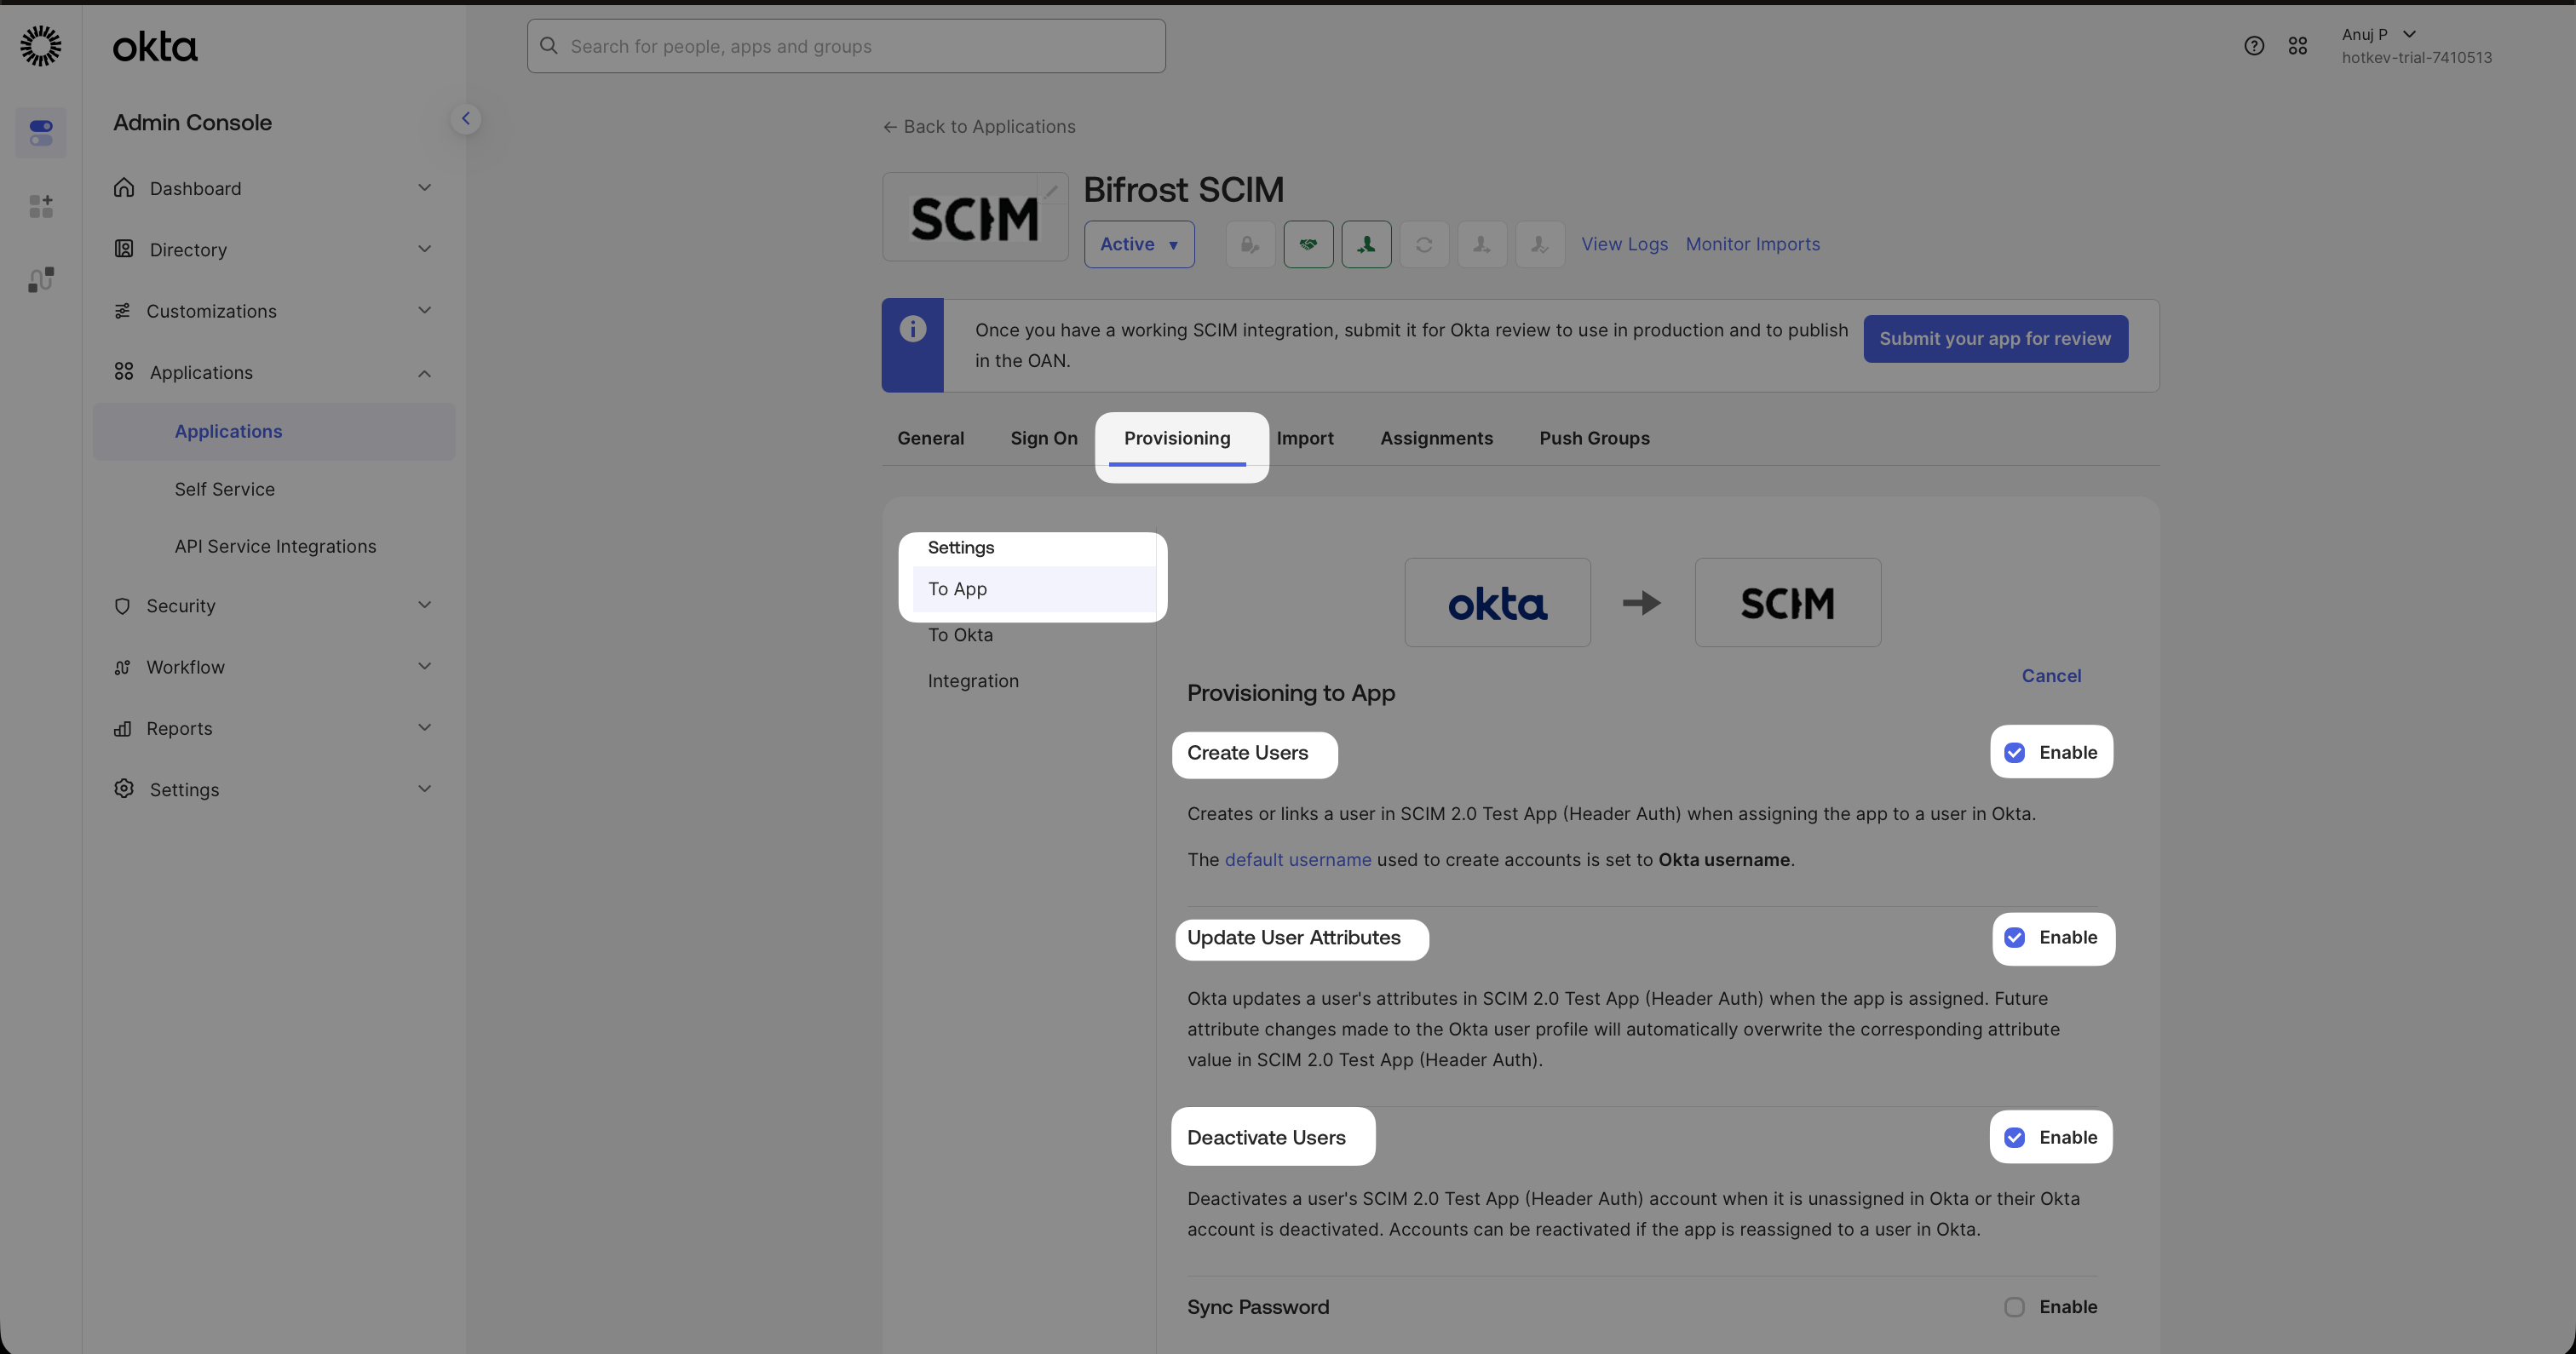
Provisioning → To App — enable Create Users, Update User Attributes, and Deactivate Users.
Add custom attributes (optional)
Syncing custom profile attributes (e.g. employeeId, costCenter, division)
Syncing custom profile attributes (e.g. employeeId, costCenter, division)
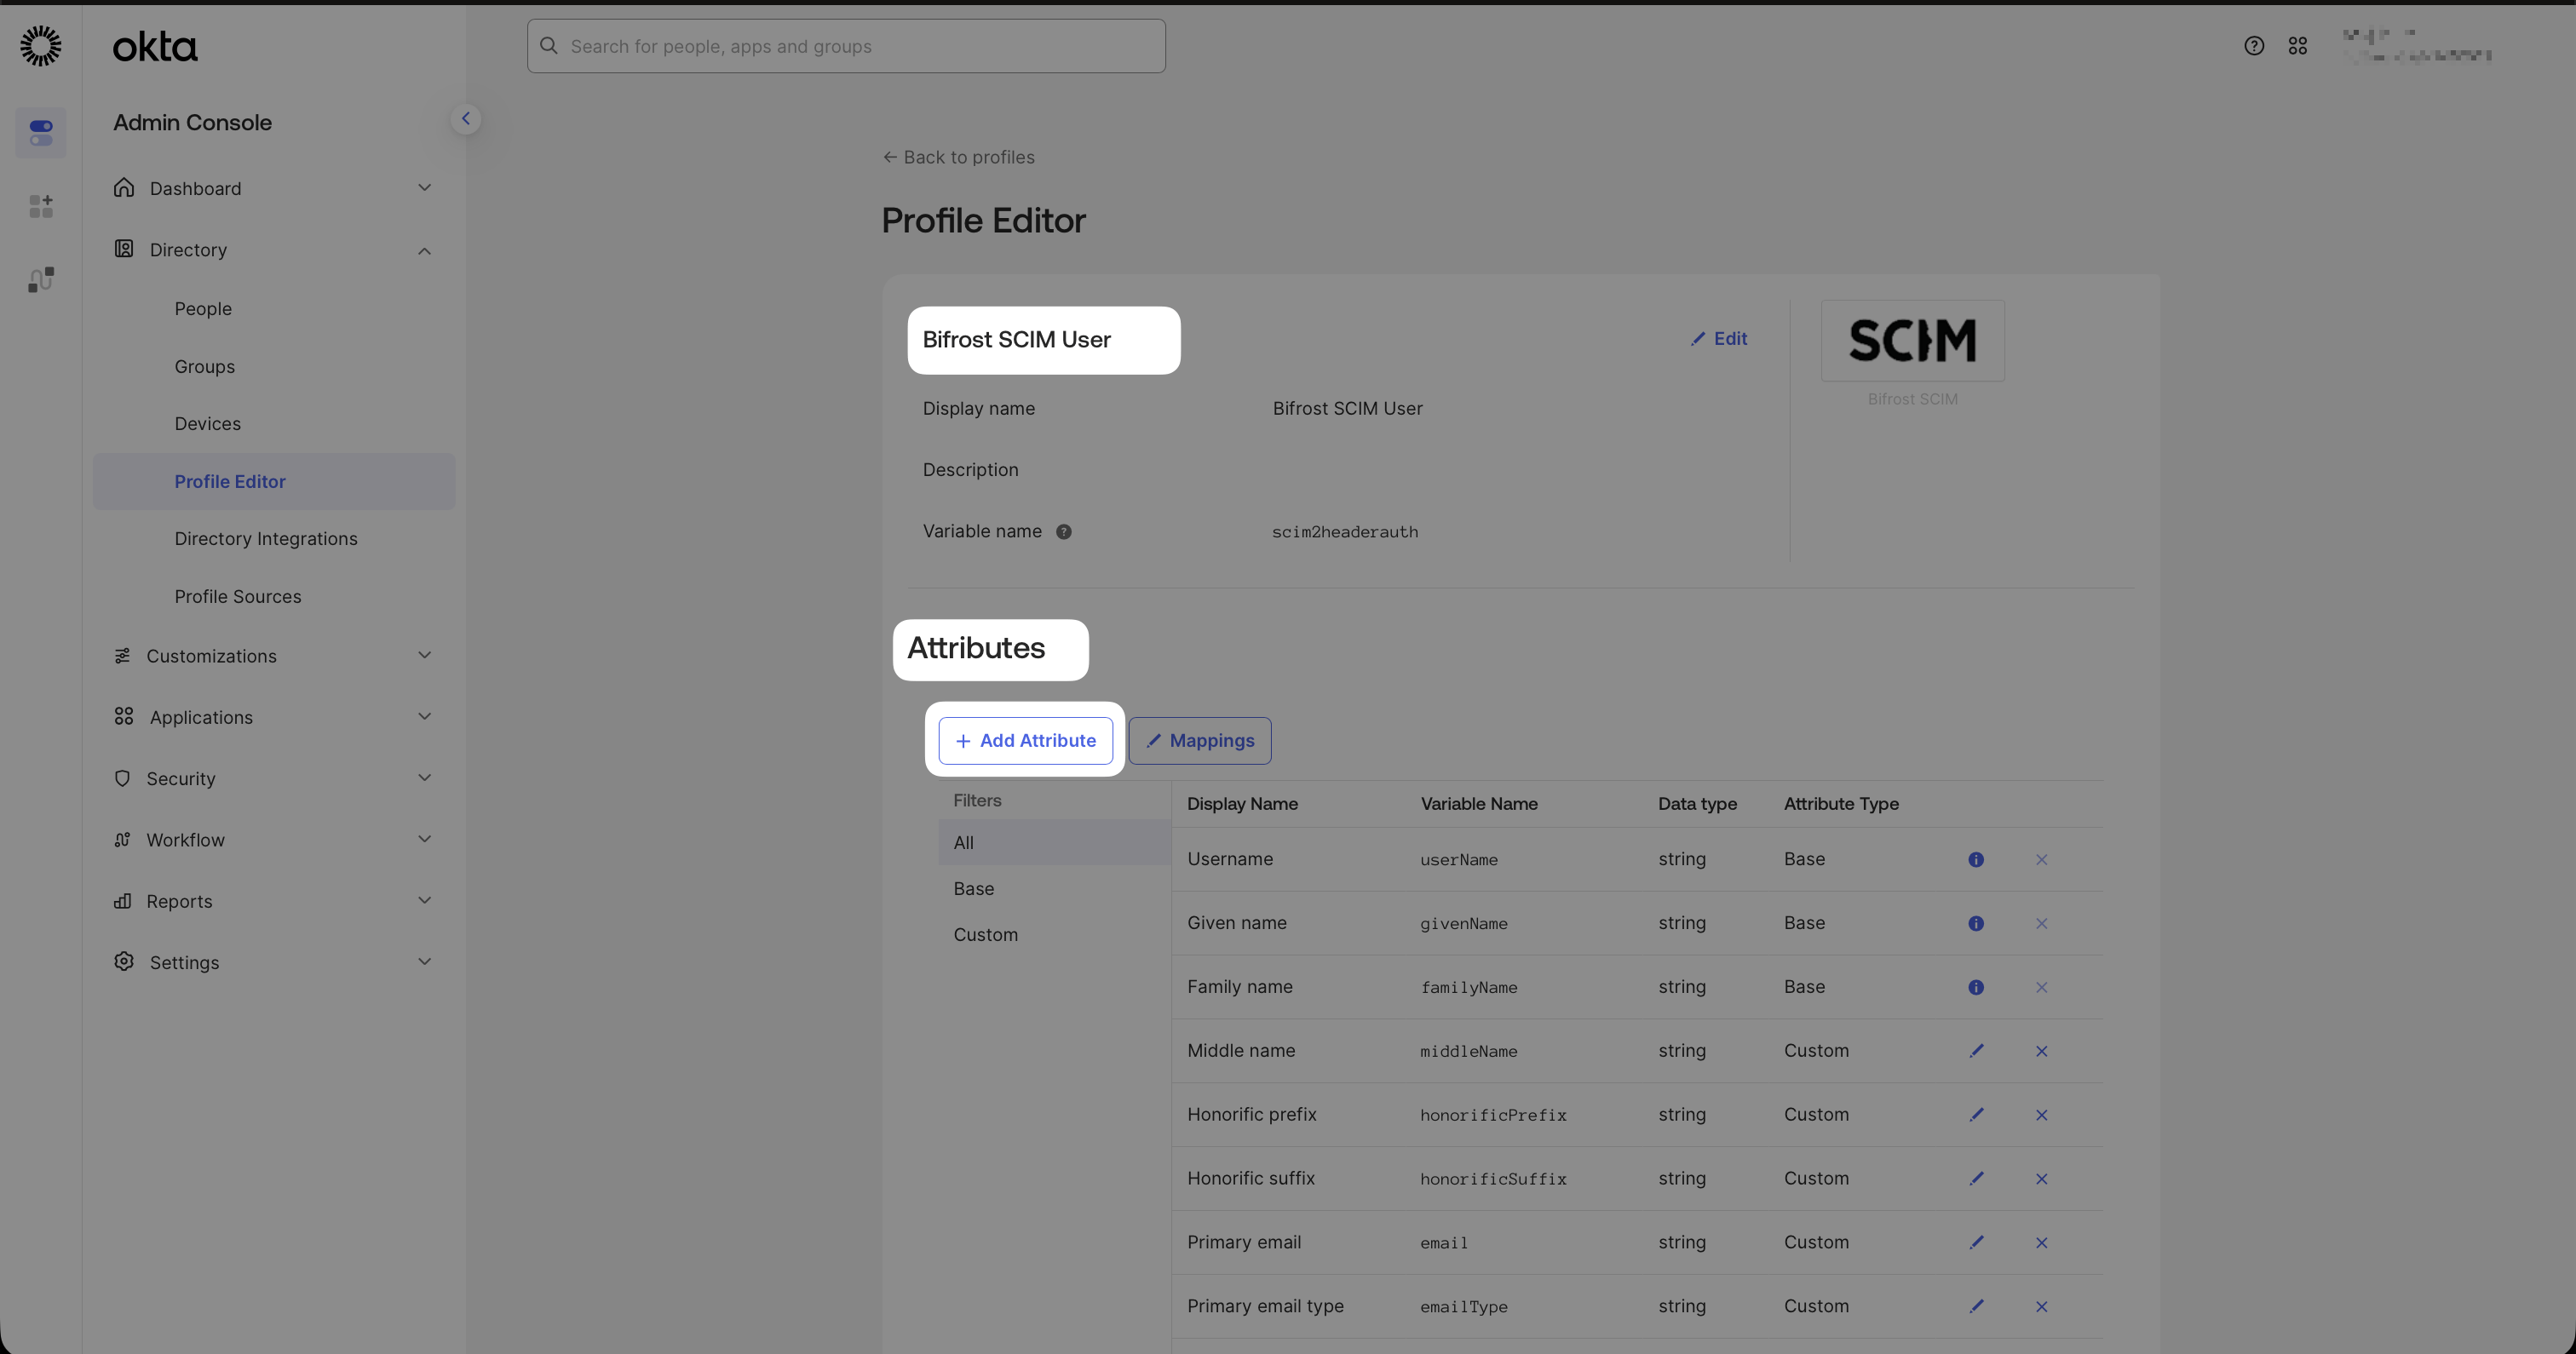
Profile Editor for the Vikat SCIM app — click Add Attribute to declare a new custom field.
Employee ID: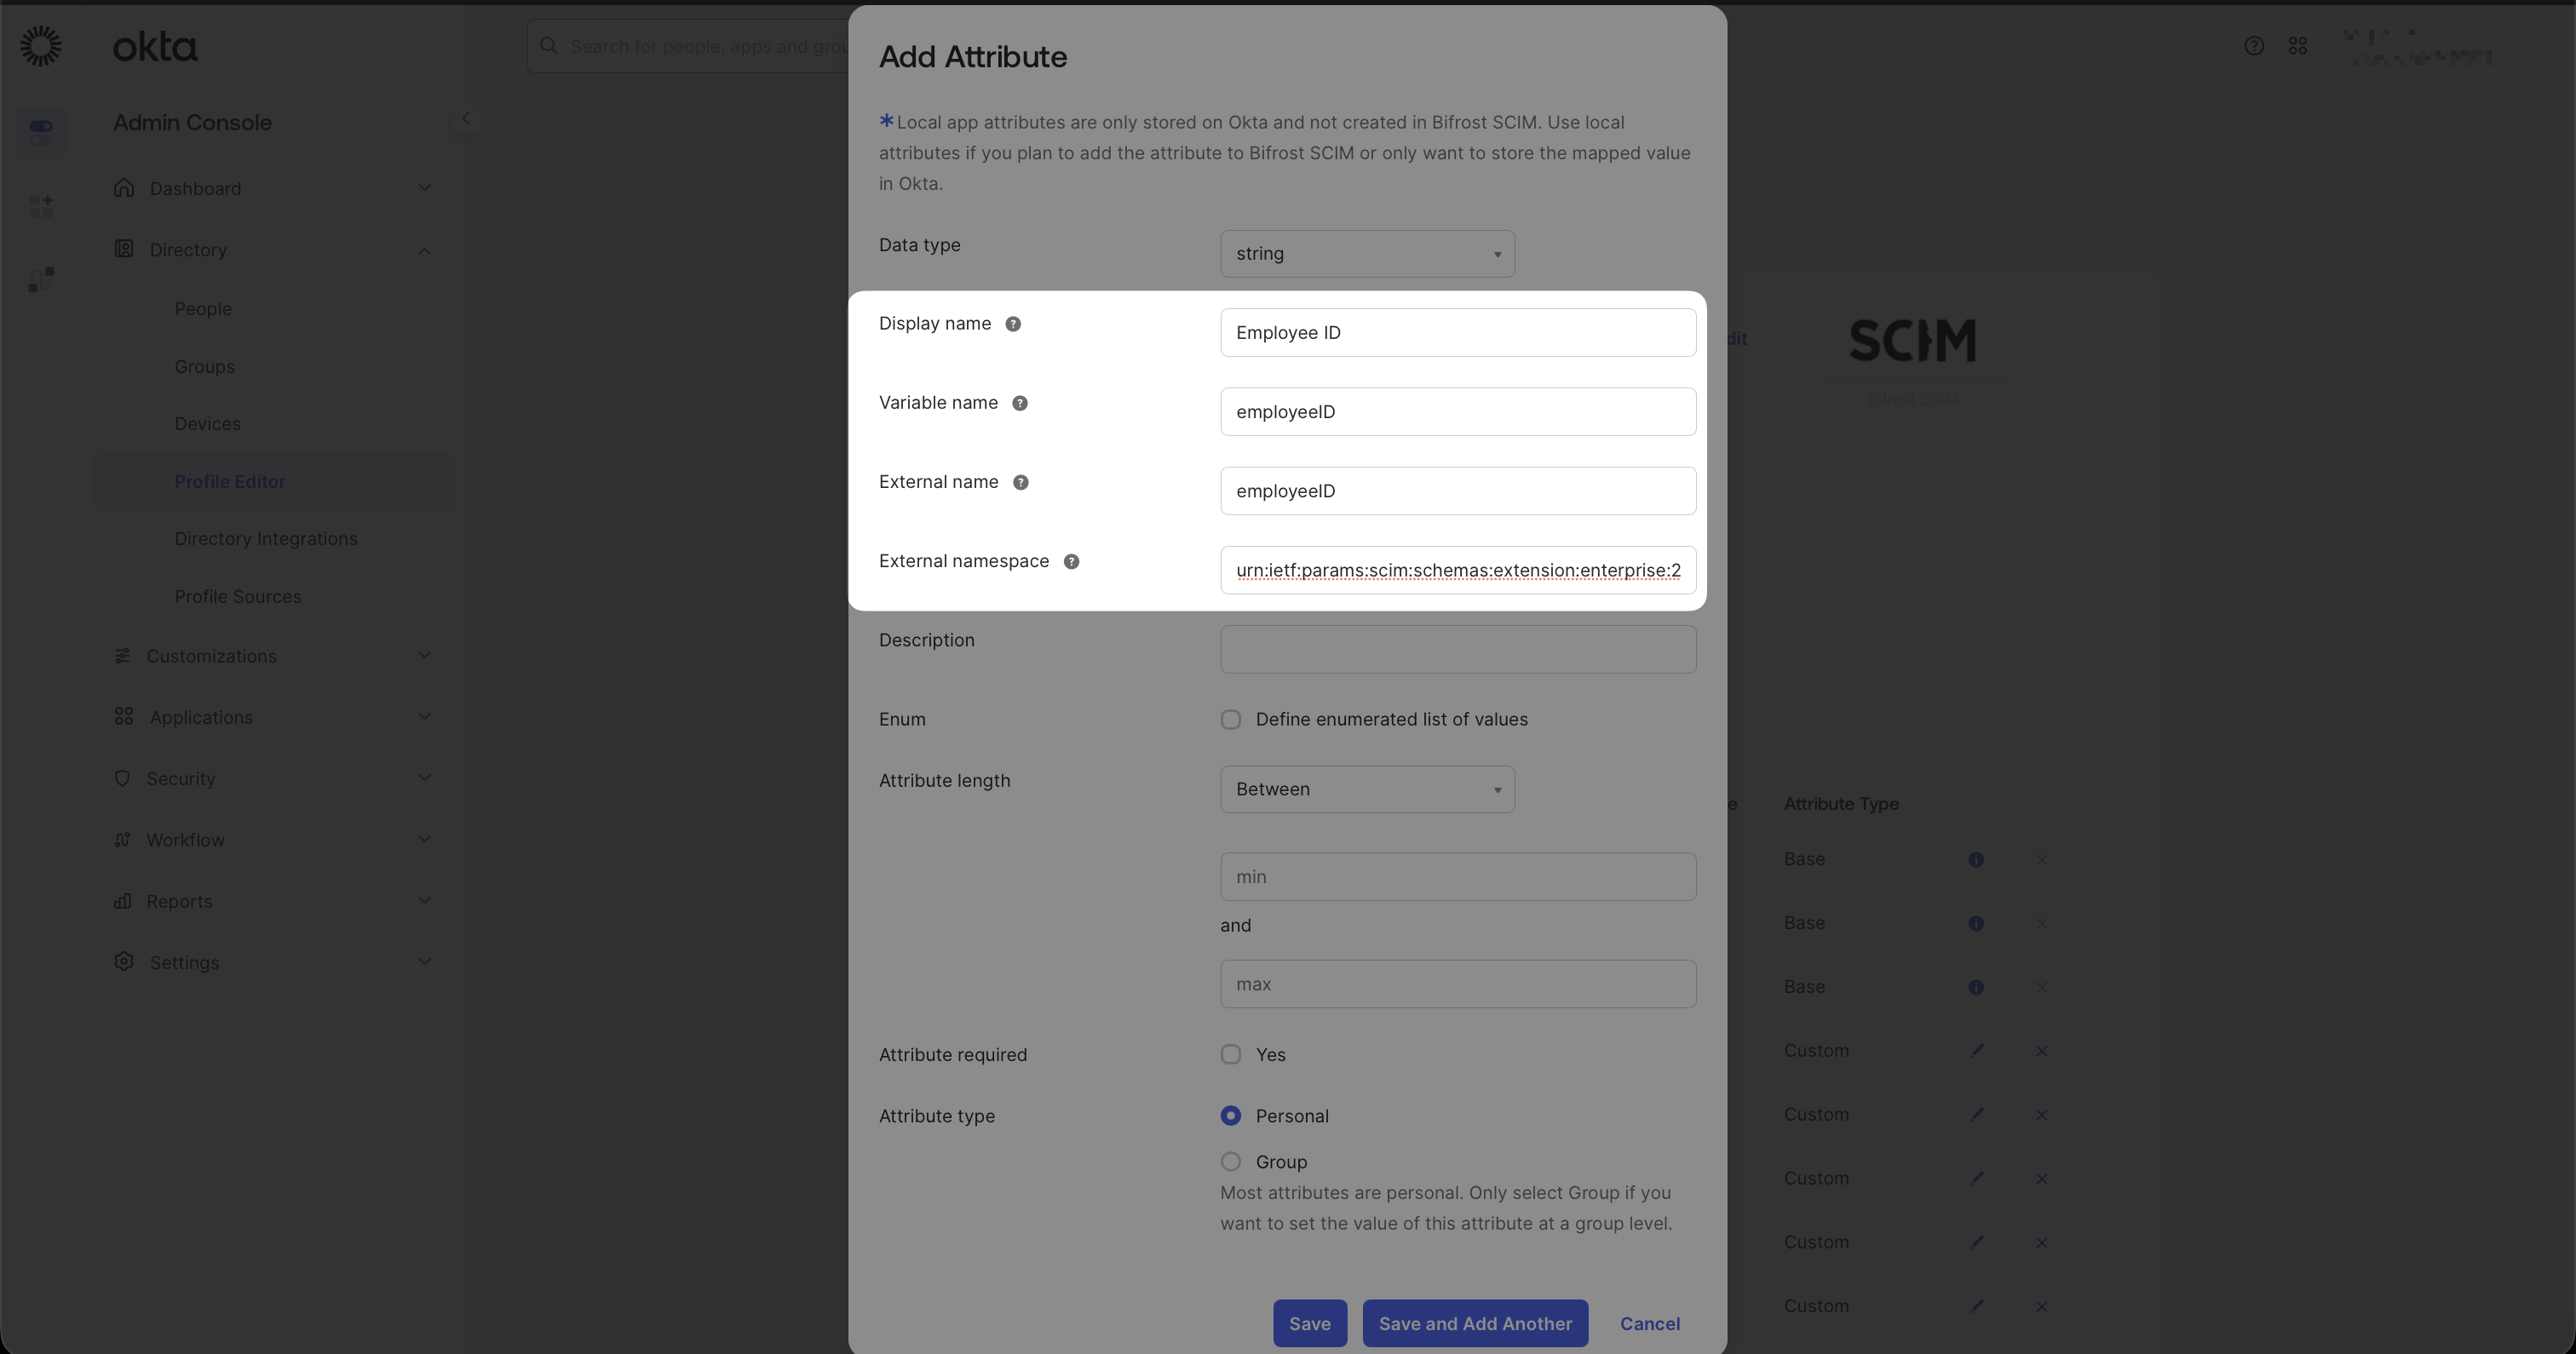
Add Attribute dialog — the External name is what Vikat receives and must match exactly what you configure in Vikat's SCIM attribute settings.
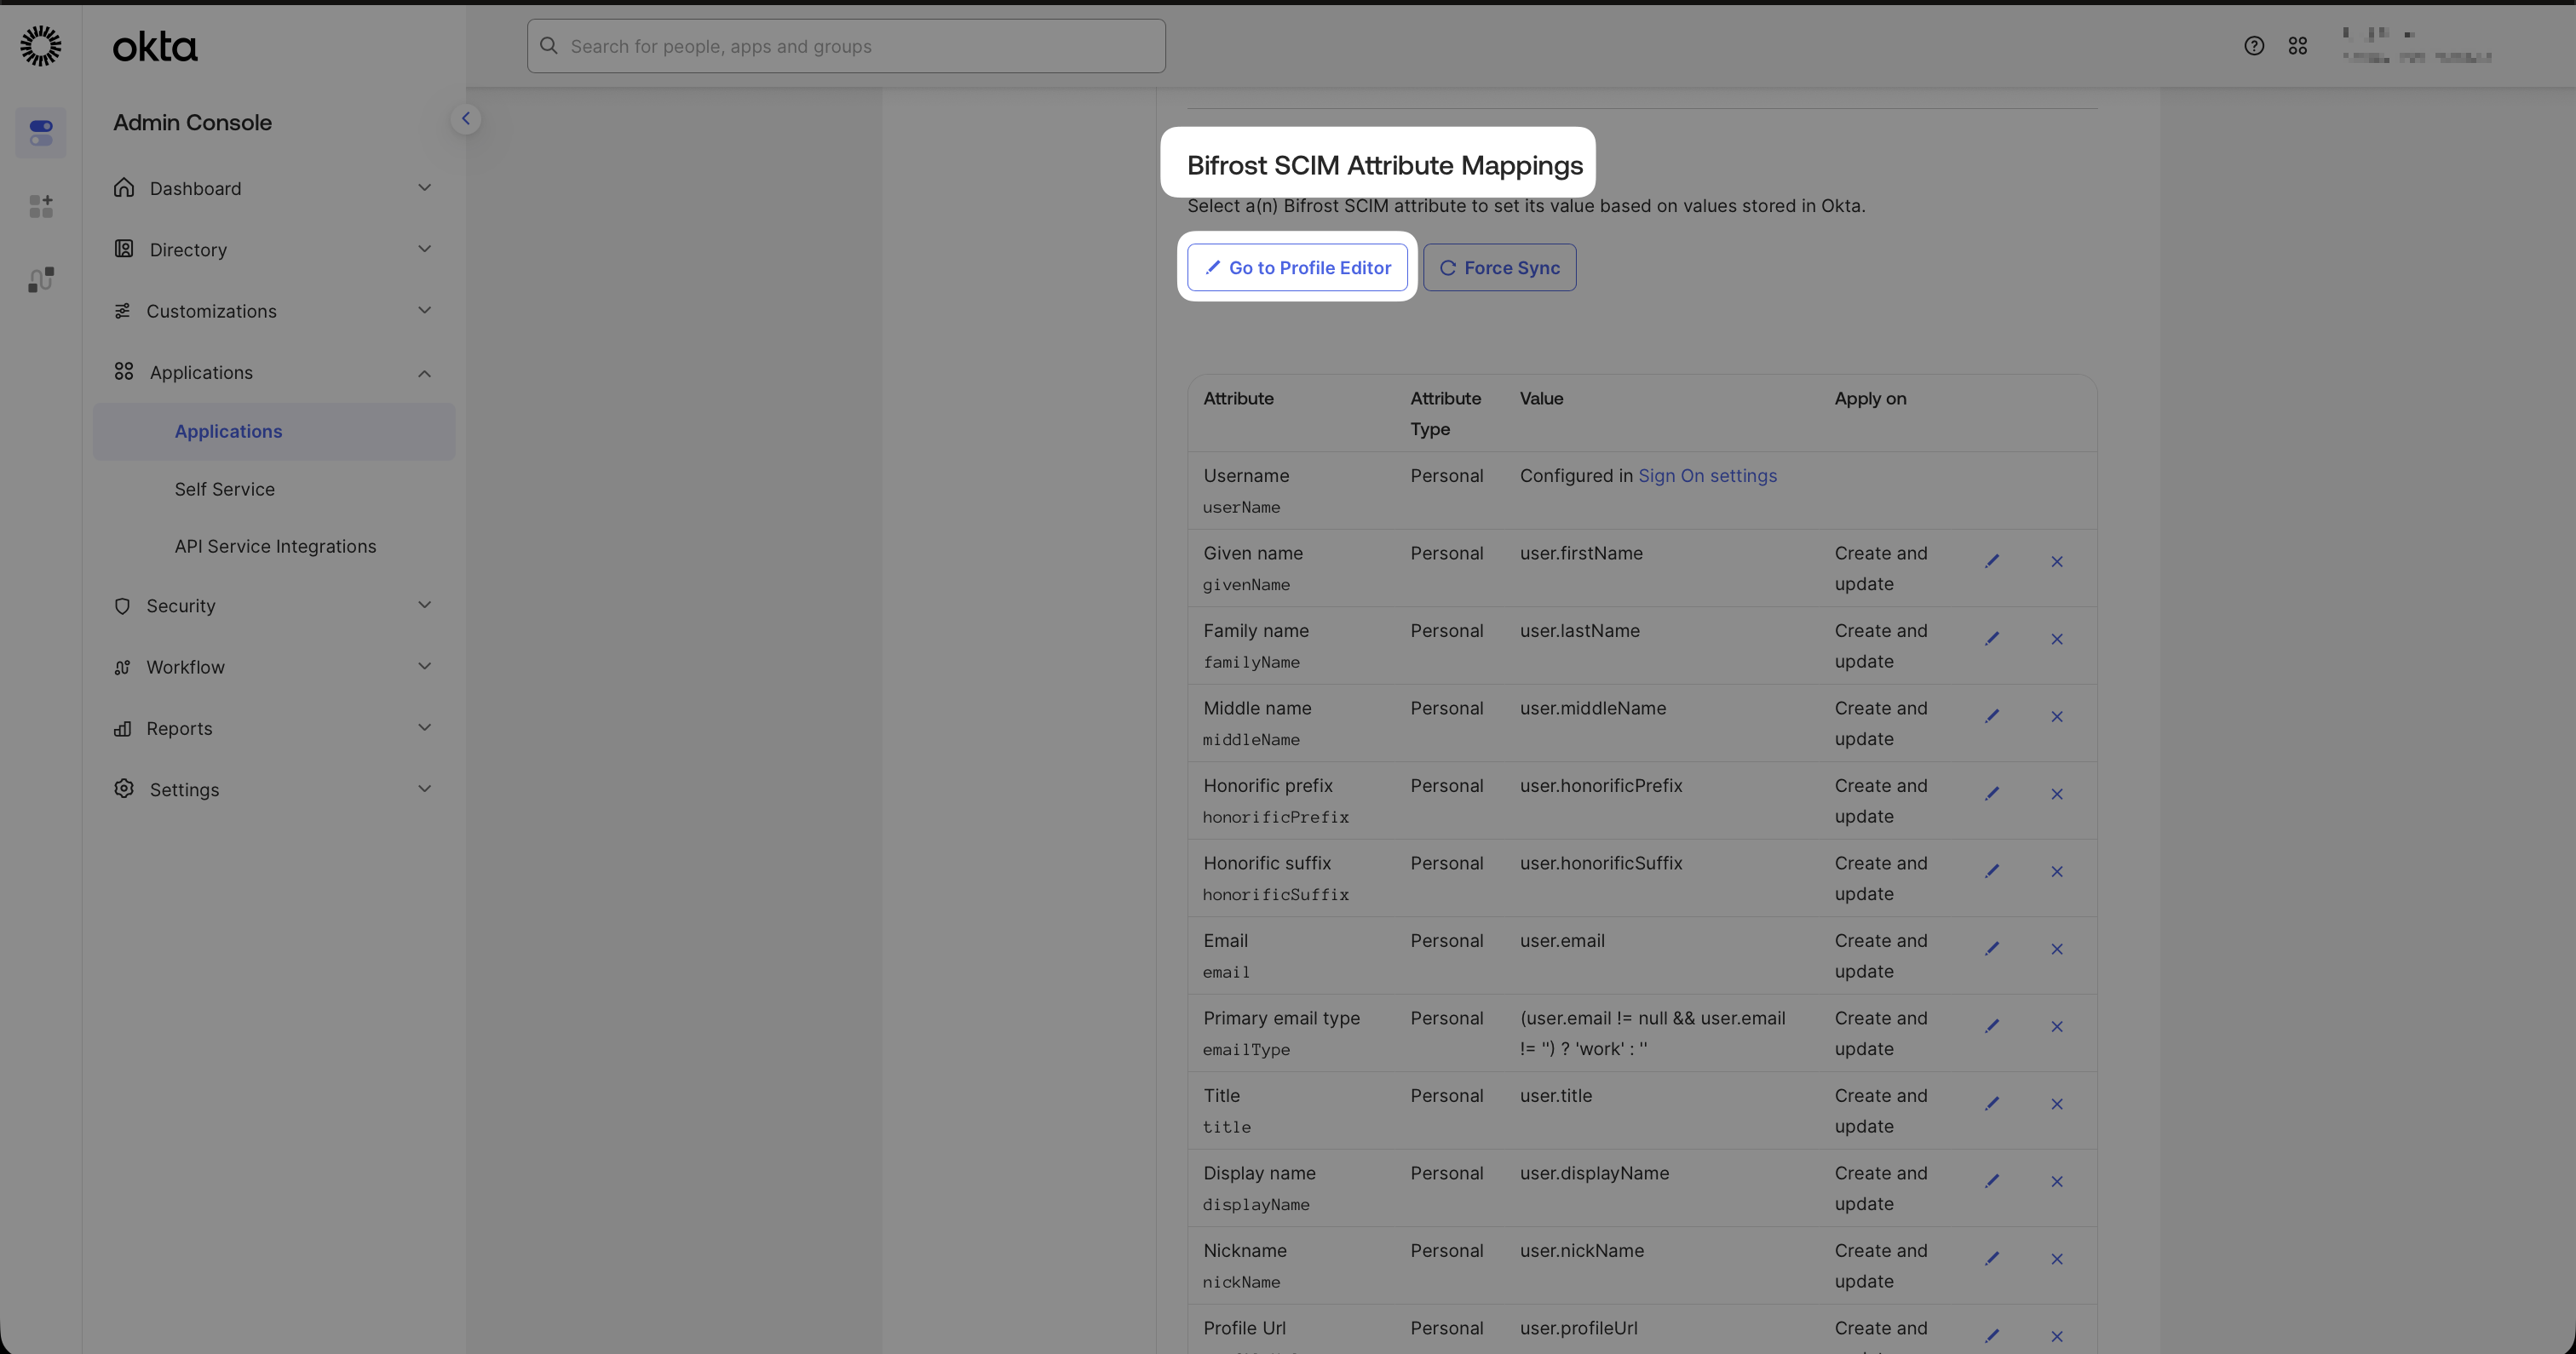
Click Mappings on the Vikat SCIM profile to open the attribute mapping view.
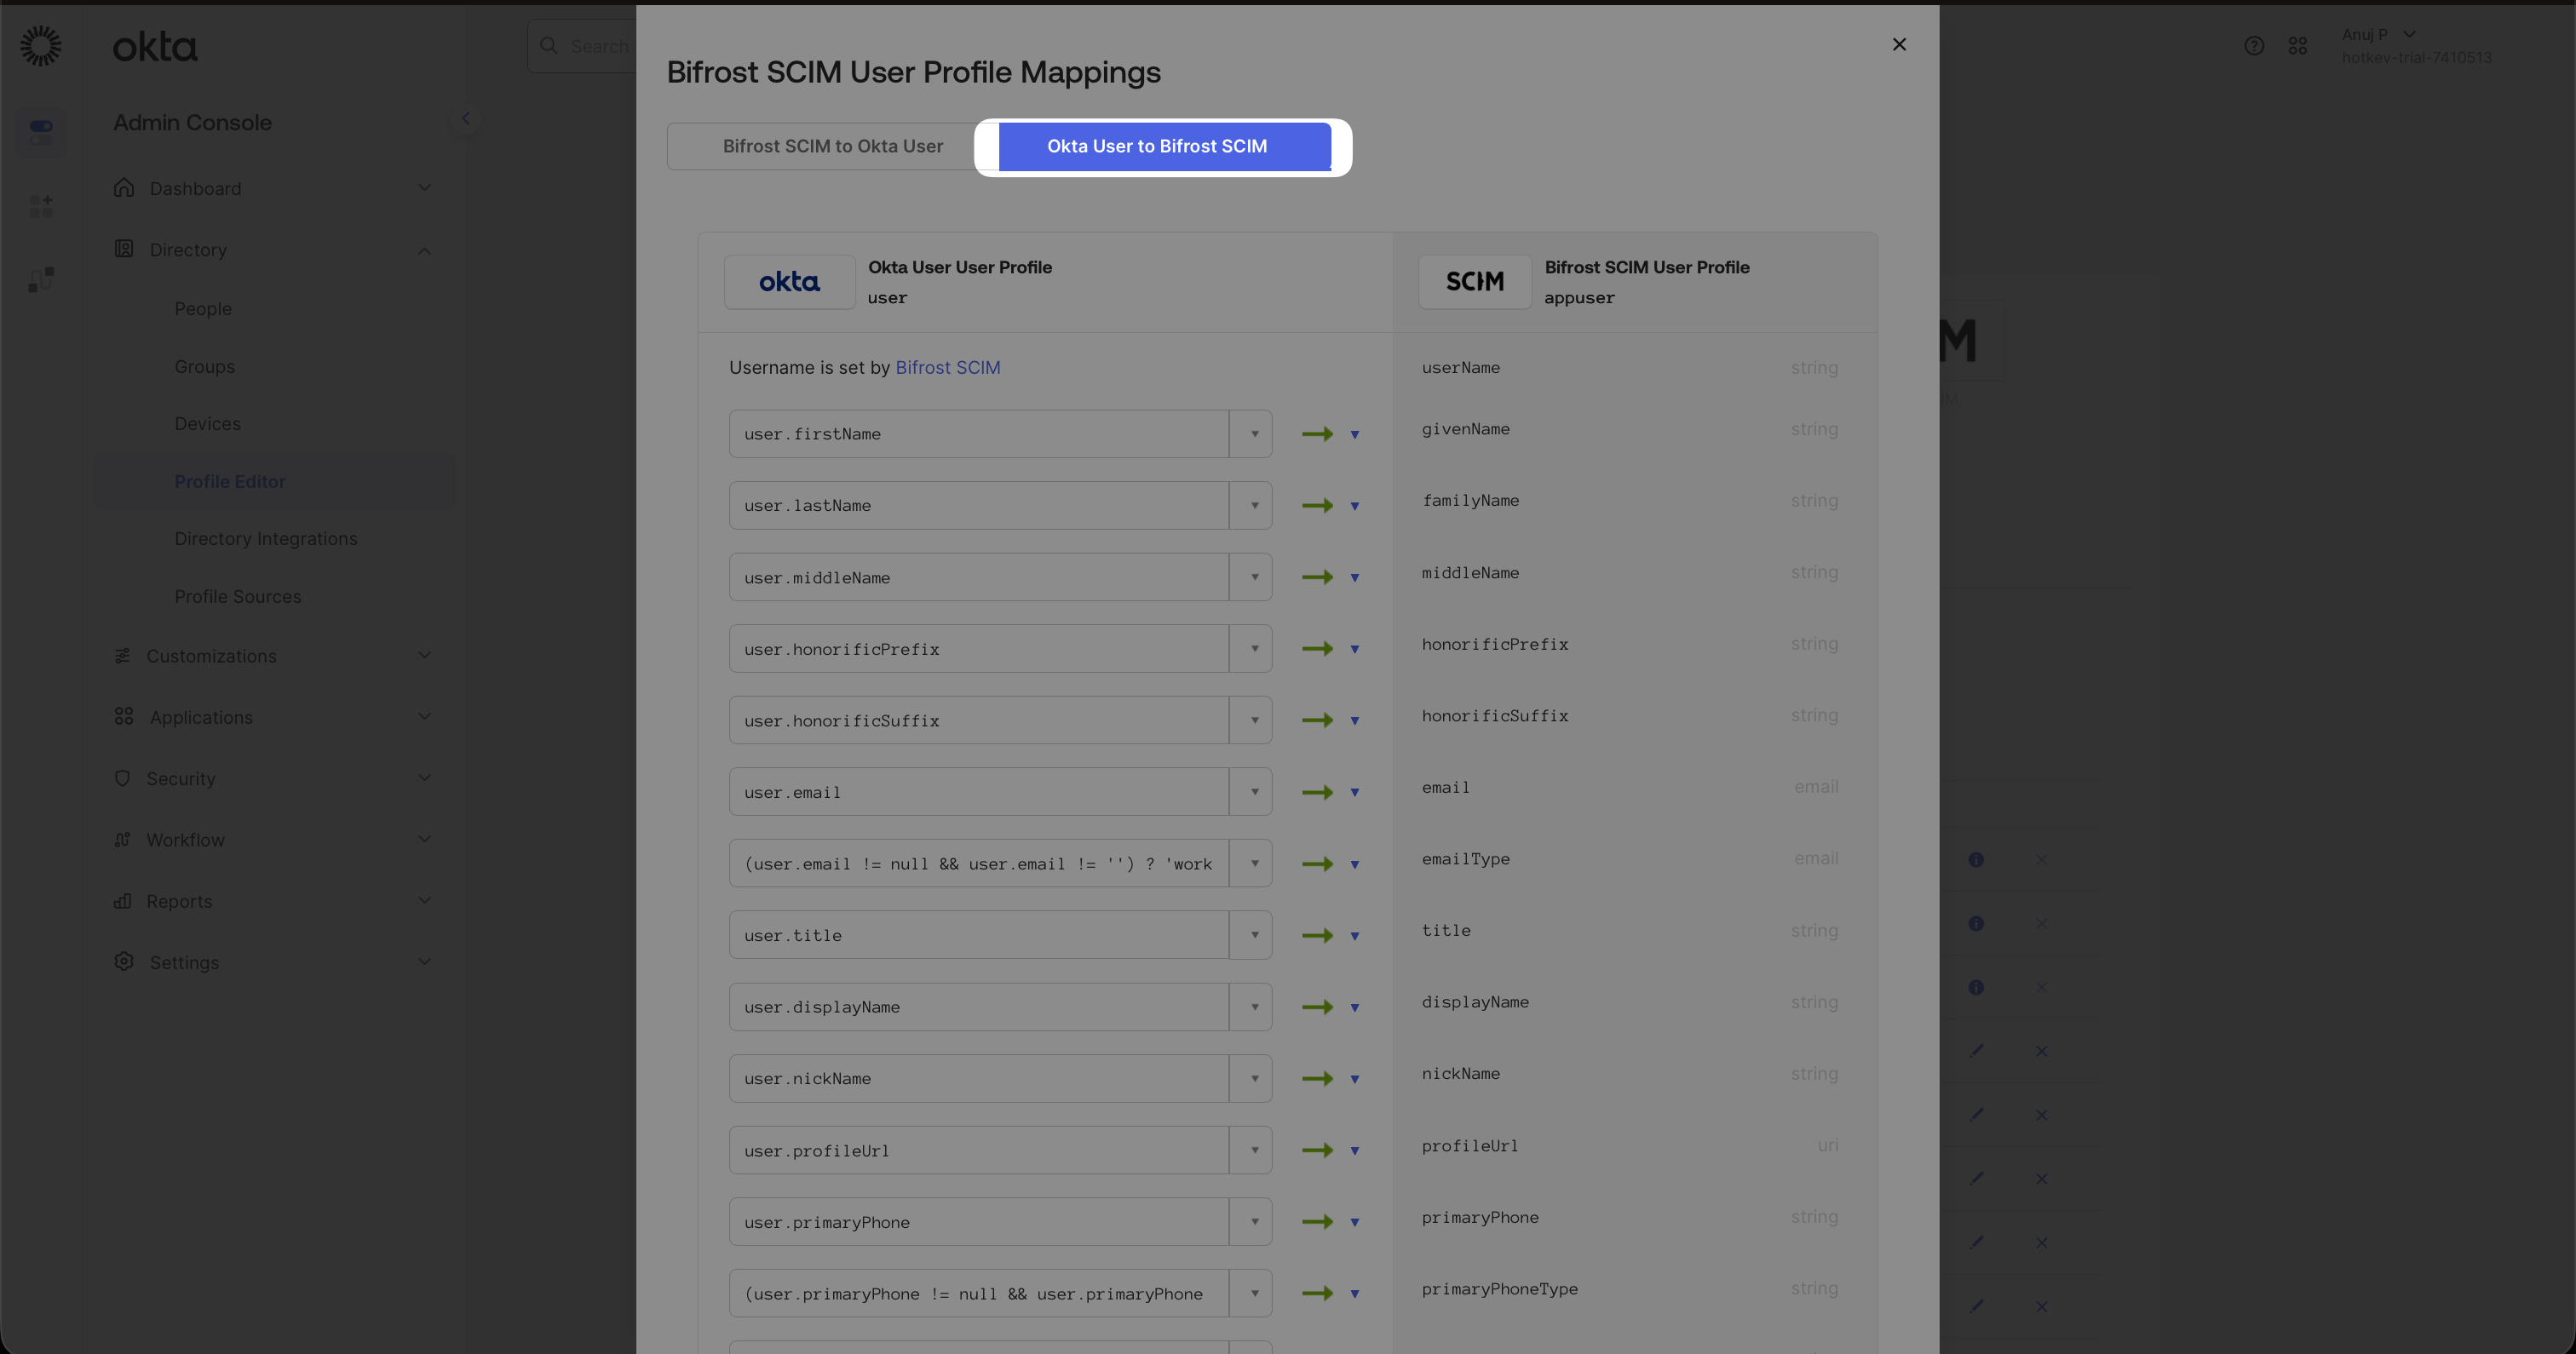
Okta User to Vikat SCIM mapping direction — map each Okta profile field to the corresponding SCIM attribute.
user.employeeNumber → employeeID. Click Save Mappings.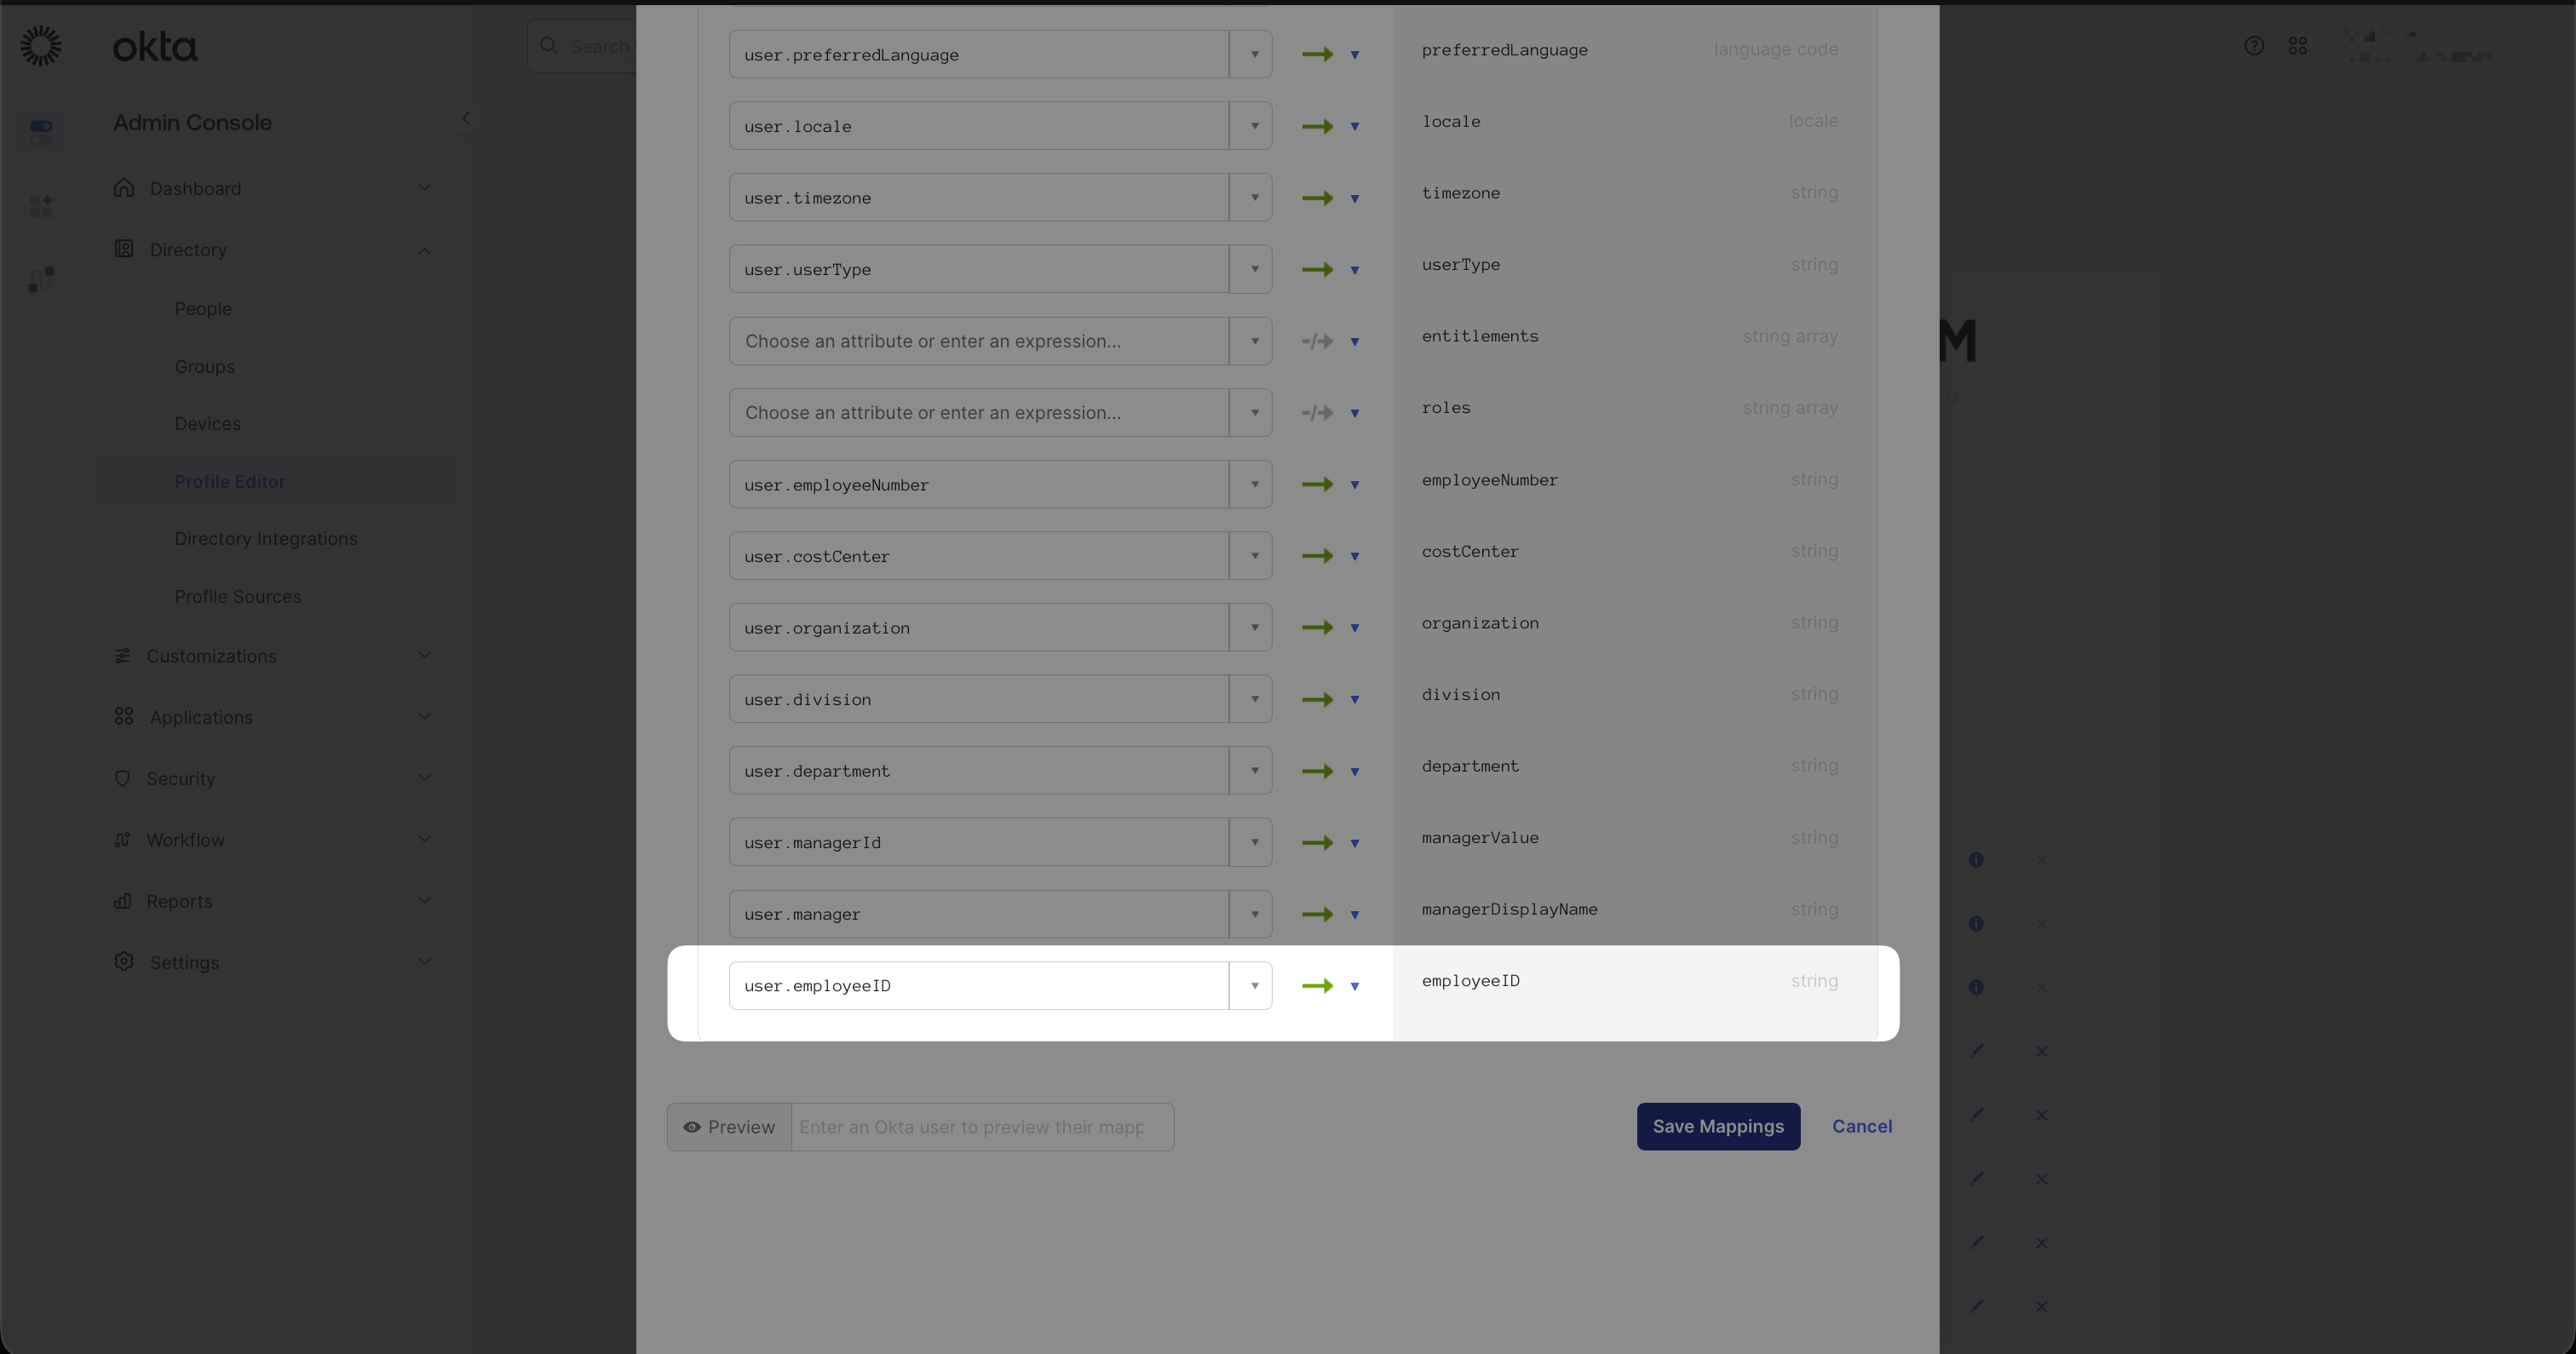
Mapping user.employeeID from the Okta user profile to the employeeID SCIM attribute.
employeeID. The External name you set in Okta must match this exactly.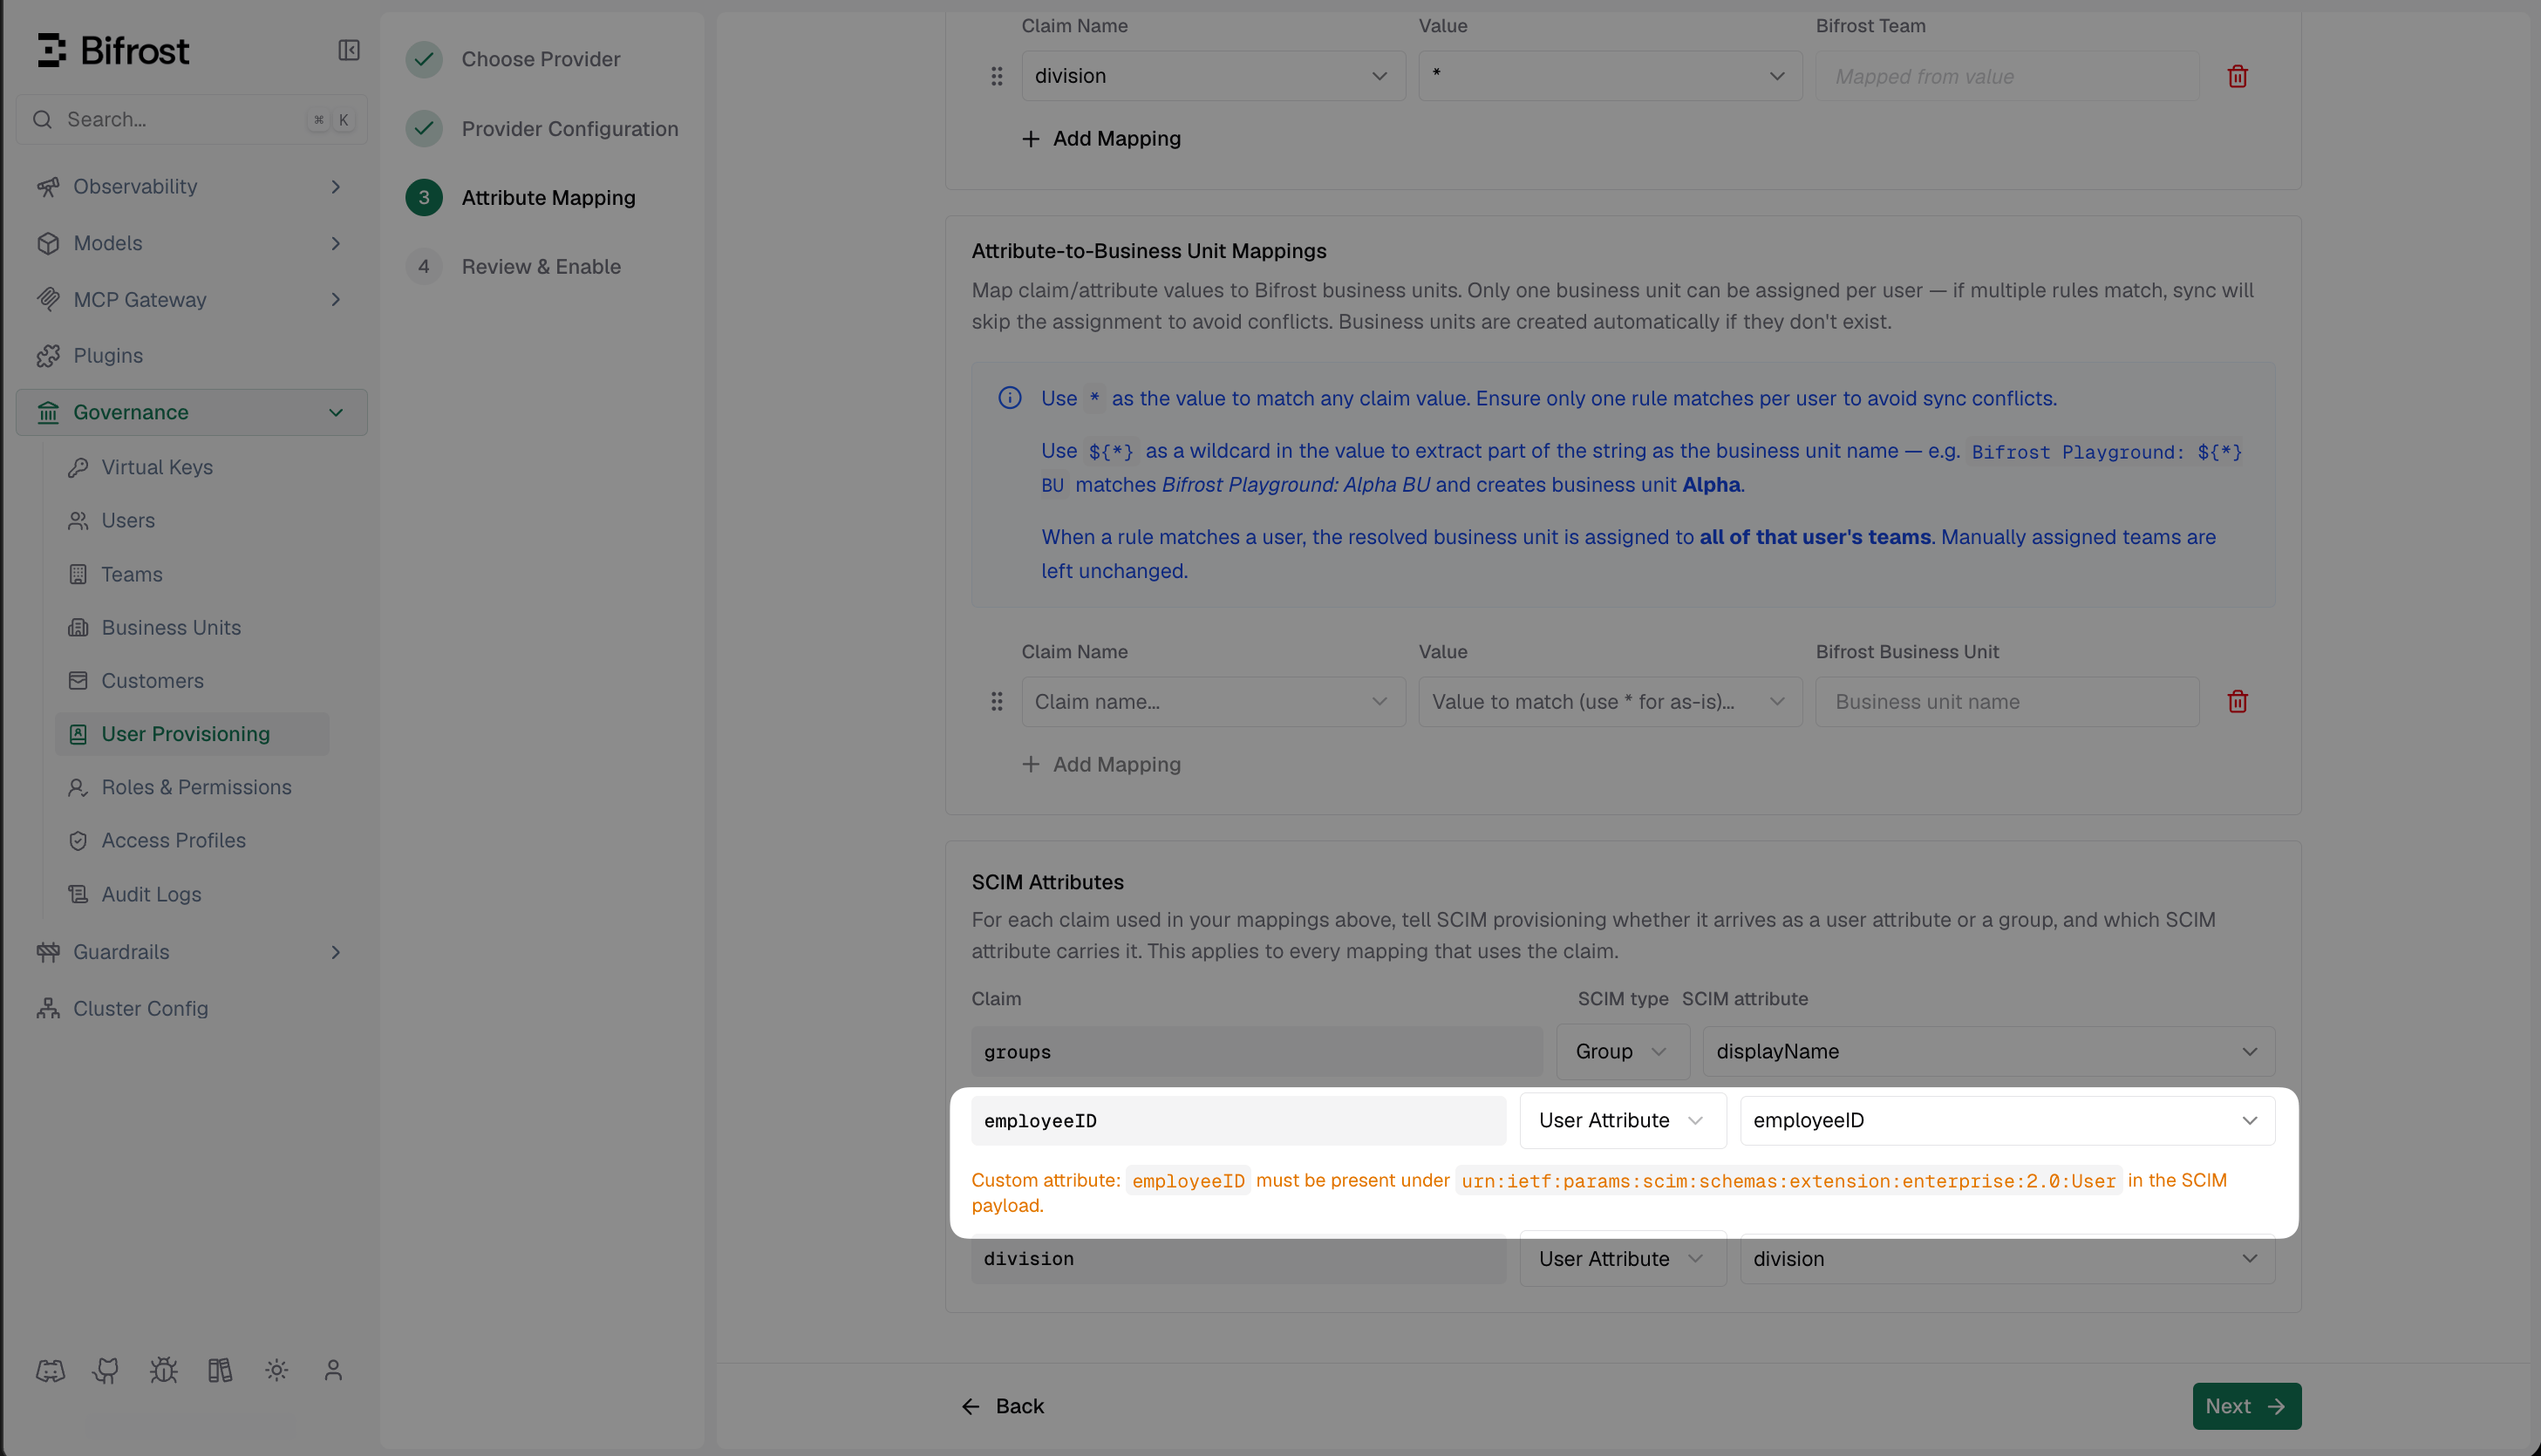
In Vikat's Attribute Mapping step, add the custom SCIM attribute using the same External name configured in Okta.
Step 4: Assign Users and Push Groups
Assign users
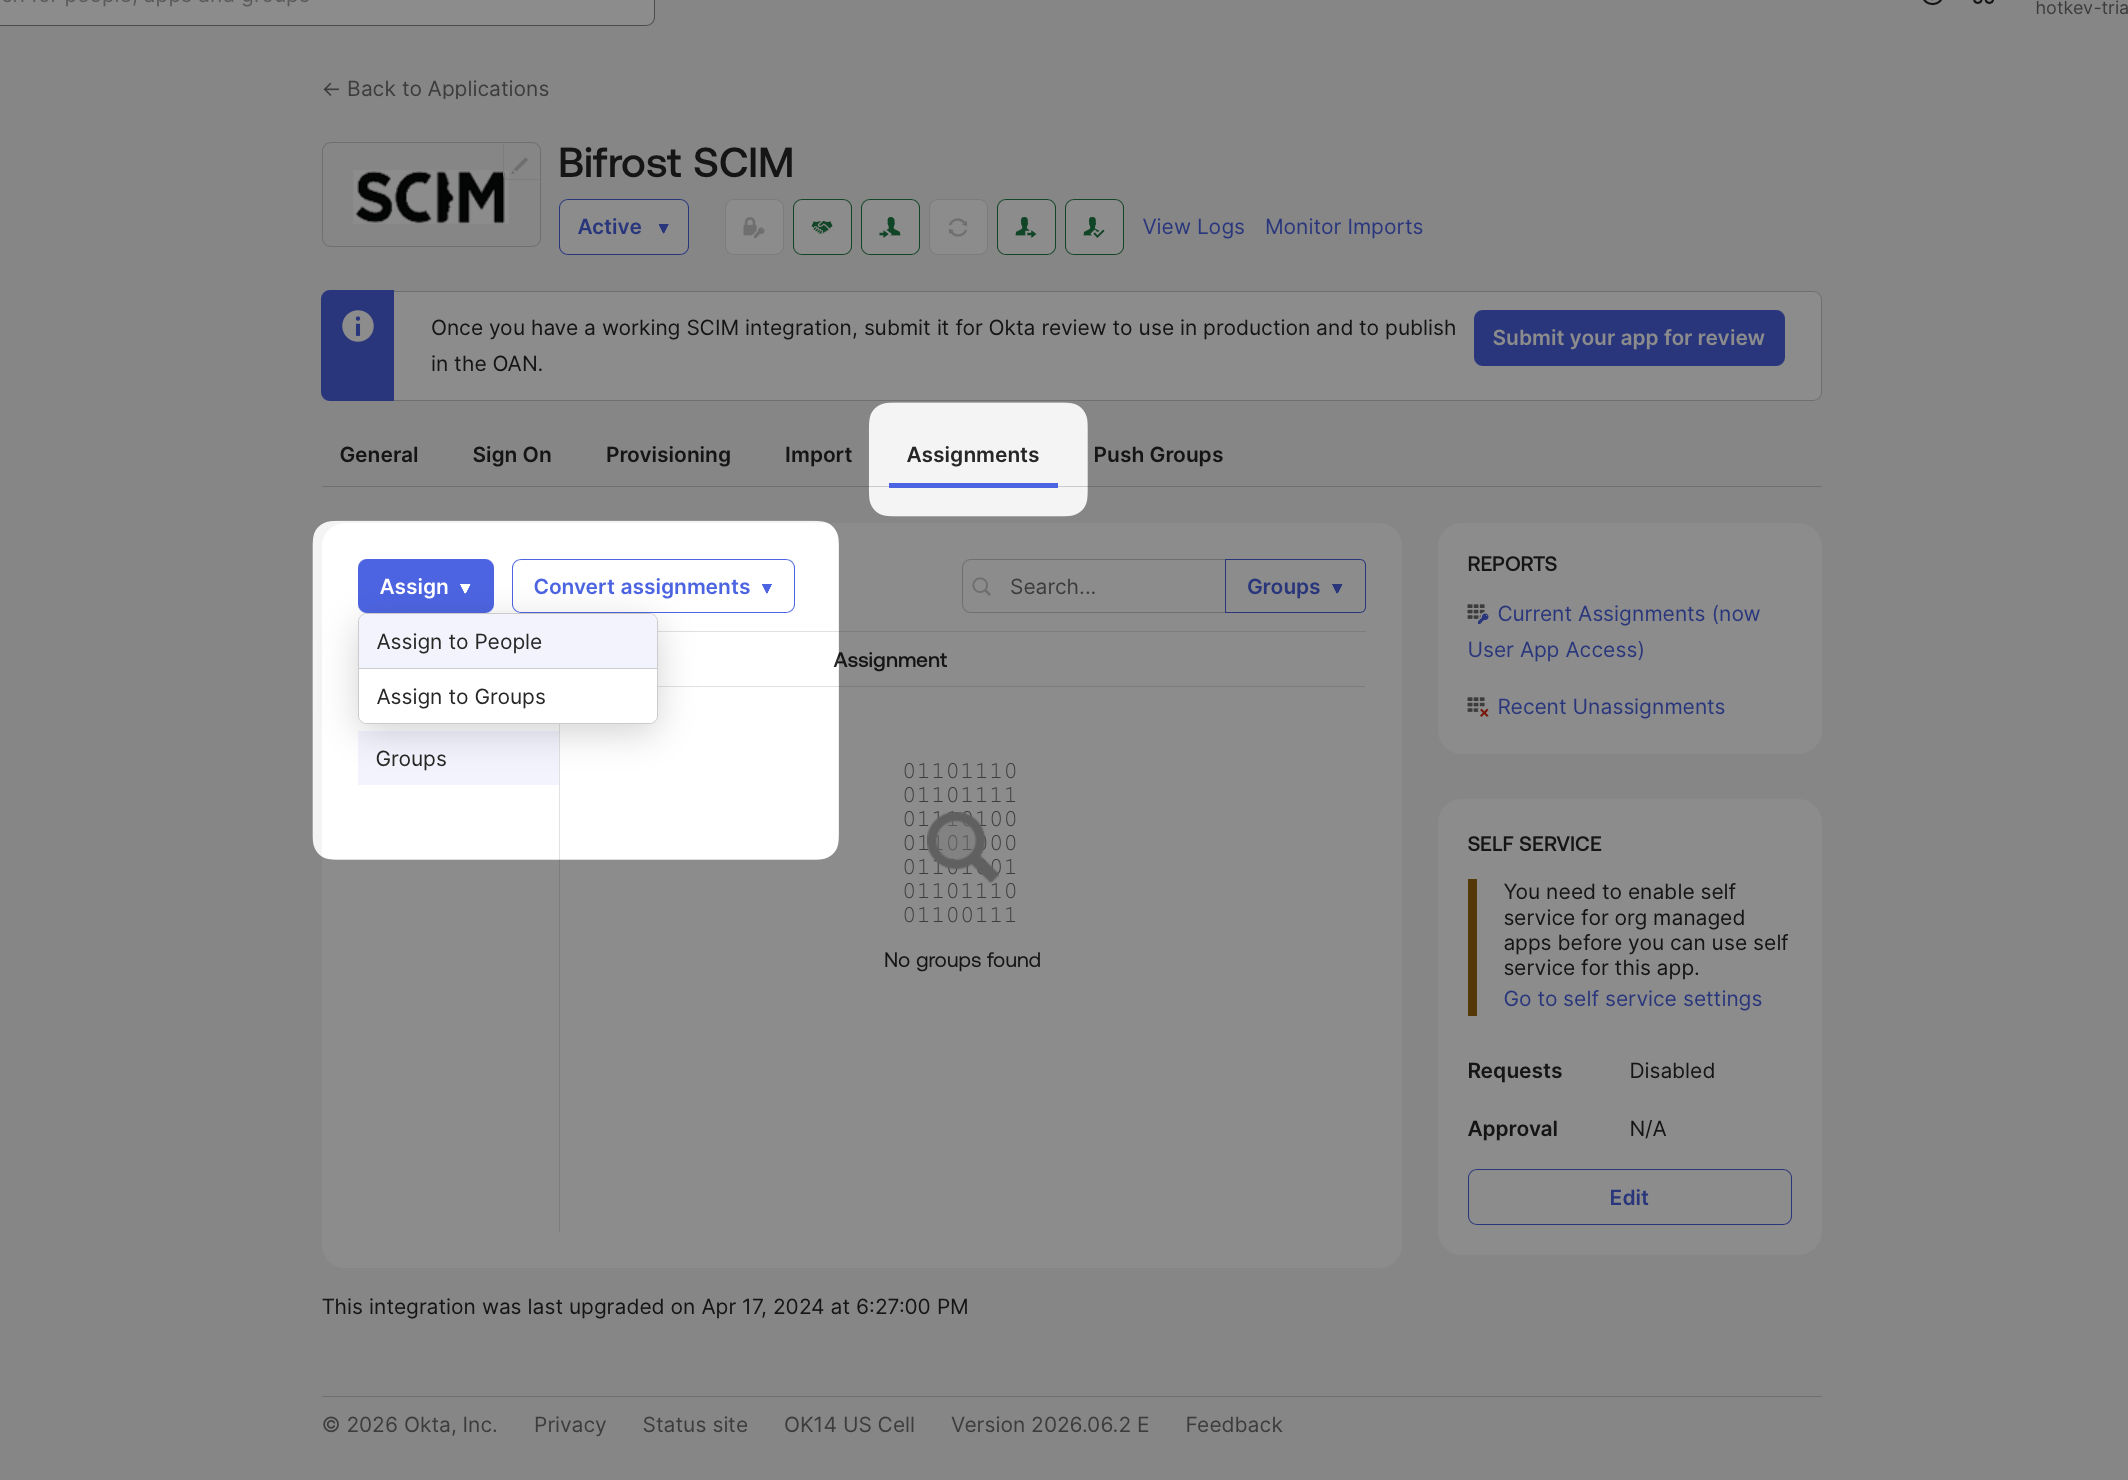
Assign users or groups from the Assignments tab — users are pushed to Vikat immediately on assignment.
Push groups (for team and BU mapping)
Vikat-*).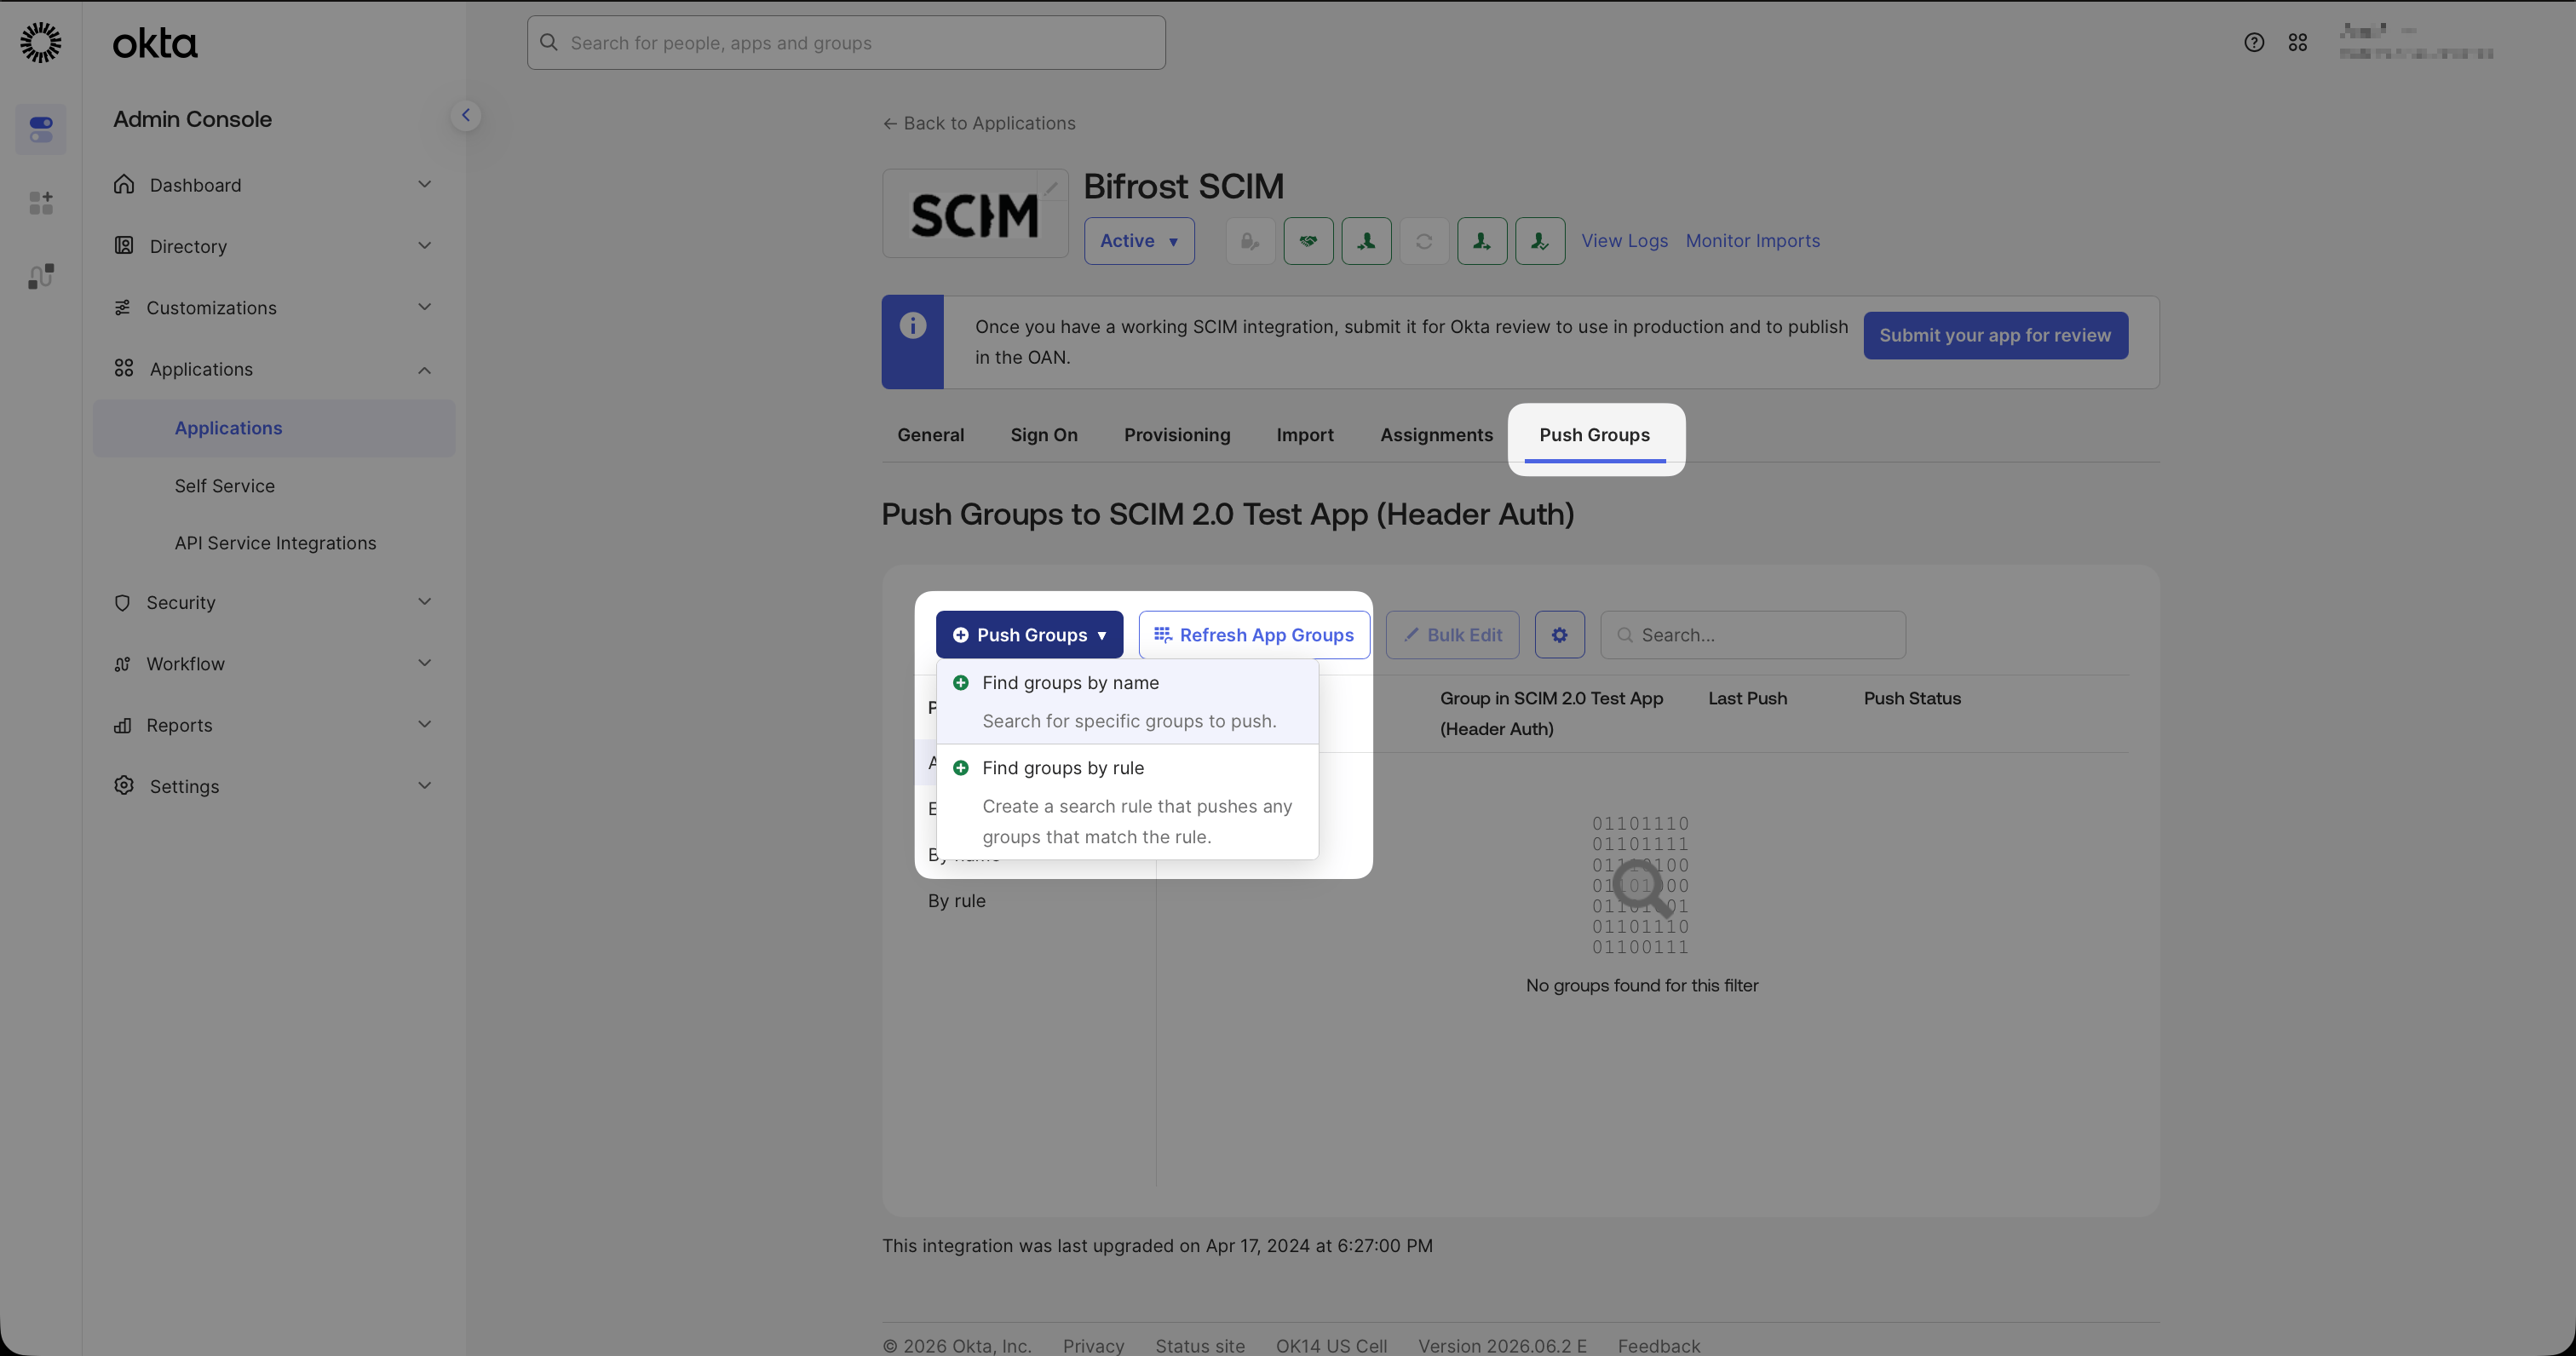
Push Groups tab — choose to find groups by name or create a rule to push all matching groups automatically.
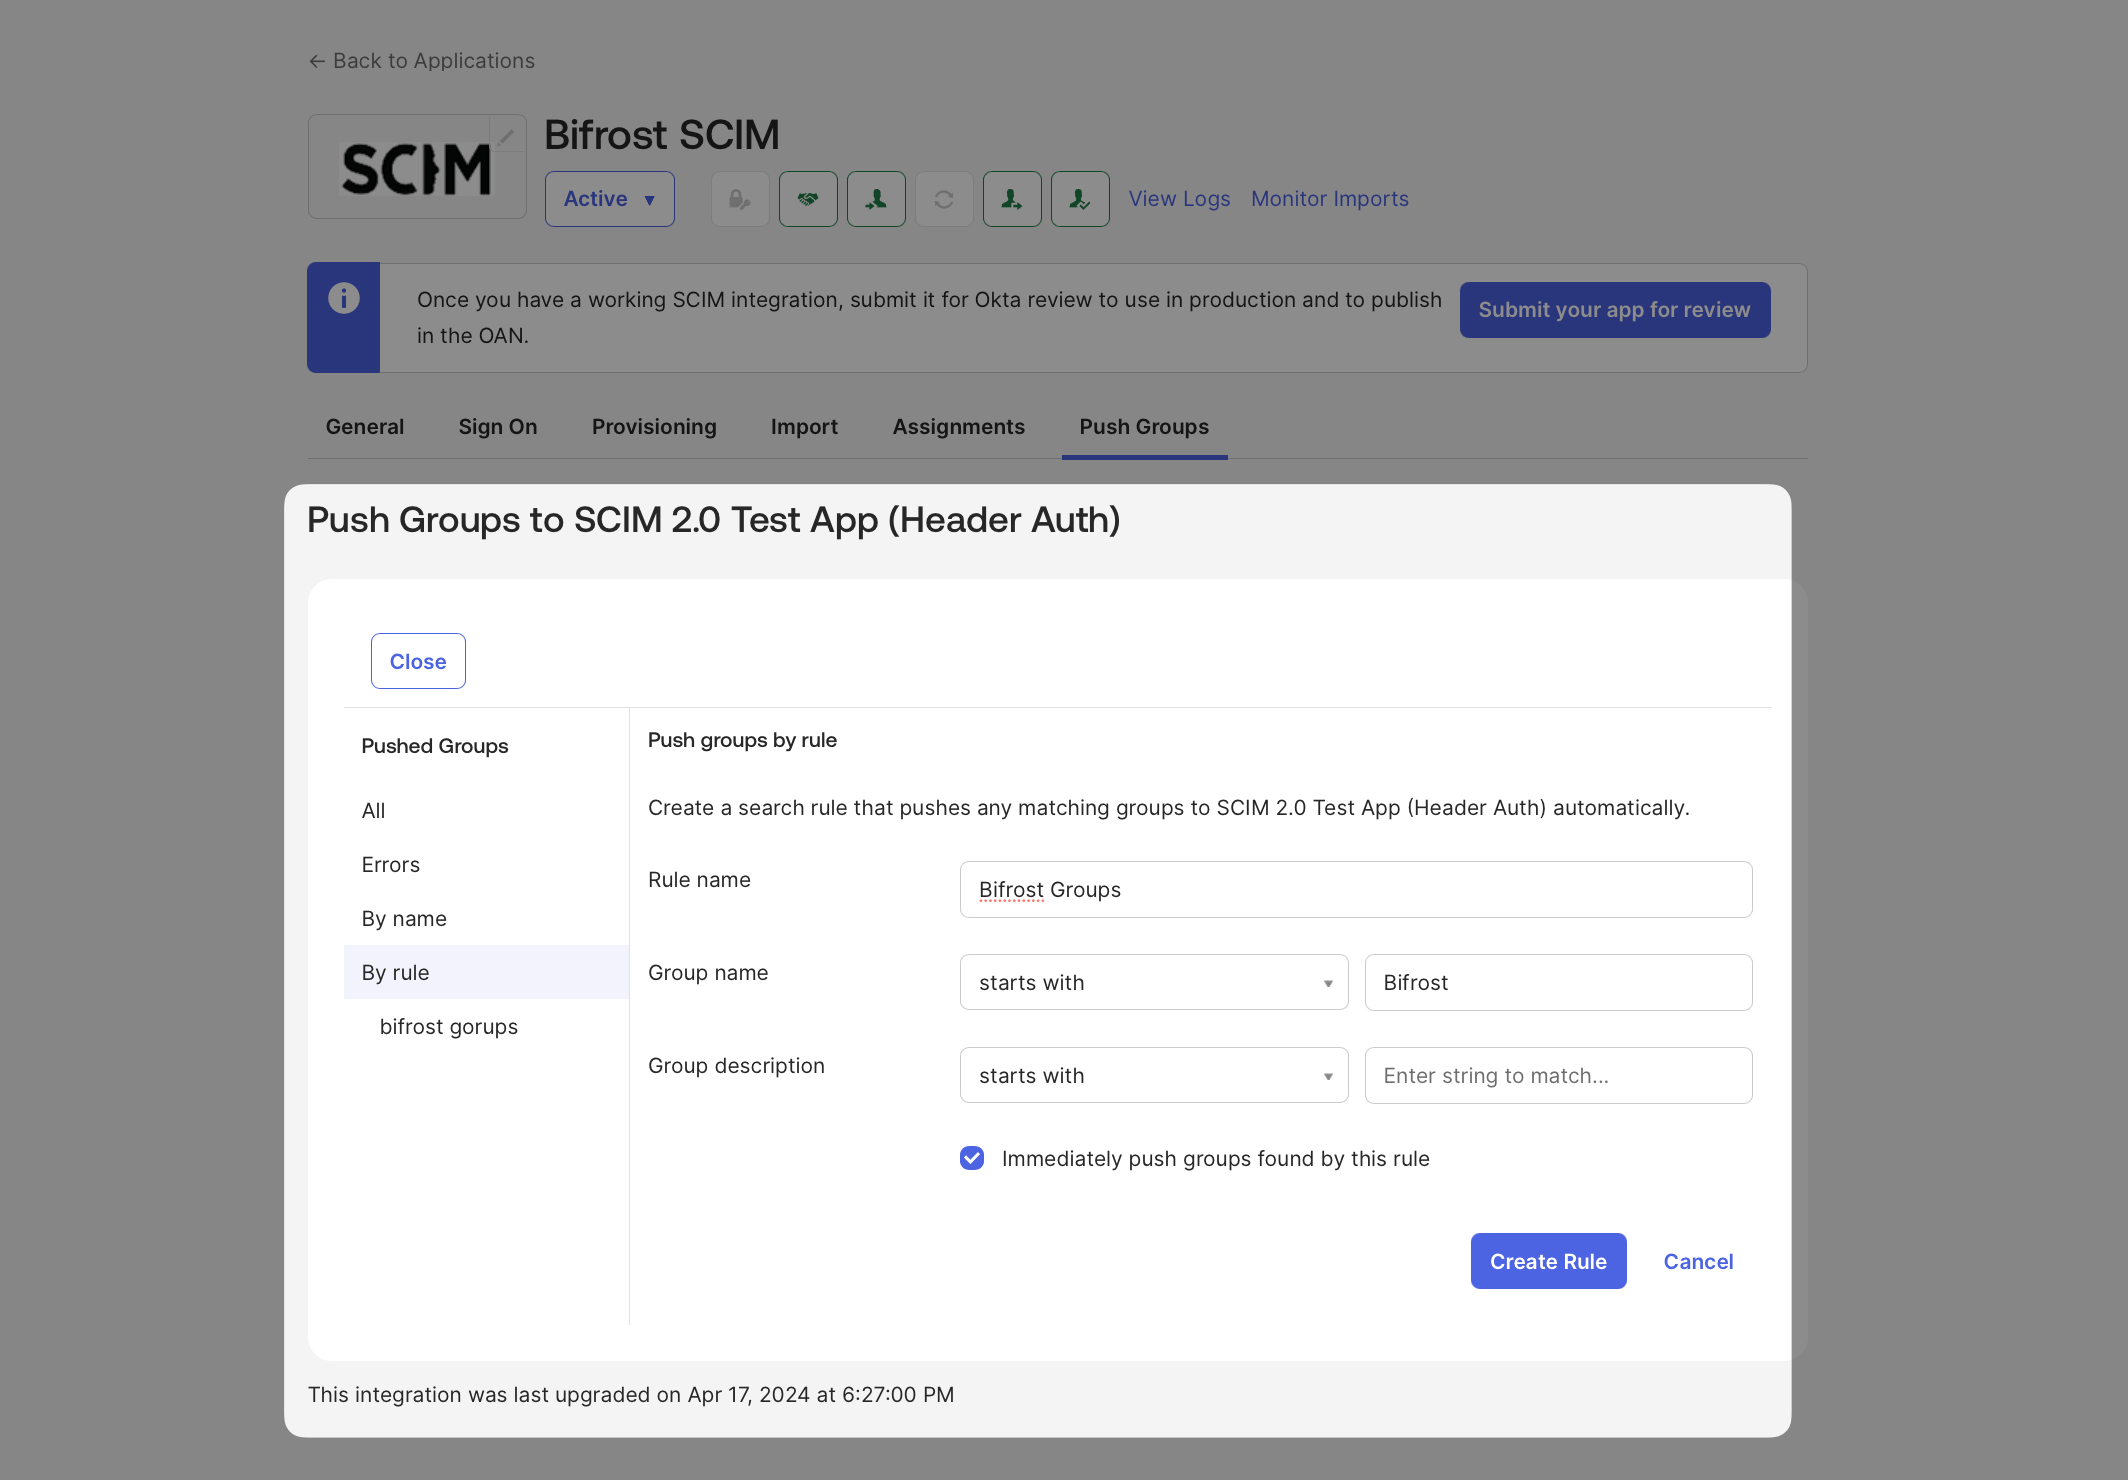
Push by rule — set a filter (e.g. Group name starts with 'Vikat') to automatically push all matching groups.
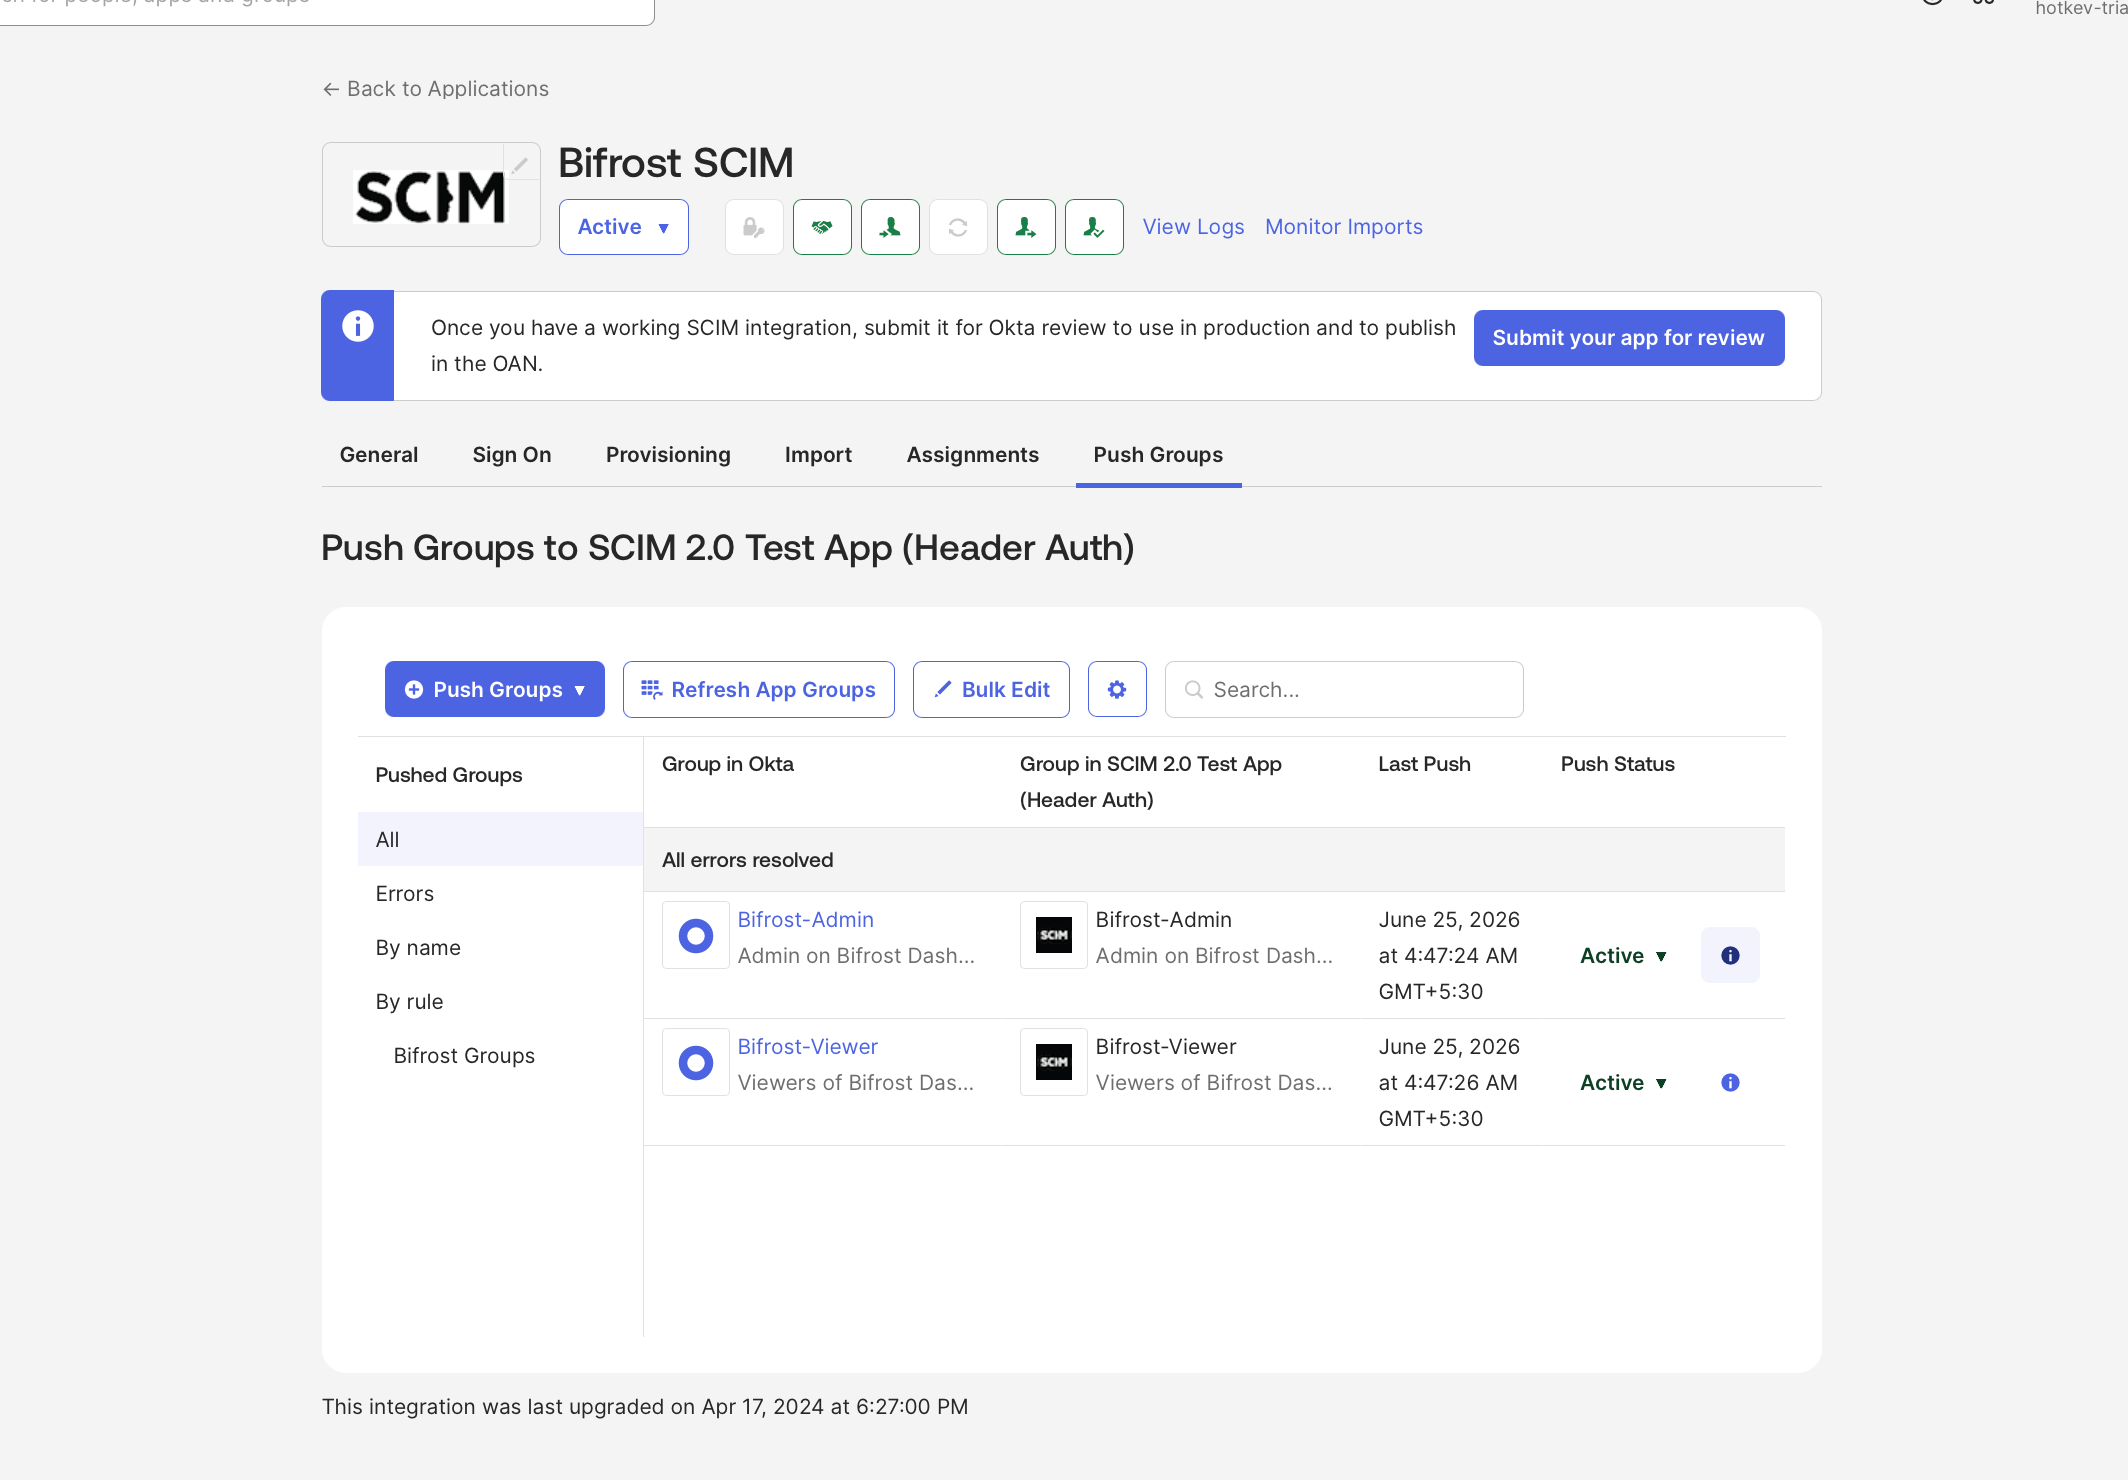
Pushed groups showing as Active — Vikat now tracks membership changes for these groups in real time.
displayName as the match value to automatically assign users to teams or business units based on their group membership.Step 5: Verify in Vikat
Once assignments and group pushes are active, confirm everything is syncing correctly.- Go to Governance → Users to see provisioned users and their assigned roles
- Go to Governance → Teams to see teams populated from pushed groups
- Go to Governance → Business Units to see business units resolved from group or attribute mappings