Enable real-time user and group provisioning from any SCIM 2.0-capable identity provider to Vikat Enterprise.
Vikat exposes a SCIM 2.0 endpoint that any compatible identity provider can push user and group changes to in real time — new users are provisioned, deactivated users are suspended, and group memberships are updated without waiting for the next background sync cycle.
Complete SSO using OIDC before setting up SCIM. SCIM provisioning runs alongside your OIDC integration — it does not replace it.
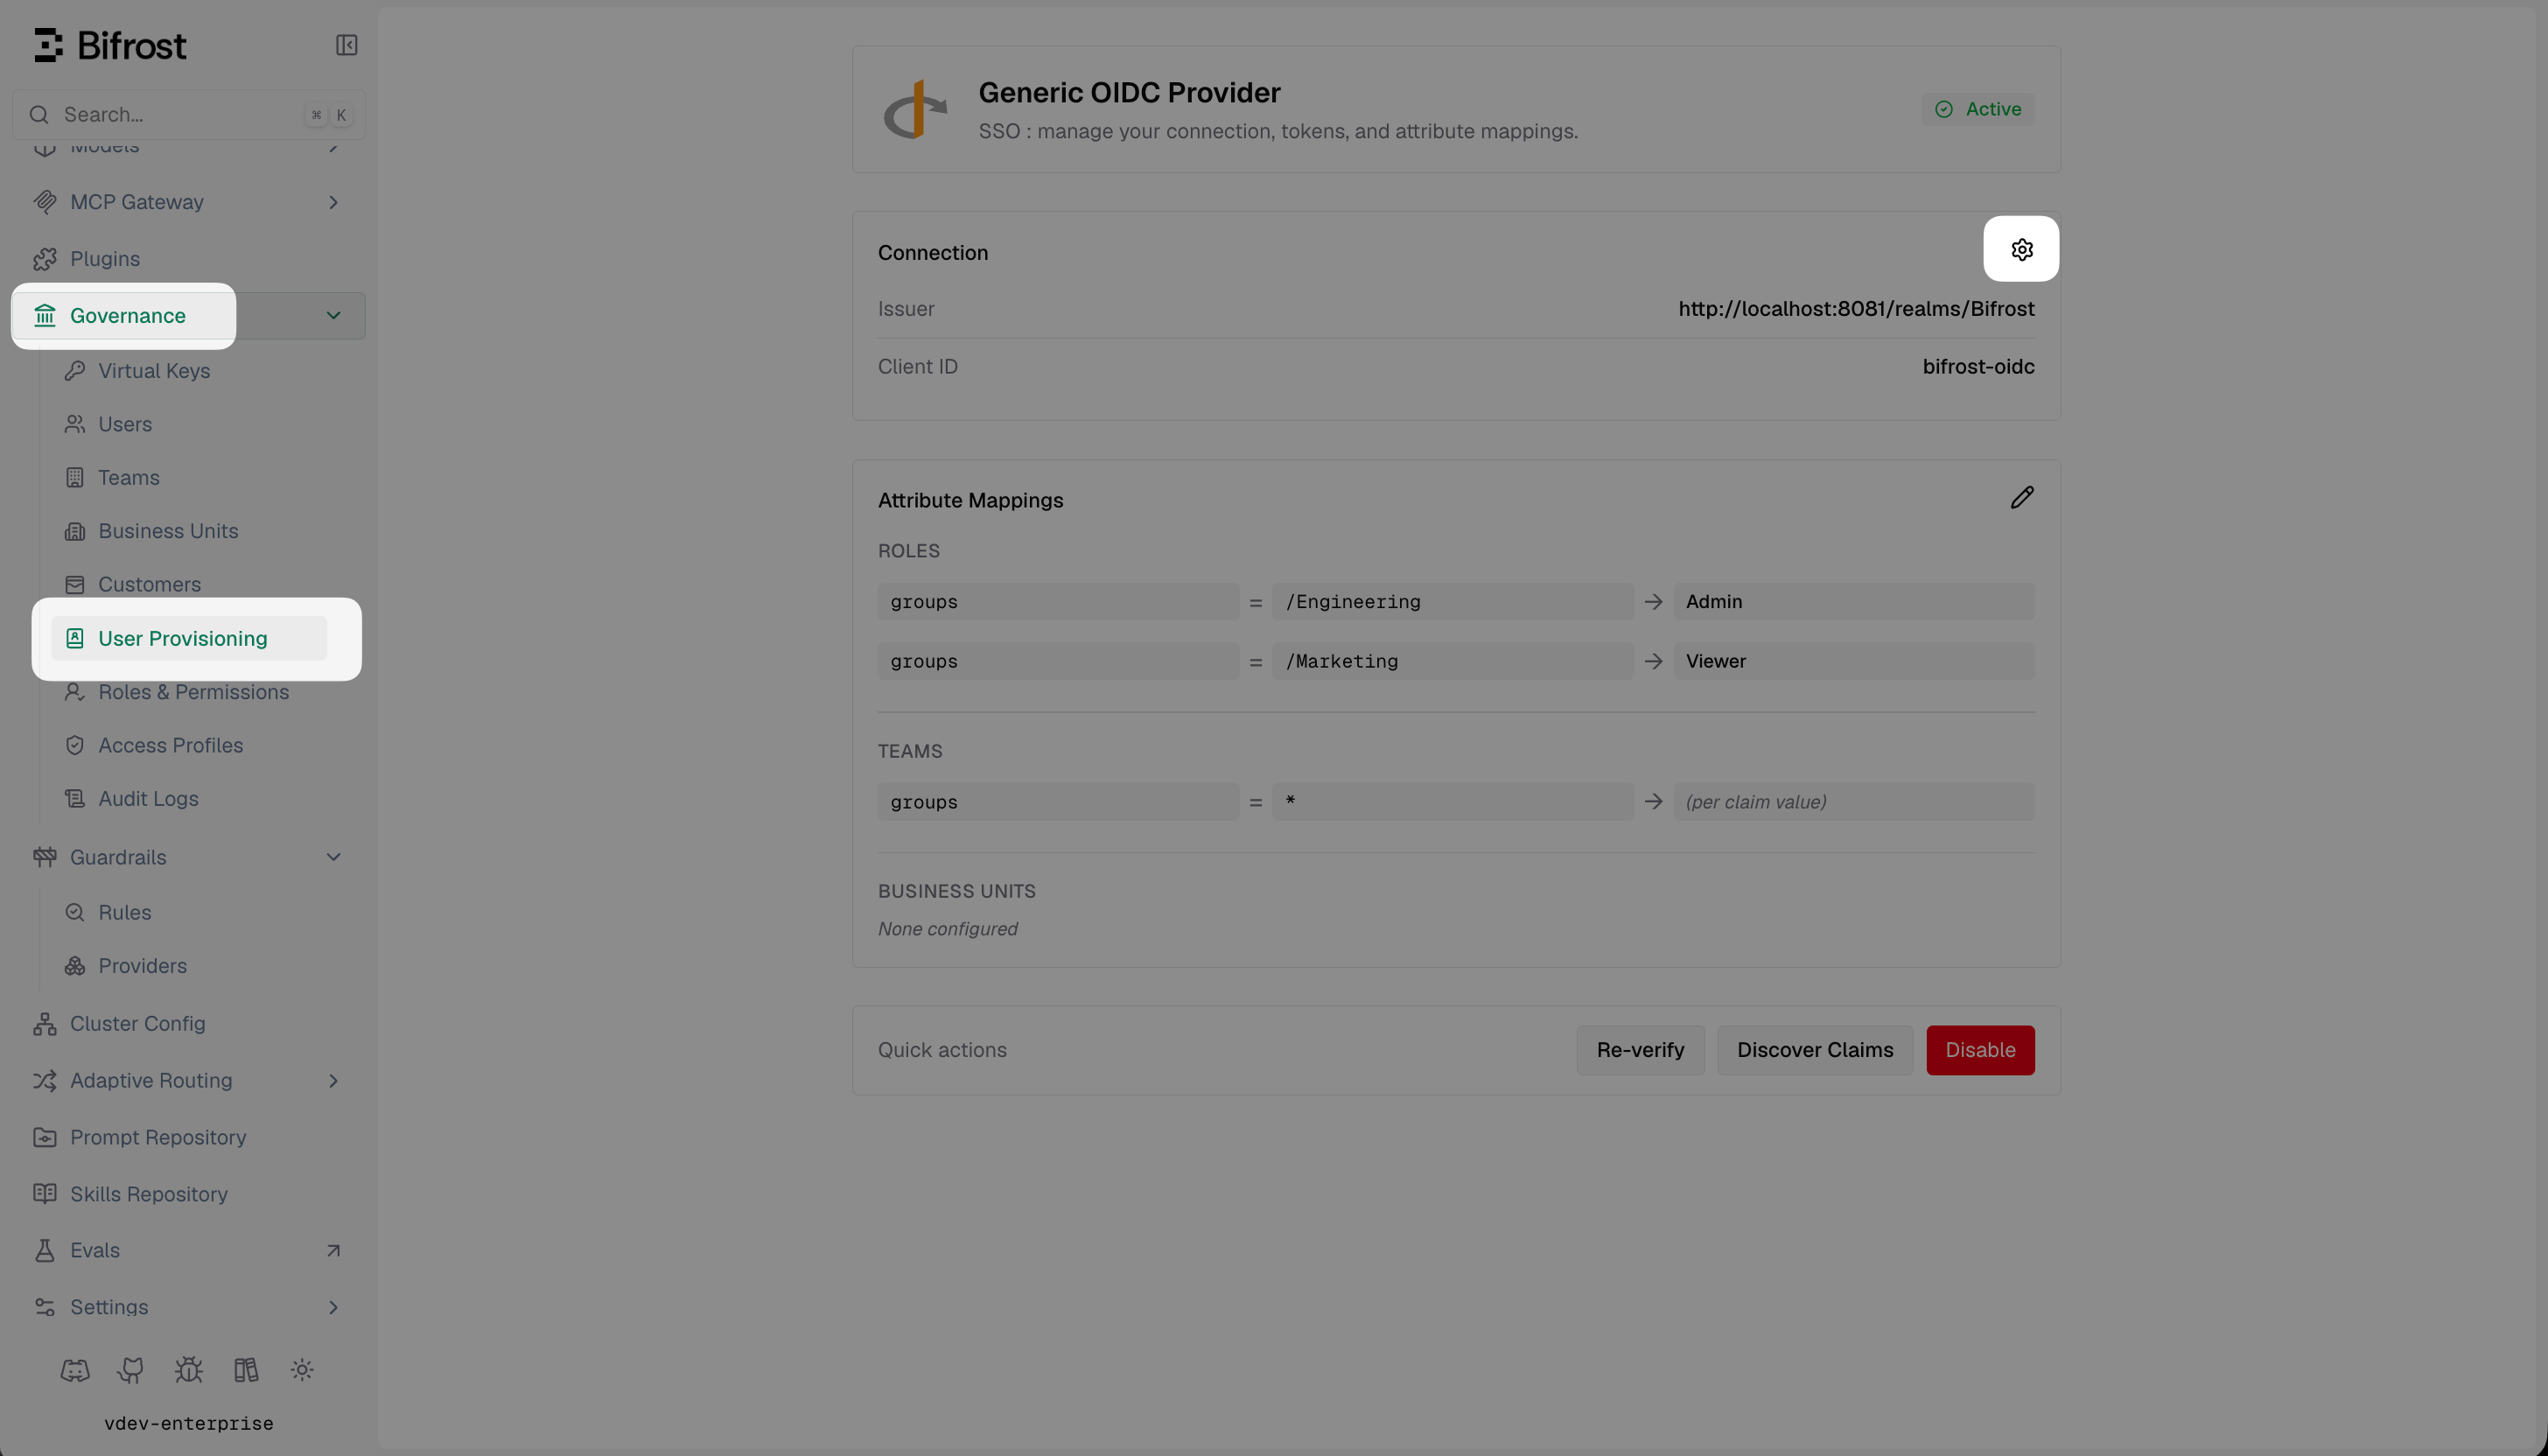
In your Vikat dashboard, go to Governance → User Provisioning and open your configured Generic OIDC provider.
The provider dashboard showing your connection details, attribute mappings, and quick actions.
2
Enable SCIM provisioning
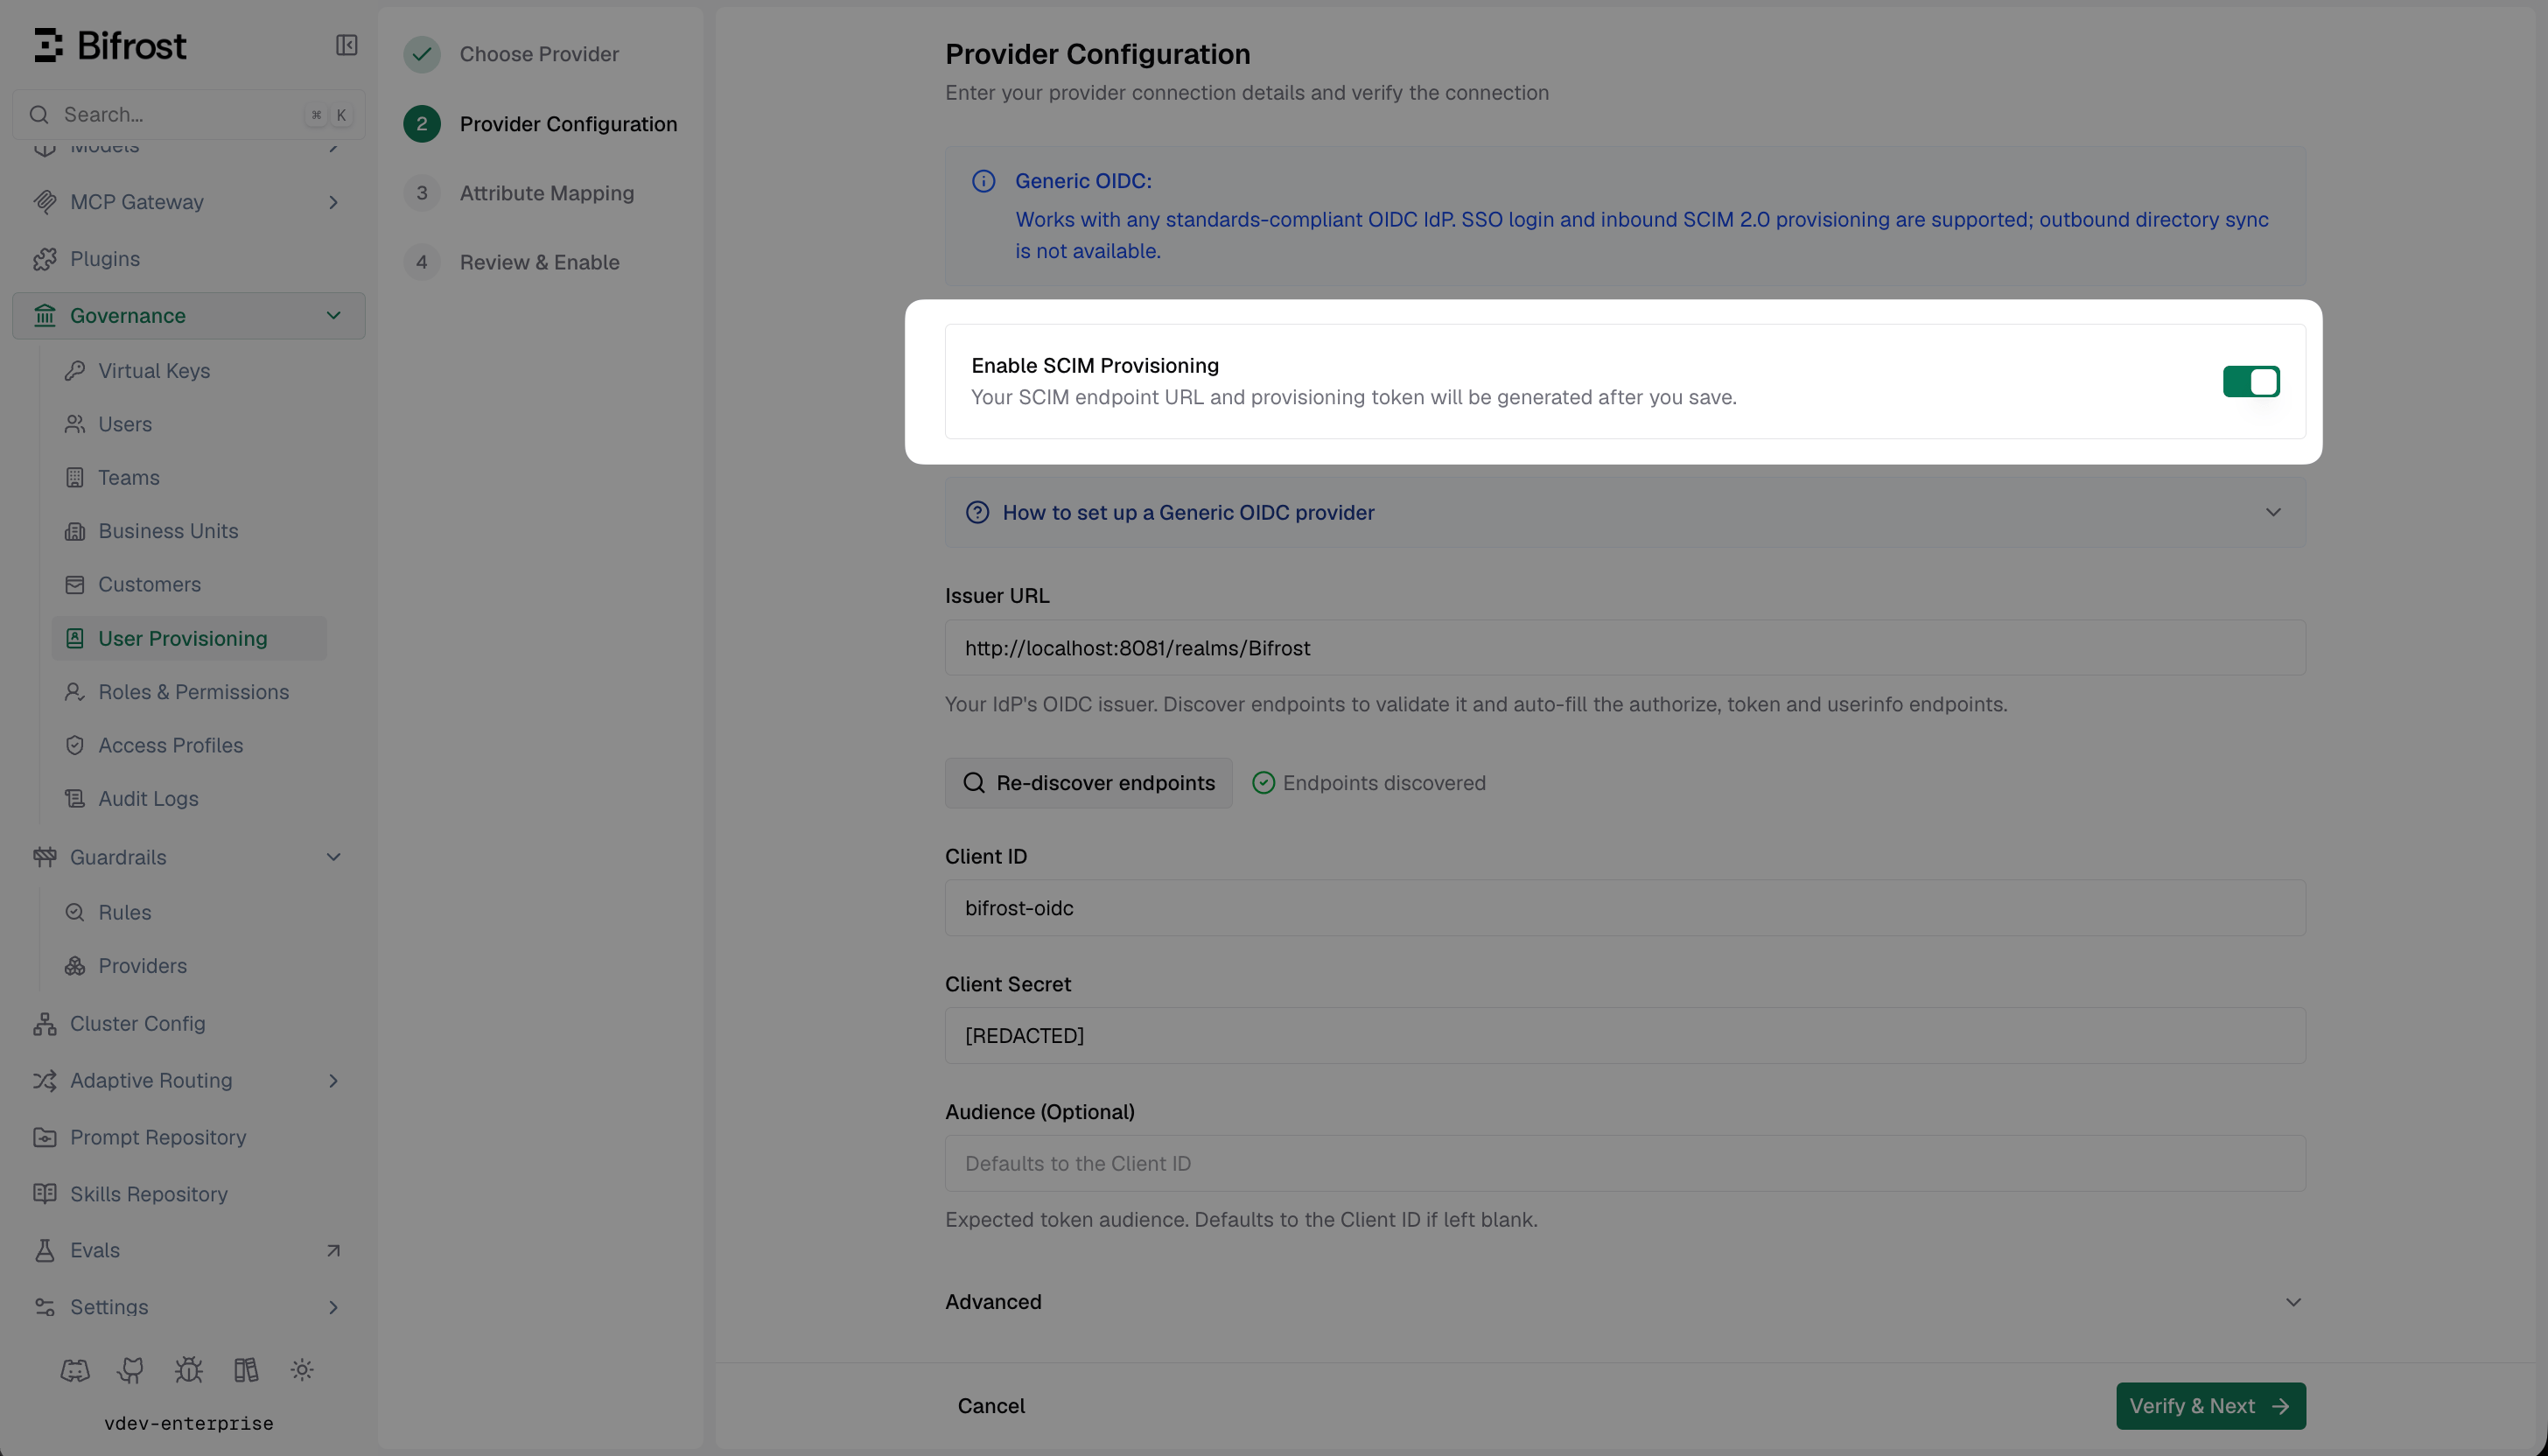
Click the settings icon to open Provider Configuration.Toggle on Enable SCIM Provisioning and click Verify & Next.
Enable SCIM Provisioning — the SCIM endpoint URL and bearer token are generated after saving.
3
Copy the SCIM credentials
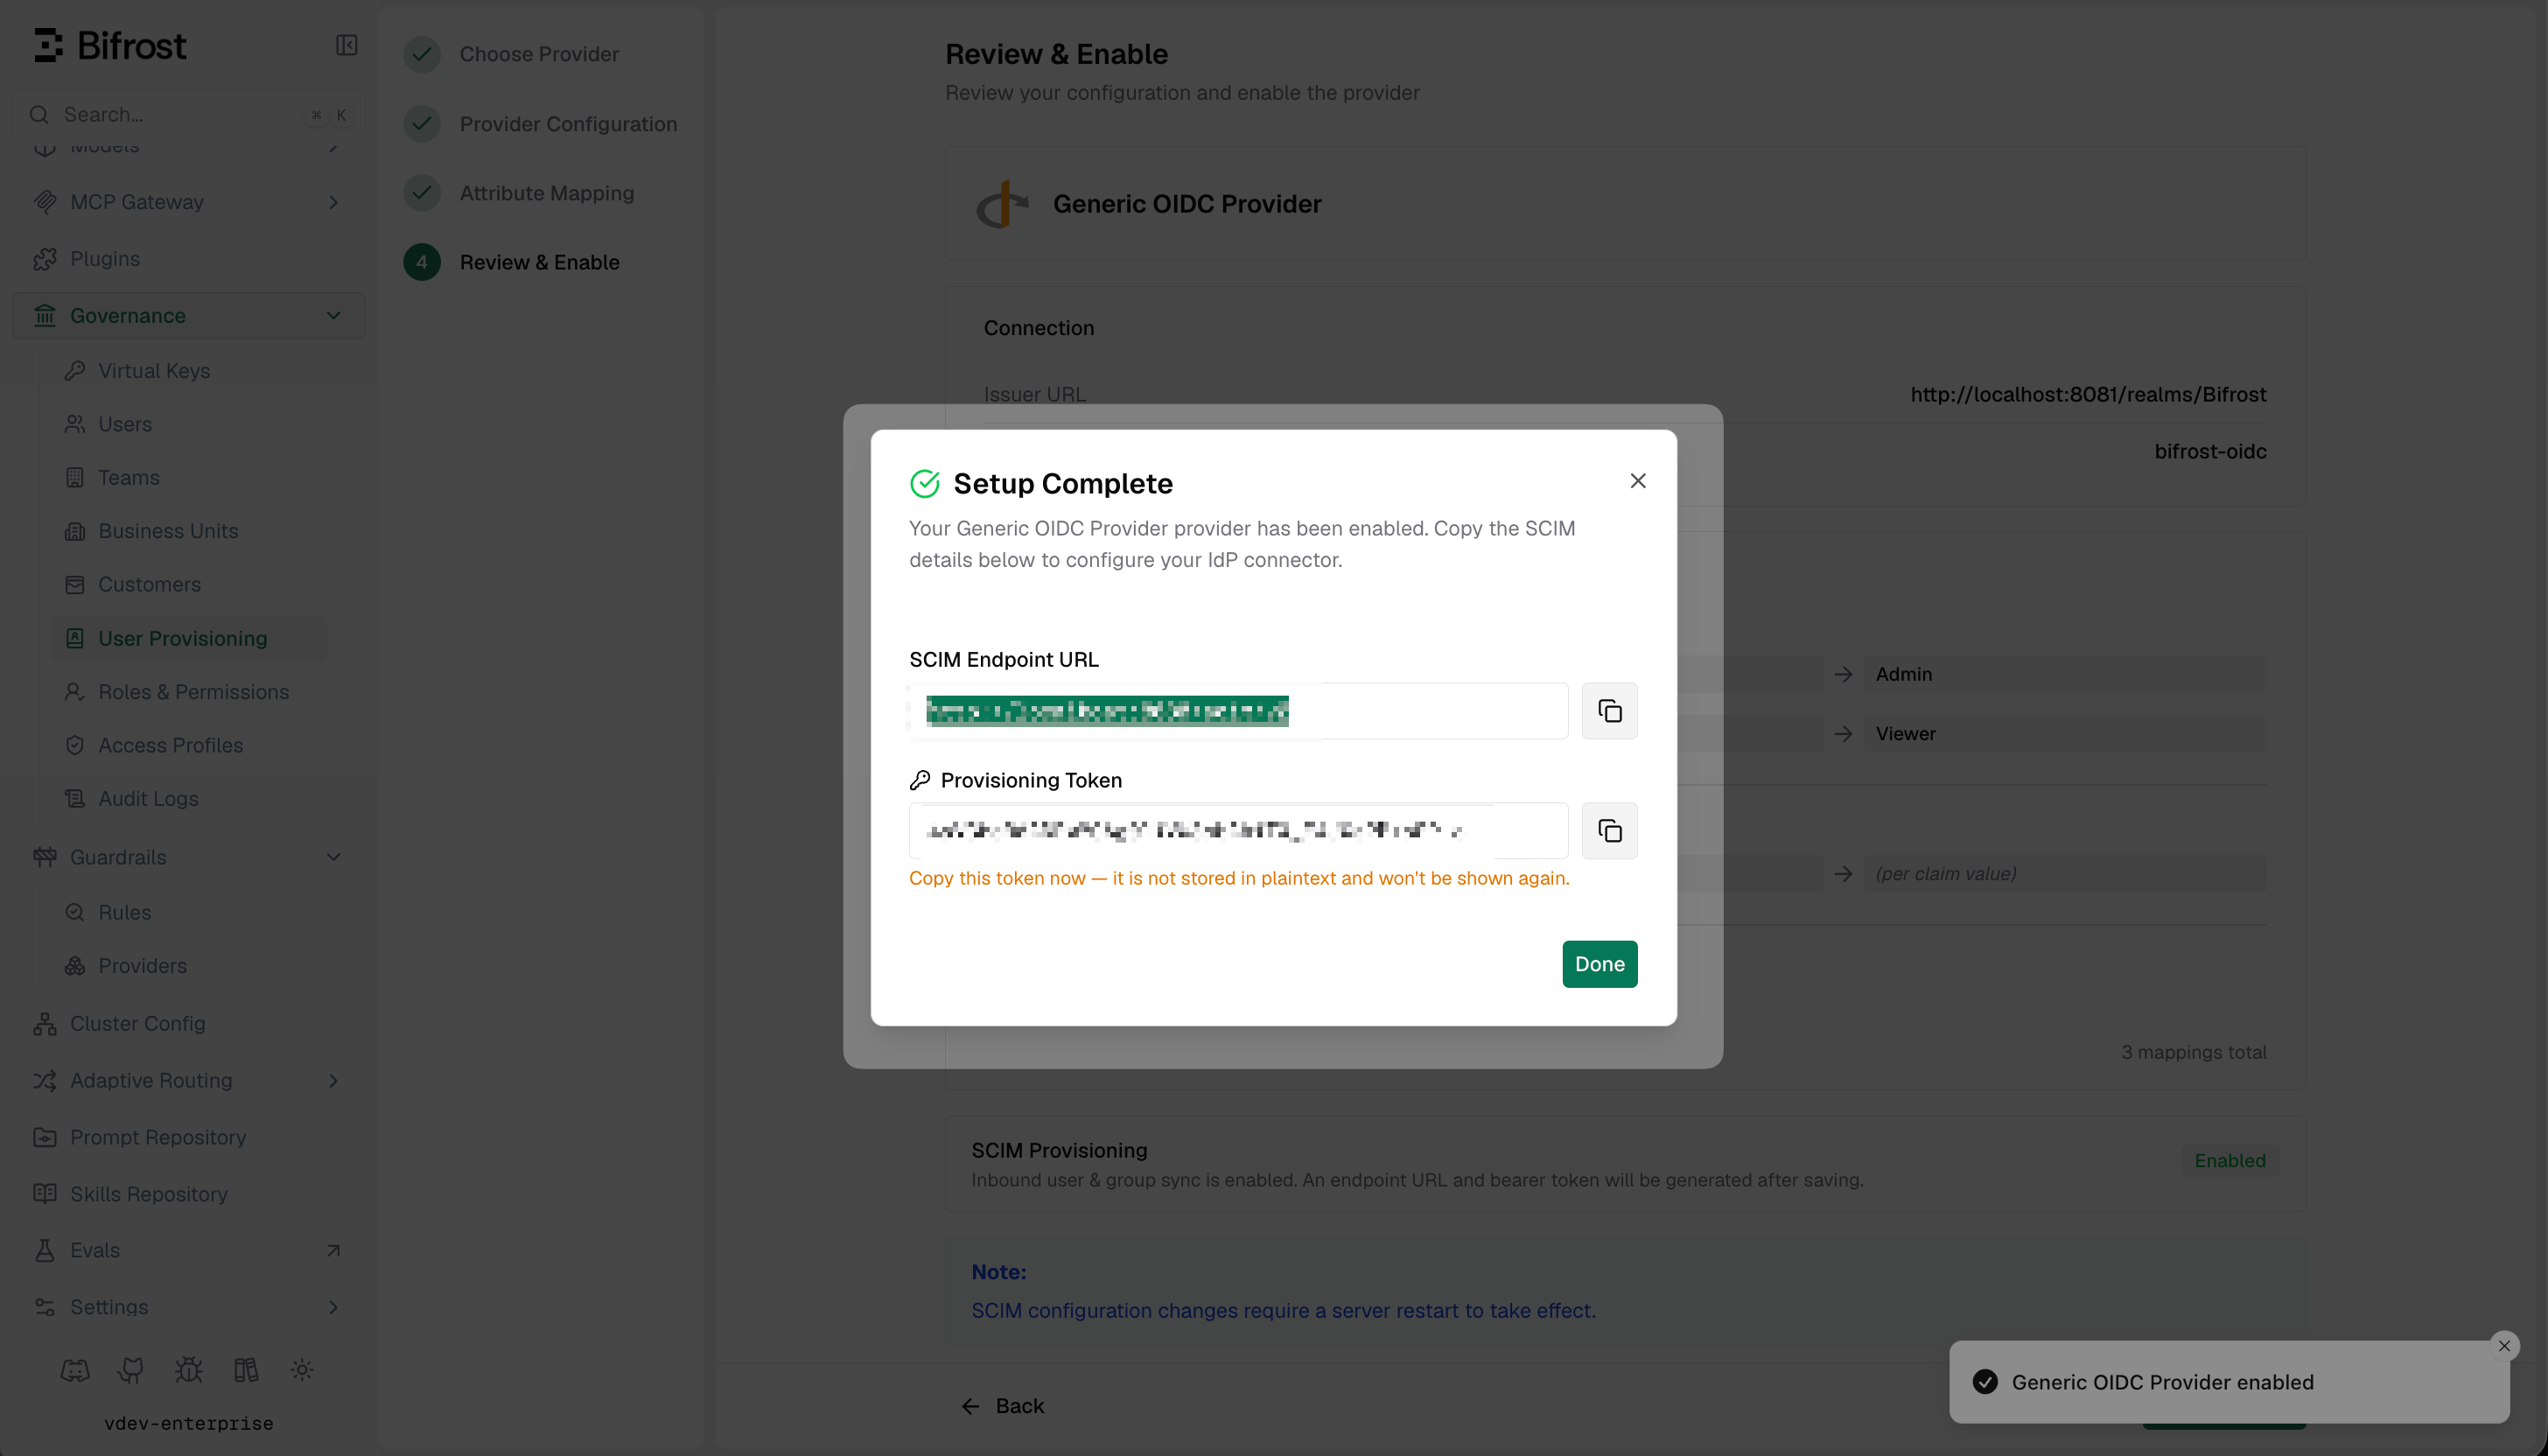
After saving, Vikat shows a Setup Complete dialog with:
SCIM Endpoint URL — the base URL your IdP will send provisioning requests to (e.g. https://<your-vikat-domain>/scim/v2)
Provisioning Token — the bearer token your IdP uses to authenticate requests
Setup Complete — copy the SCIM Endpoint URL and Provisioning Token before closing this dialog.
The provisioning token is only shown once. Store it somewhere safe before closing. You can rotate it later, but the previous token becomes invalid immediately.
In your IdP, assign the users or groups you want to provision into Vikat. Only users within the provisioning scope are pushed.Changes — new assignments, deactivations, group membership updates — will reflect in Vikat within the next provisioning cycle. Most IdPs offer an on-demand sync option for immediate provisioning.
Real-time push — your IdP pushes user and group changes to Vikat immediately when they occur.OIDC session refresh — every 15 minutes, Vikat refreshes active OIDC sessions. If a user has been deactivated, their Vikat session is terminated.
Test Connection fails — verify the SCIM Base URL has no trailing slash and the token matches exactly what Vikat generated. Rotate the token in Vikat and update your IdP.Users are provisioned but have no role — SCIM provisions the user record; role assignment comes from attribute mappings in the OIDC provider. Confirm your Attribute-to-Role mappings are set and the relevant claims appear in the JWT at login time.Groups are not syncing — confirm group push is enabled in your IdP’s provisioning settings. Some IdPs require groups to be enabled separately from user sync.401 Unauthorized from Vikat SCIM endpoint — the provisioning token is incorrect or has been rotated. Generate a new token in Vikat (Provider Configuration → Rotate Token) and update your IdP.409 Conflict when provisioning a user — the user already exists in Vikat (provisioned via OIDC login). Vikat will merge the records on the next PATCH request from your IdP.
Assistant
Responses are generated using AI and may contain mistakes.