

Prerequisites
- An Auth0 account with admin access to create applications
- Vikat Enterprise deployed and accessible
- Your Vikat callback URL:
https://<your-vikat-domain>/login - Vikat roles created for the roles you plan to map
Step 1: Create a regular web application
Open the Auth0 dashboard
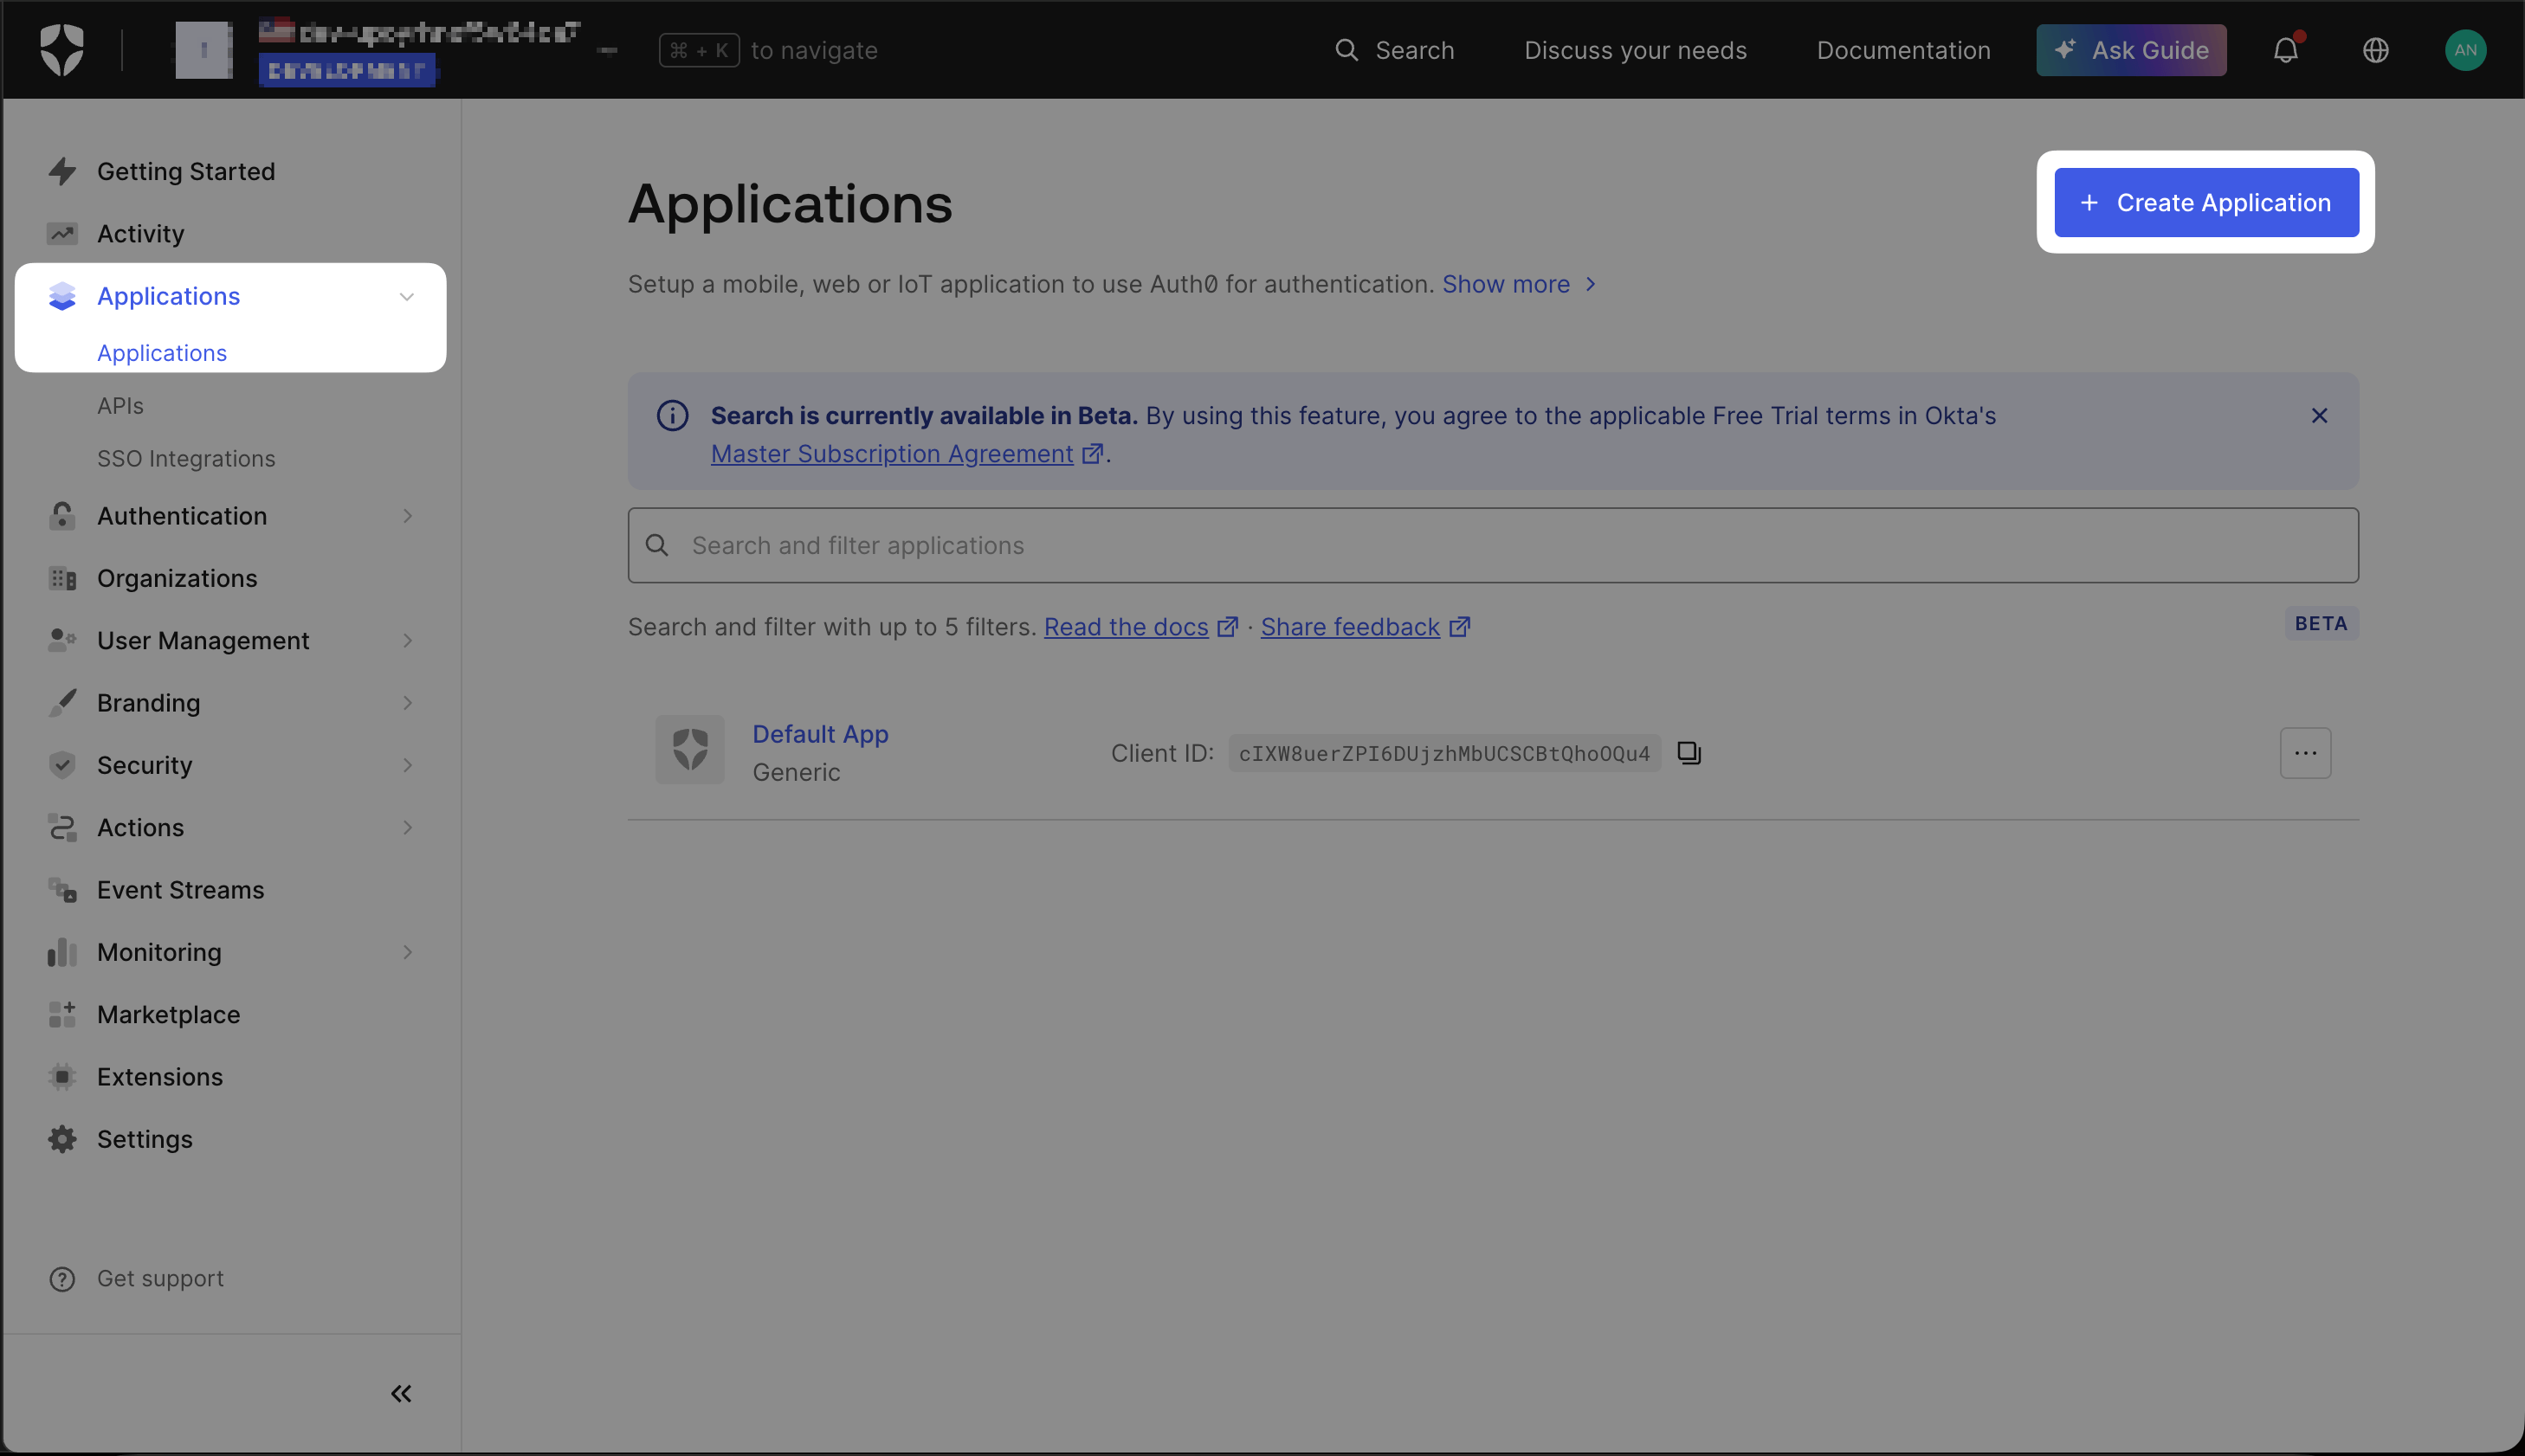
Applications page - click Create Application to add a new integration.
Choose the application type
Vikat OIDC.Select Regular Web Application and click Create.Open the Settings tab
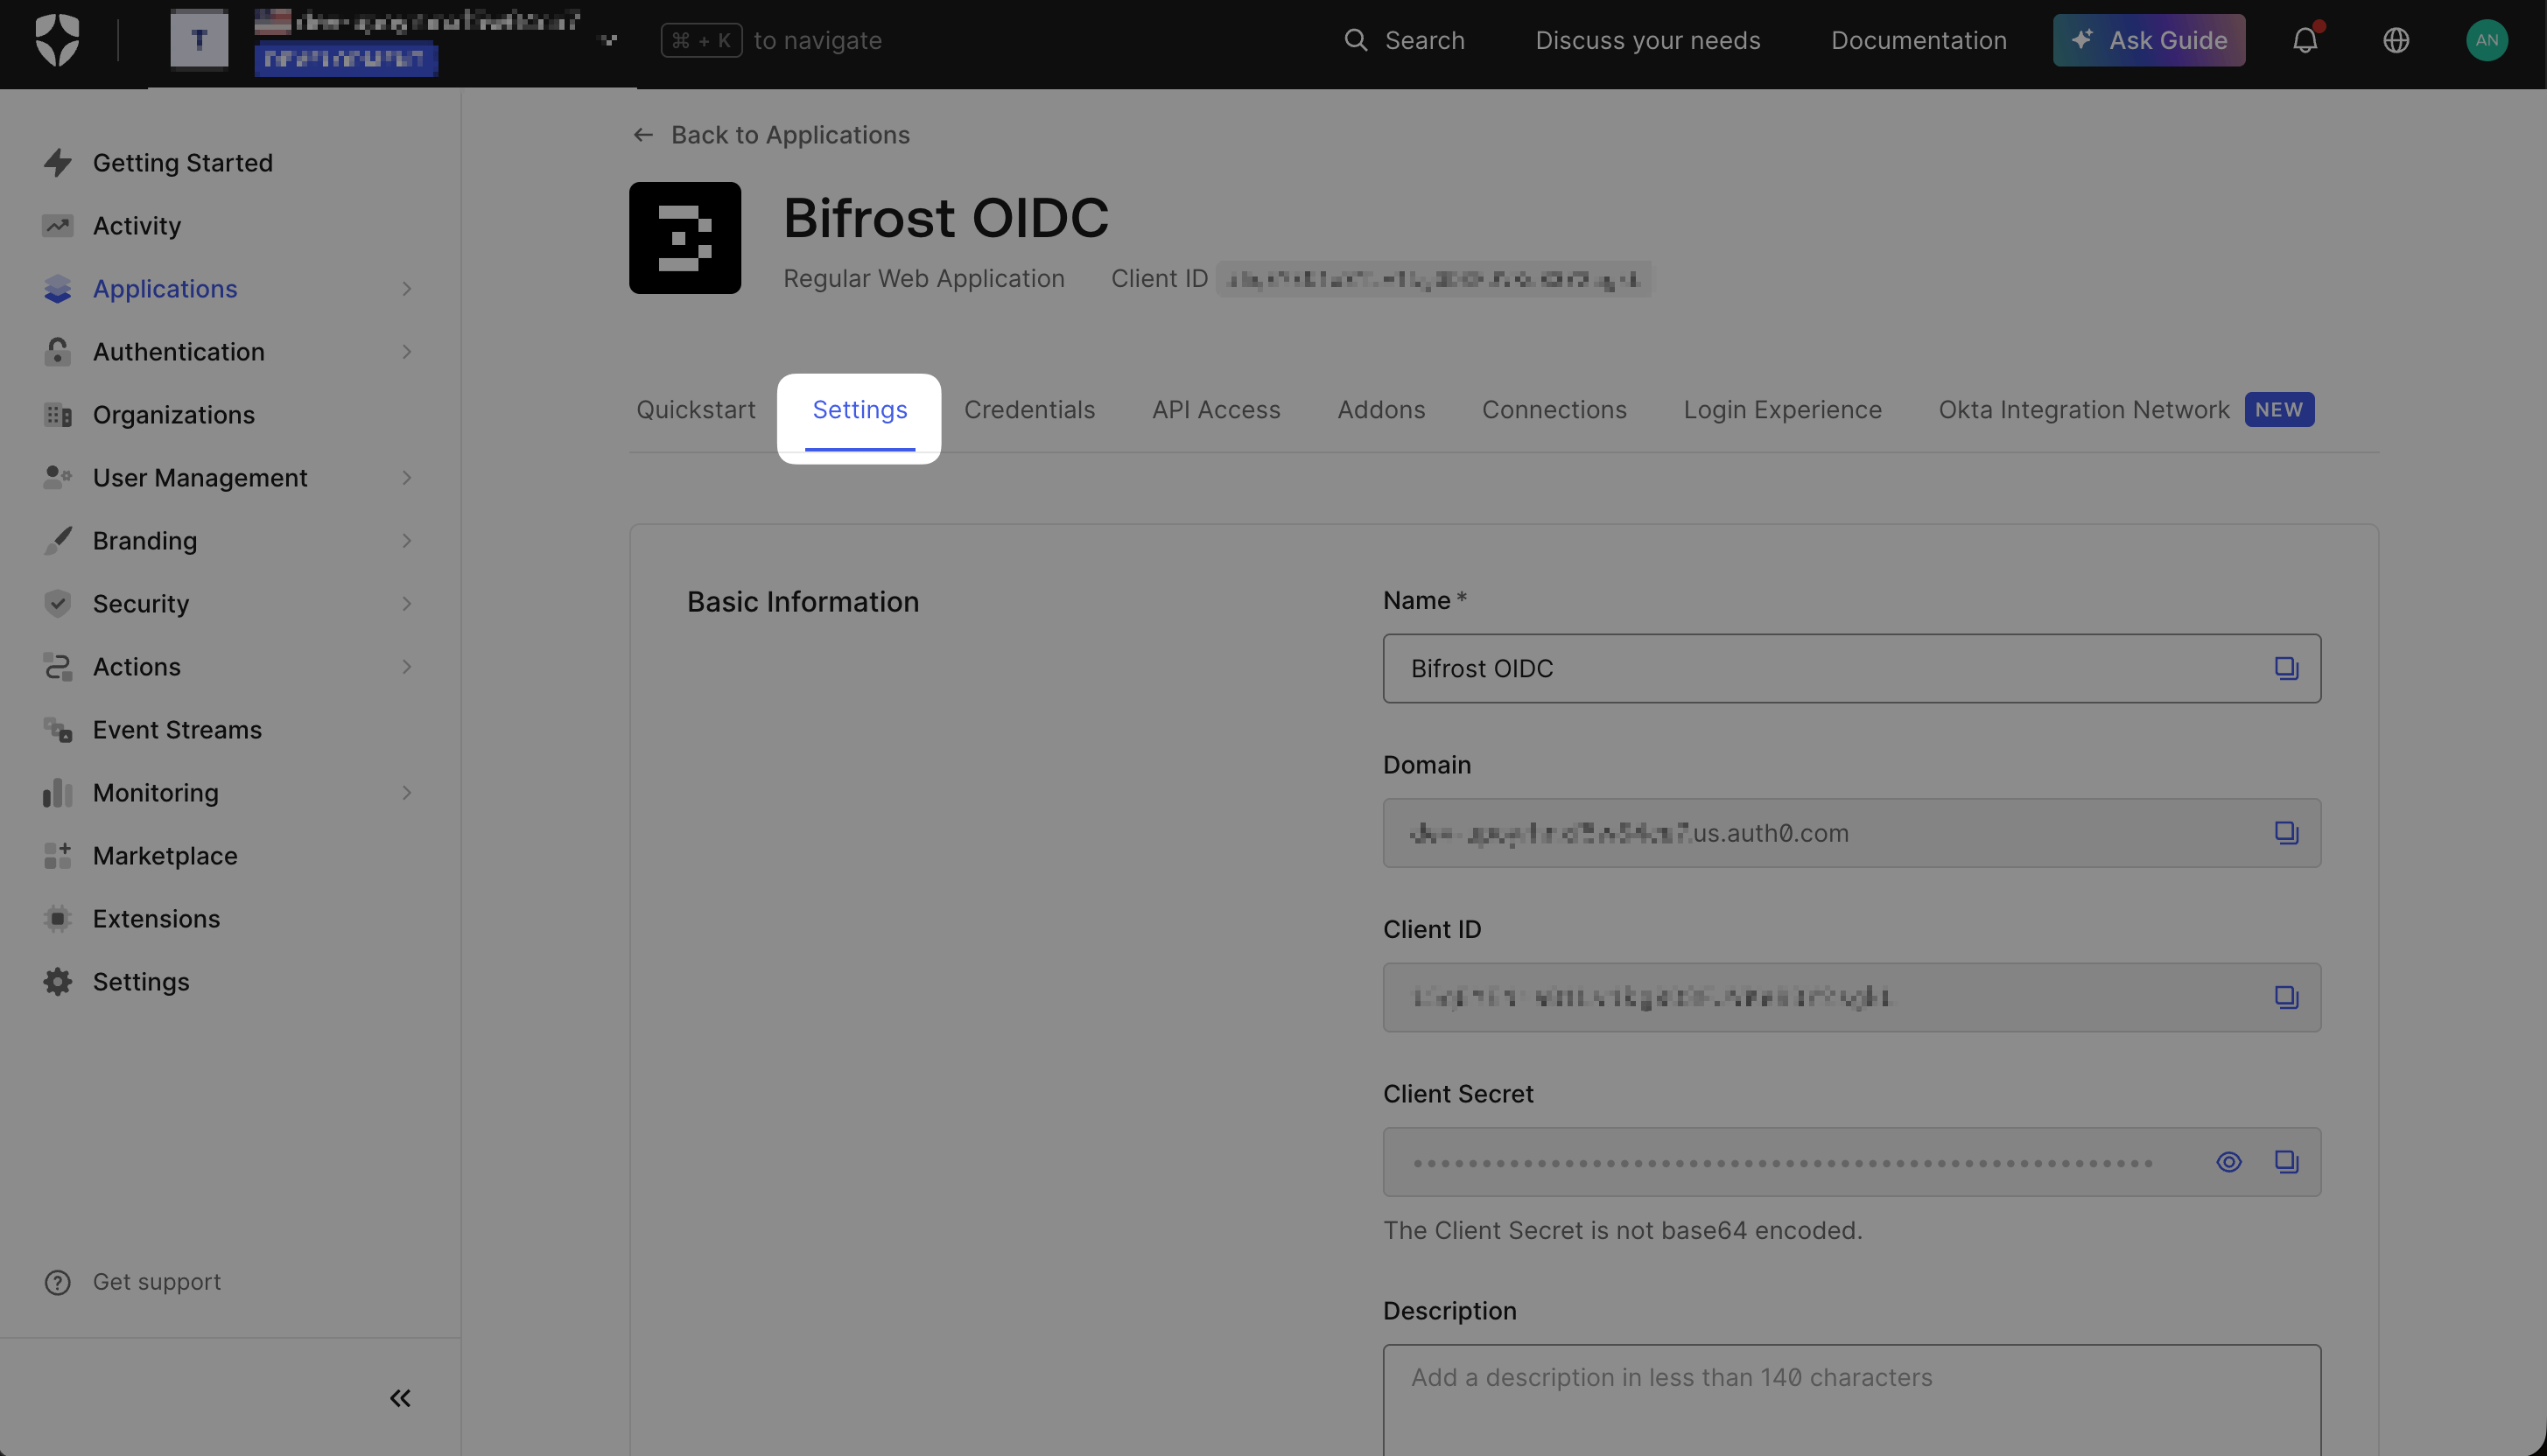
Settings tab - Domain, Client ID, and Client Secret are shown here. Keep this tab open.
Configure callback URLs
roles claim is present before you build your attribute mappings. You can skip it and add the URL later if needed.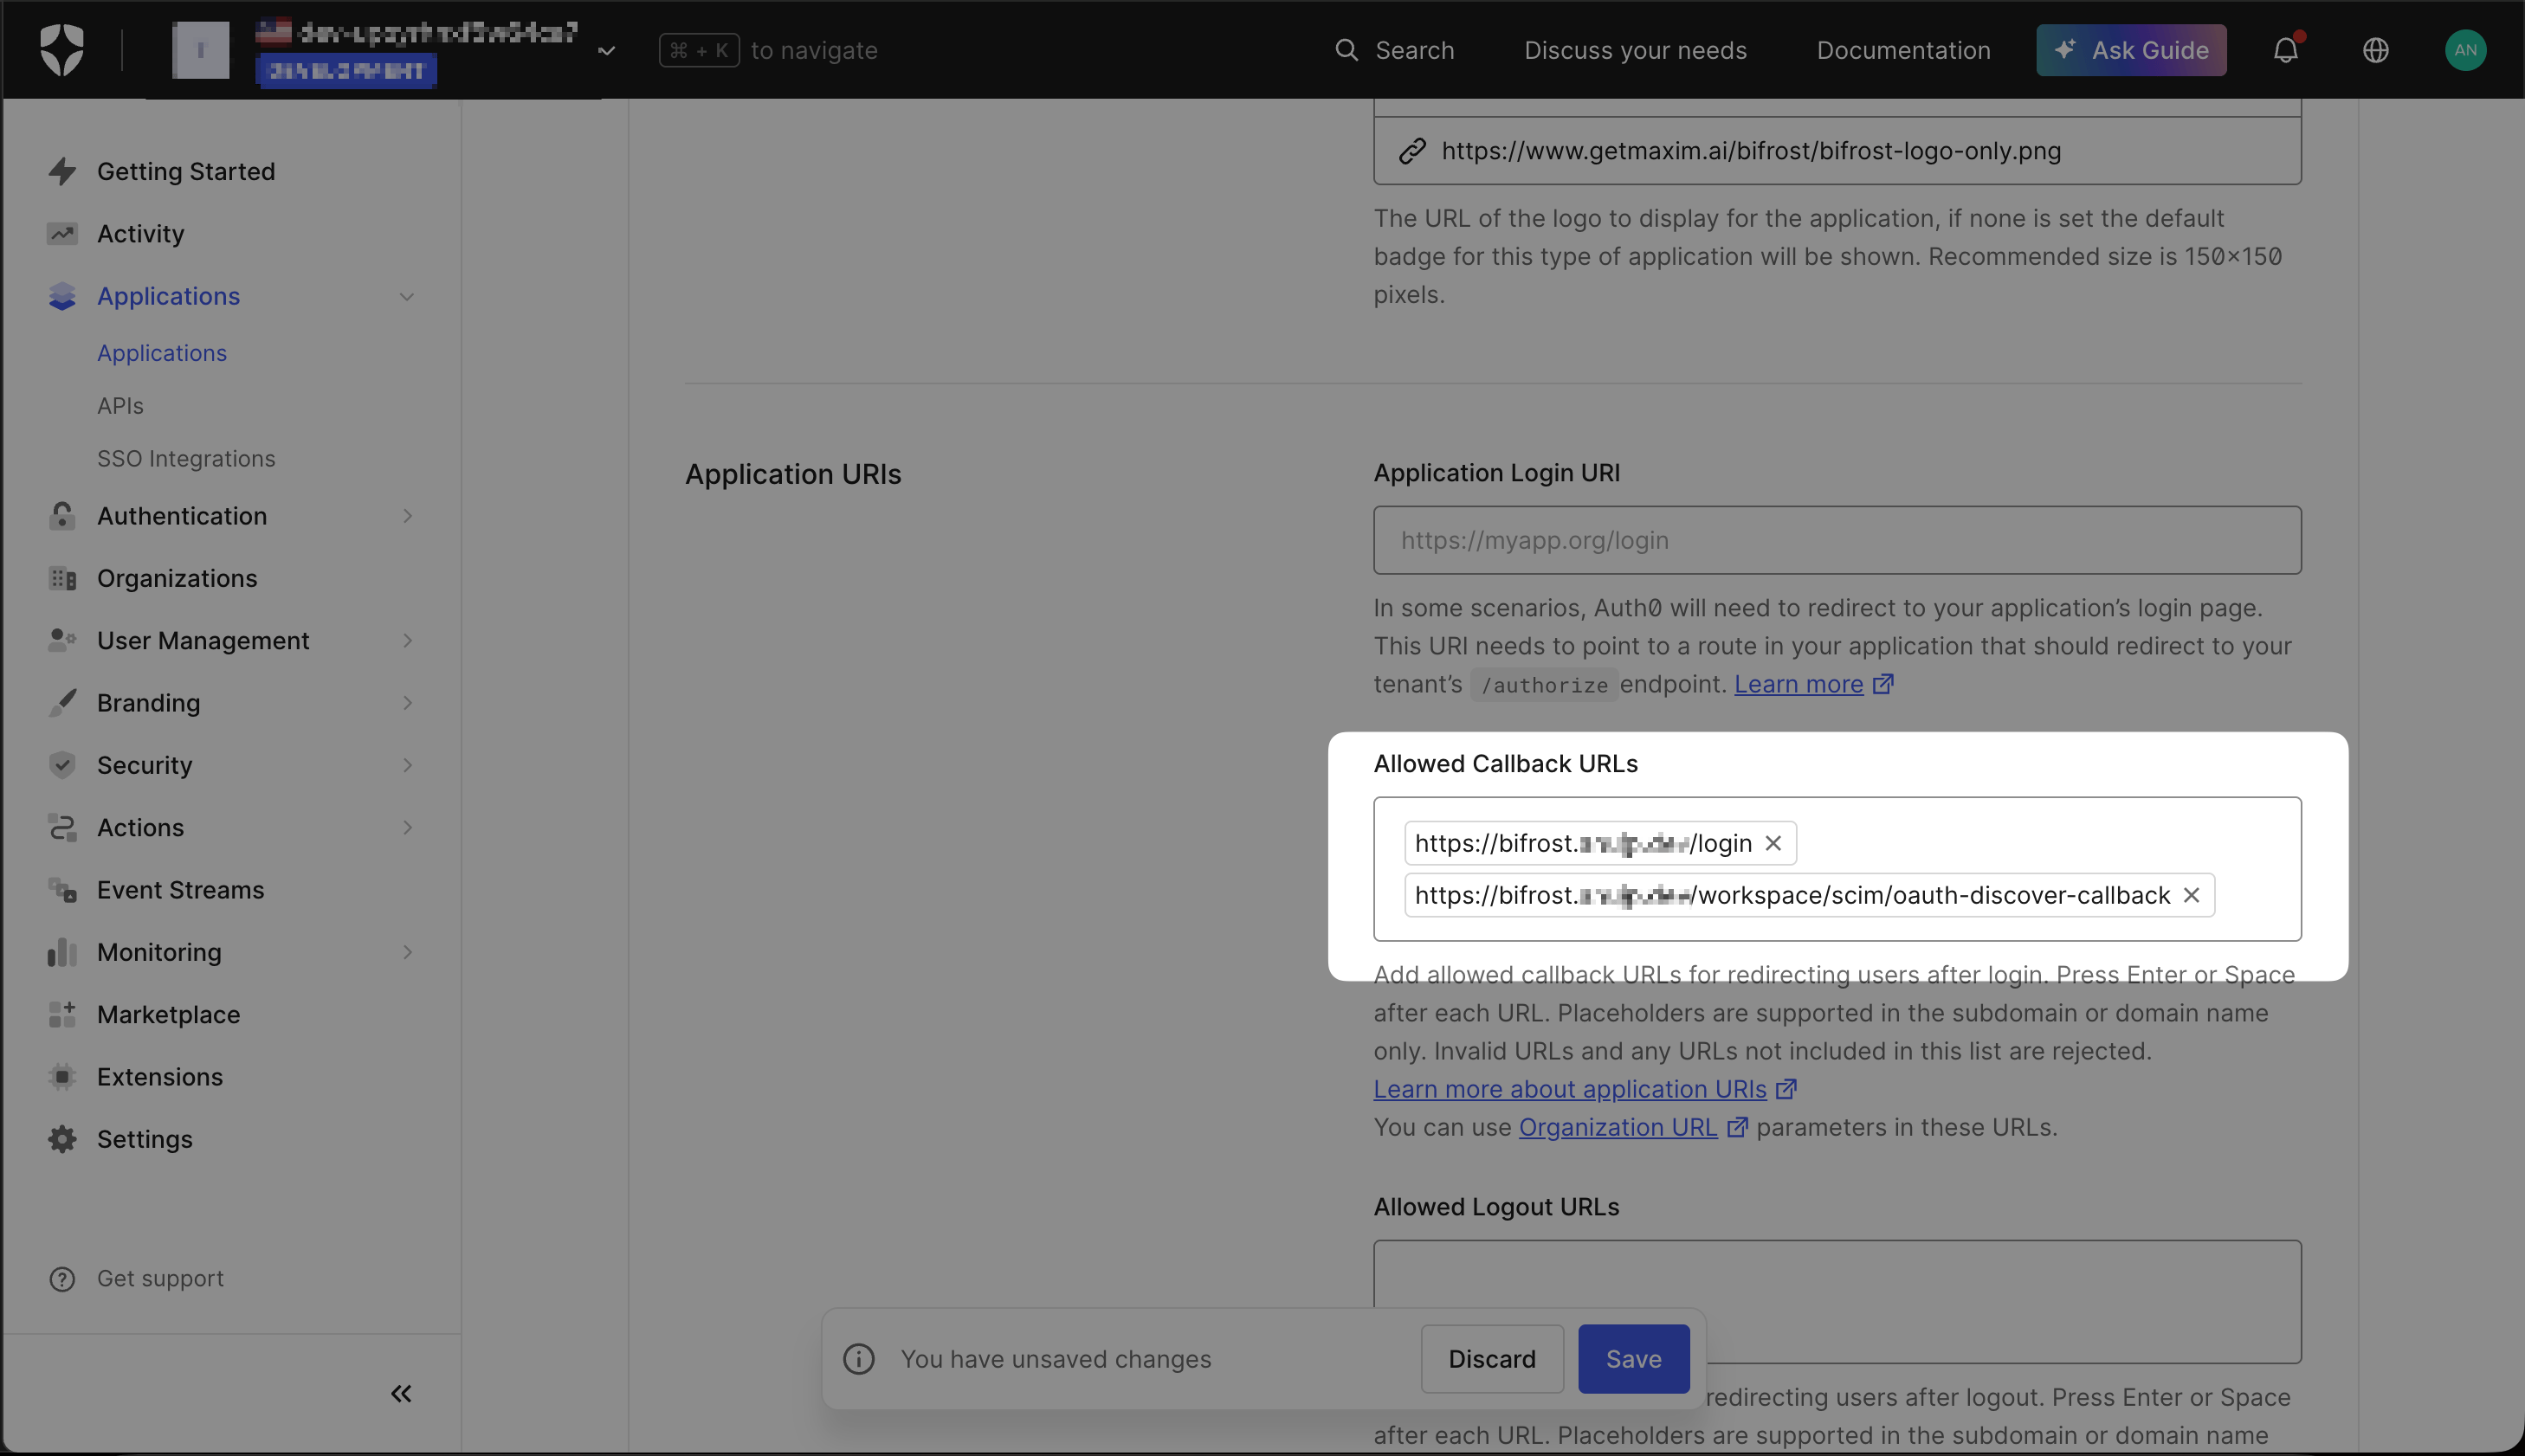
Allowed Callback URLs - the login callback is required; the discovery callback is optional and only used during initial setup.
Copy your credentials
- Domain - e.g.
your-tenant.us.auth0.com - Client ID
- Client Secret (click to reveal)
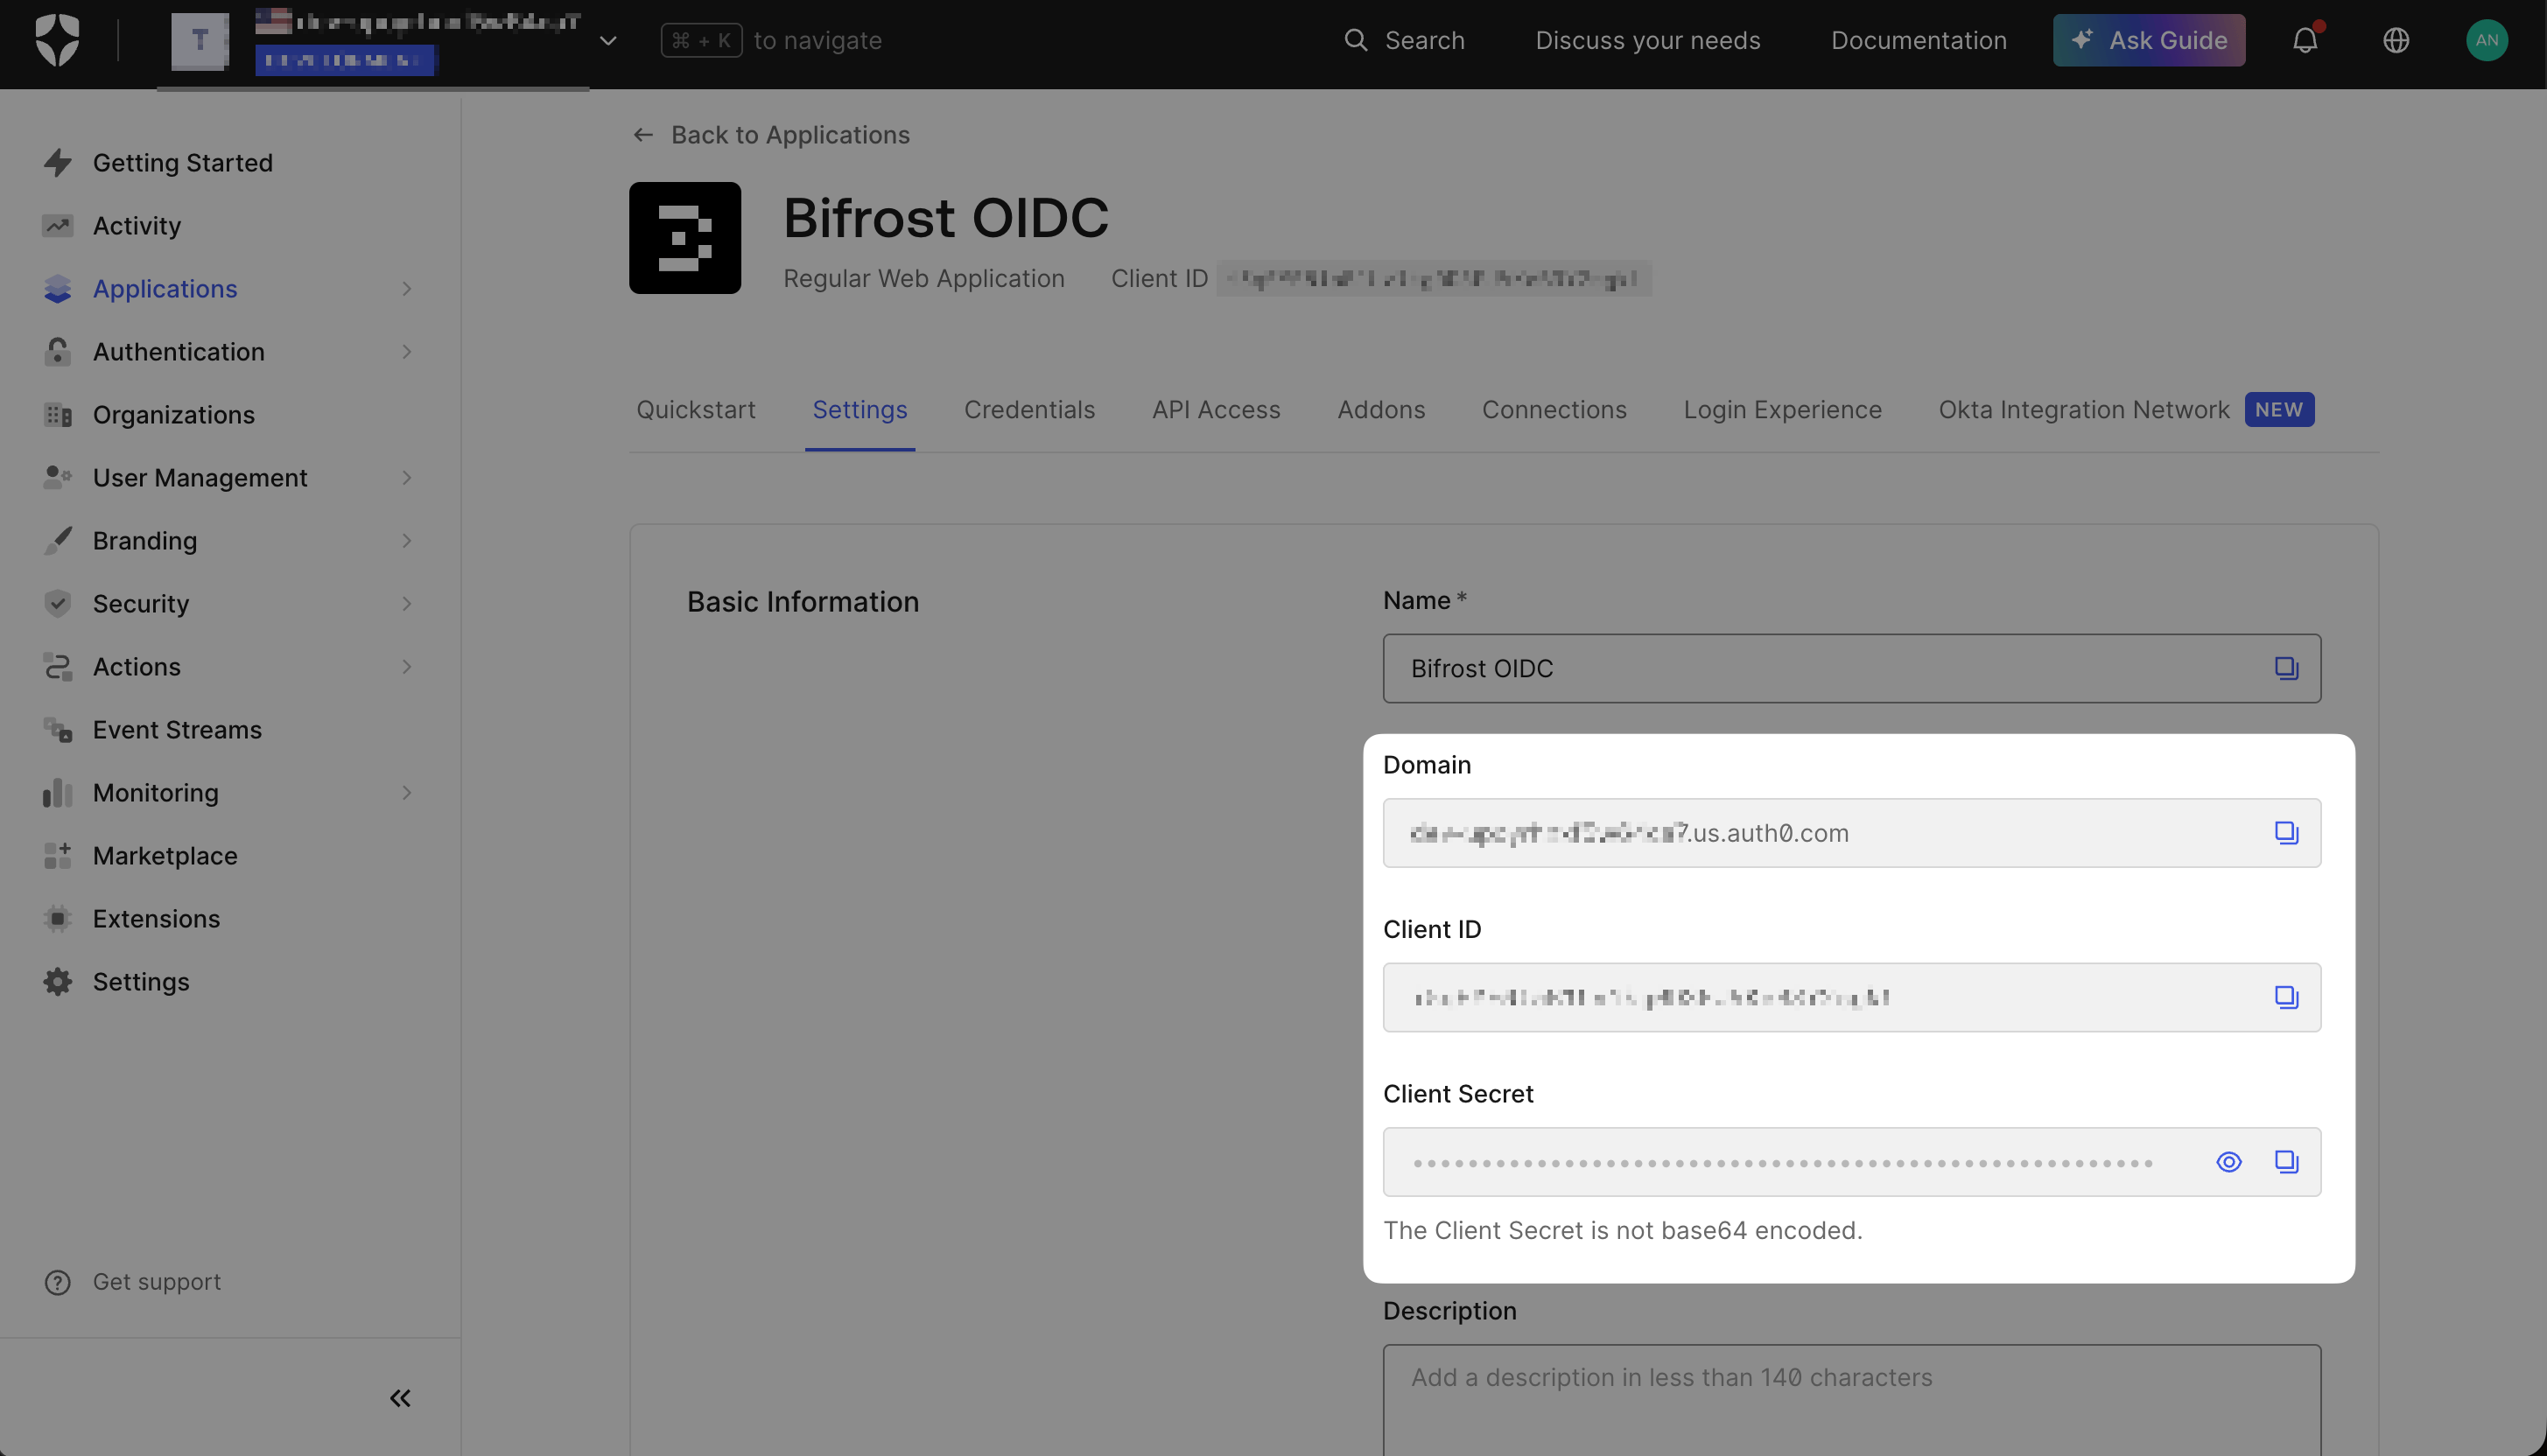
App credentials - copy Domain, Client ID, and Client Secret. You will need all three when configuring Vikat.
Step 2: Add custom claims to the token
Auth0 does not include roles or group memberships in the ID token by default. Use a Post Login Action to inject any attributes you want to map in Vikat. In Actions → Triggers → post-login, create a custom action and add the claims you need. For example, to expose Auth0 roles: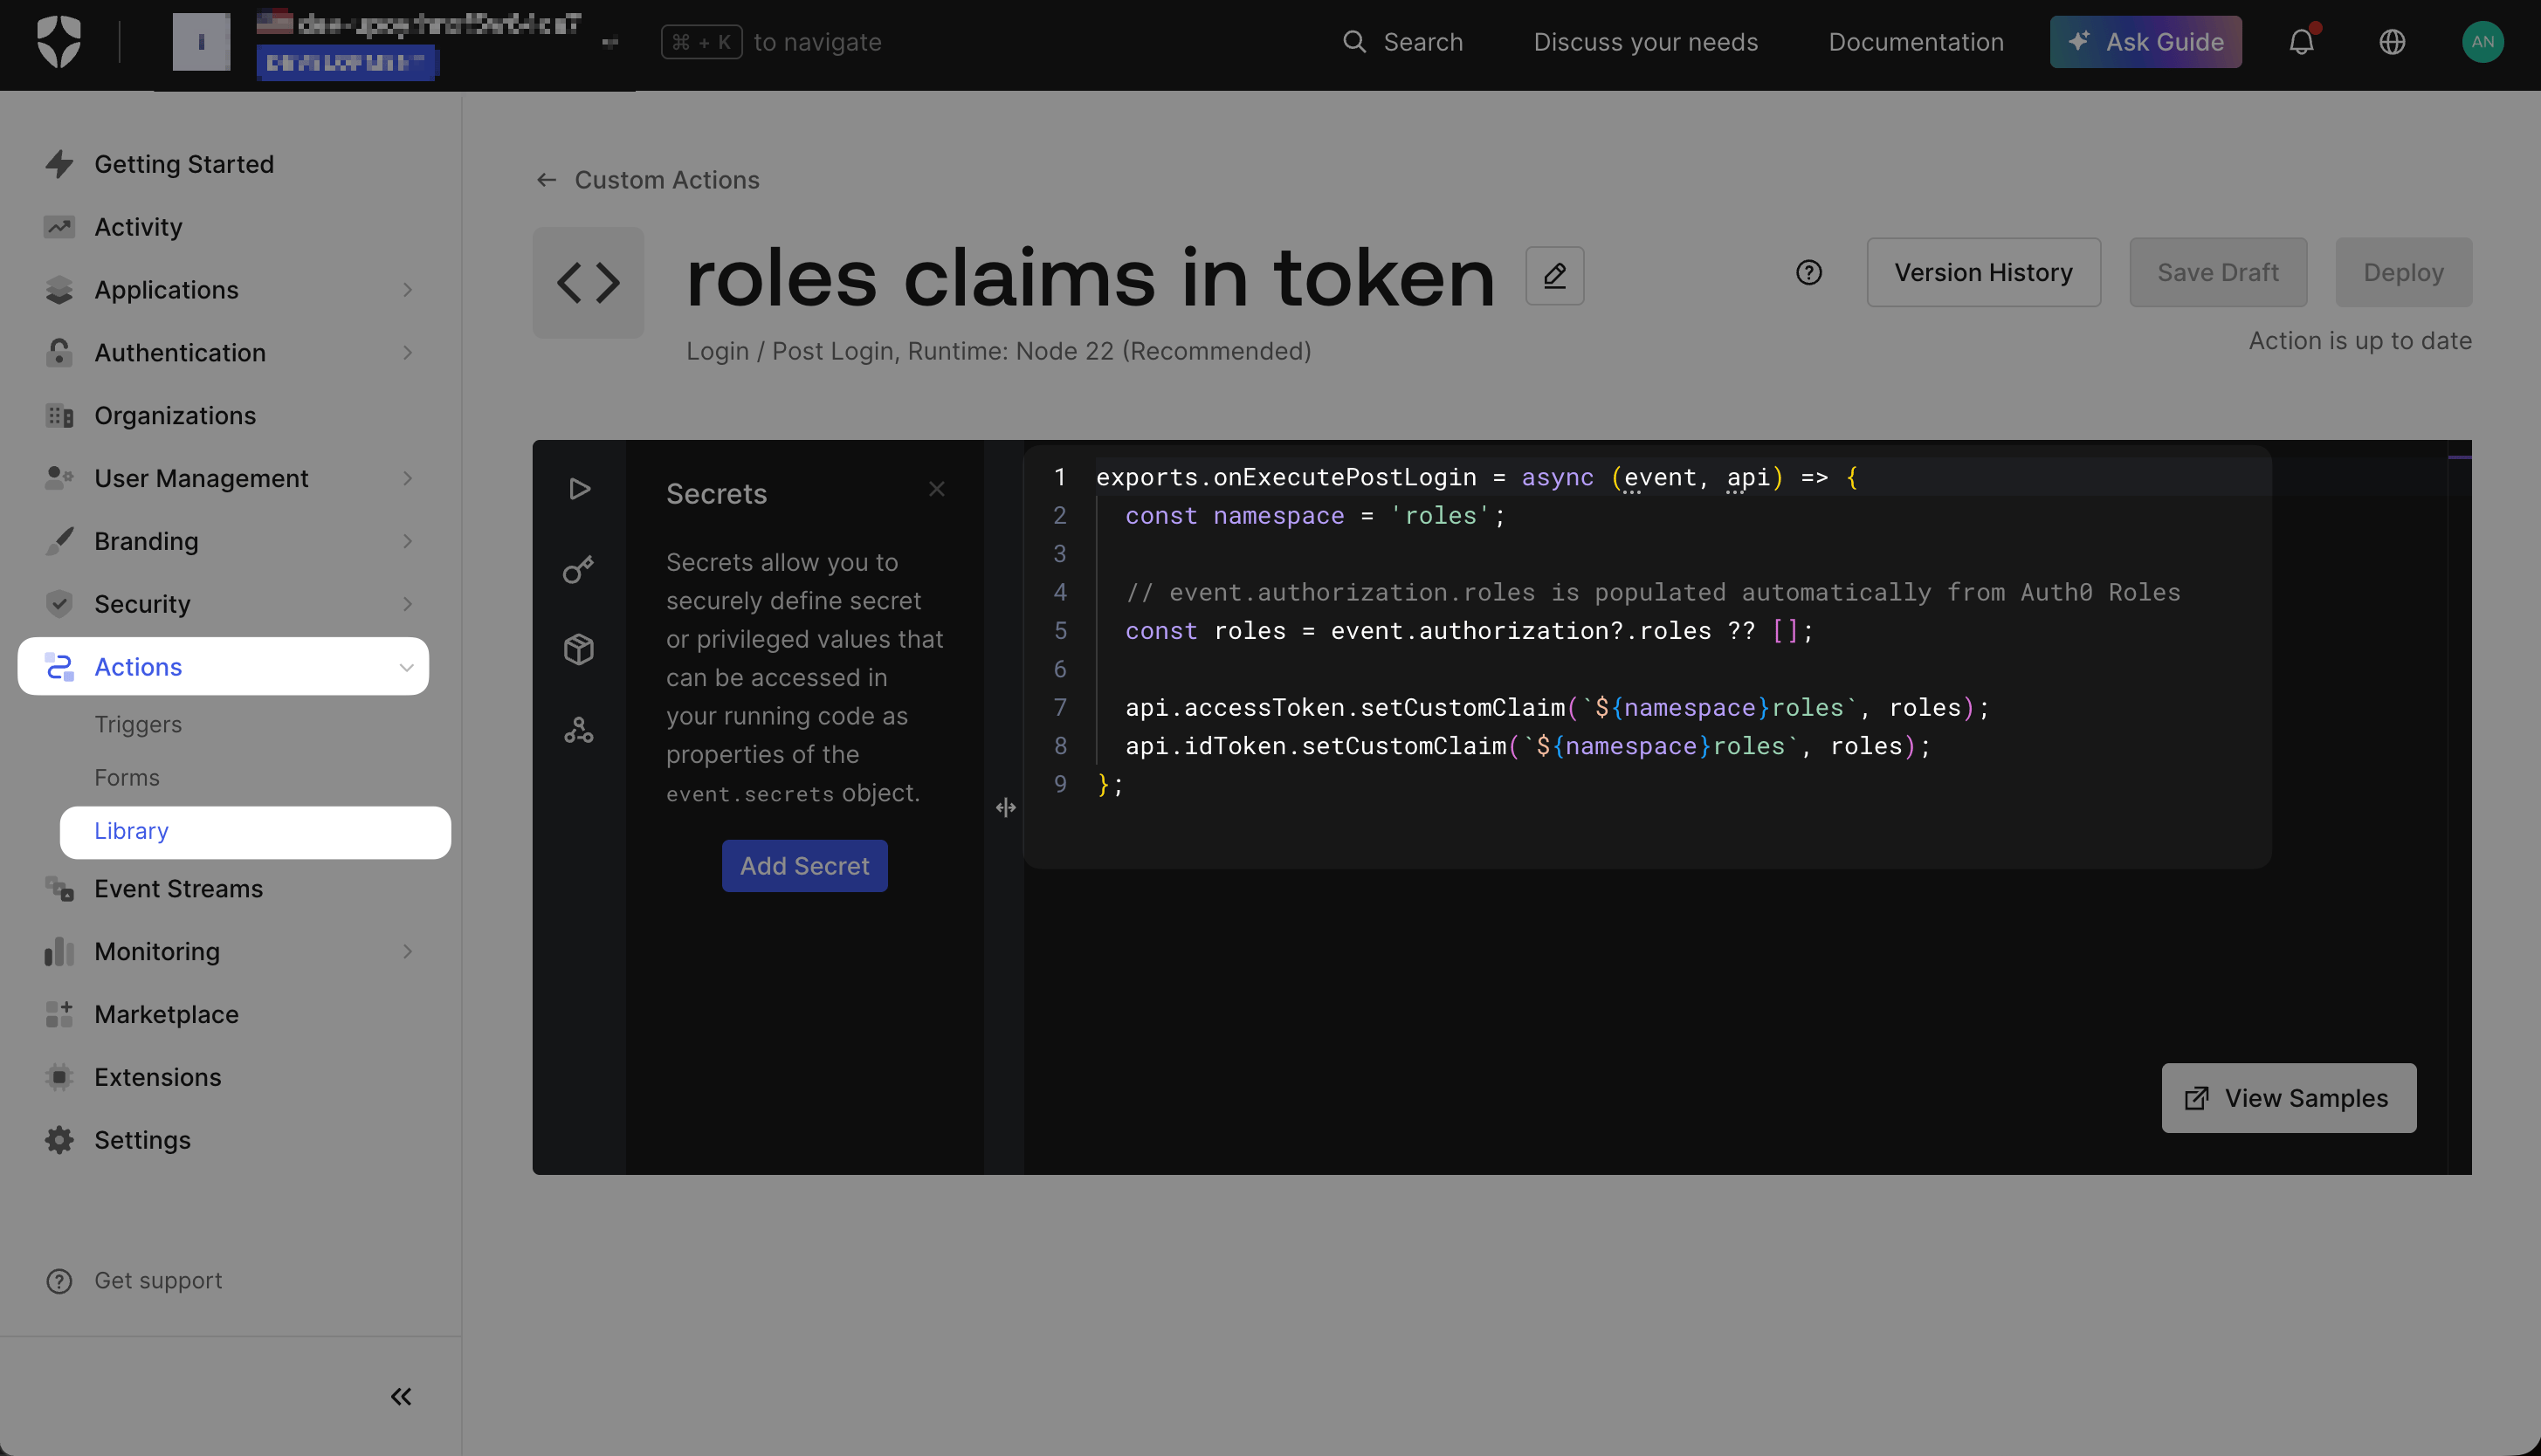
Post Login Action — deploy the action and wire it into the post-login flow between Start and Complete.
event.user.department, event.user.app_metadata.team, etc. Any claim you set here will be available in Vikat’s Attribute Mapping step.
roles) keeps the mapping simple. If your org policy requires a URL-namespaced claim (e.g. https://your-domain.com/roles), use the full namespaced string as the claim name in Vikat’s attribute mappings.Step 3: Create a Machine-to-Machine app for bulk sync (optional)
Create a Machine-to-Machine application
Vikat Bulk Sync - and select Machine to Machine Application.Click Create.Authorize the Management API
read:usersread:user_idp_tokensread:rolesread:role_members
Copy the M2M credentials
Vikat Bulk Sync app and copy:- Client ID
- Client Secret
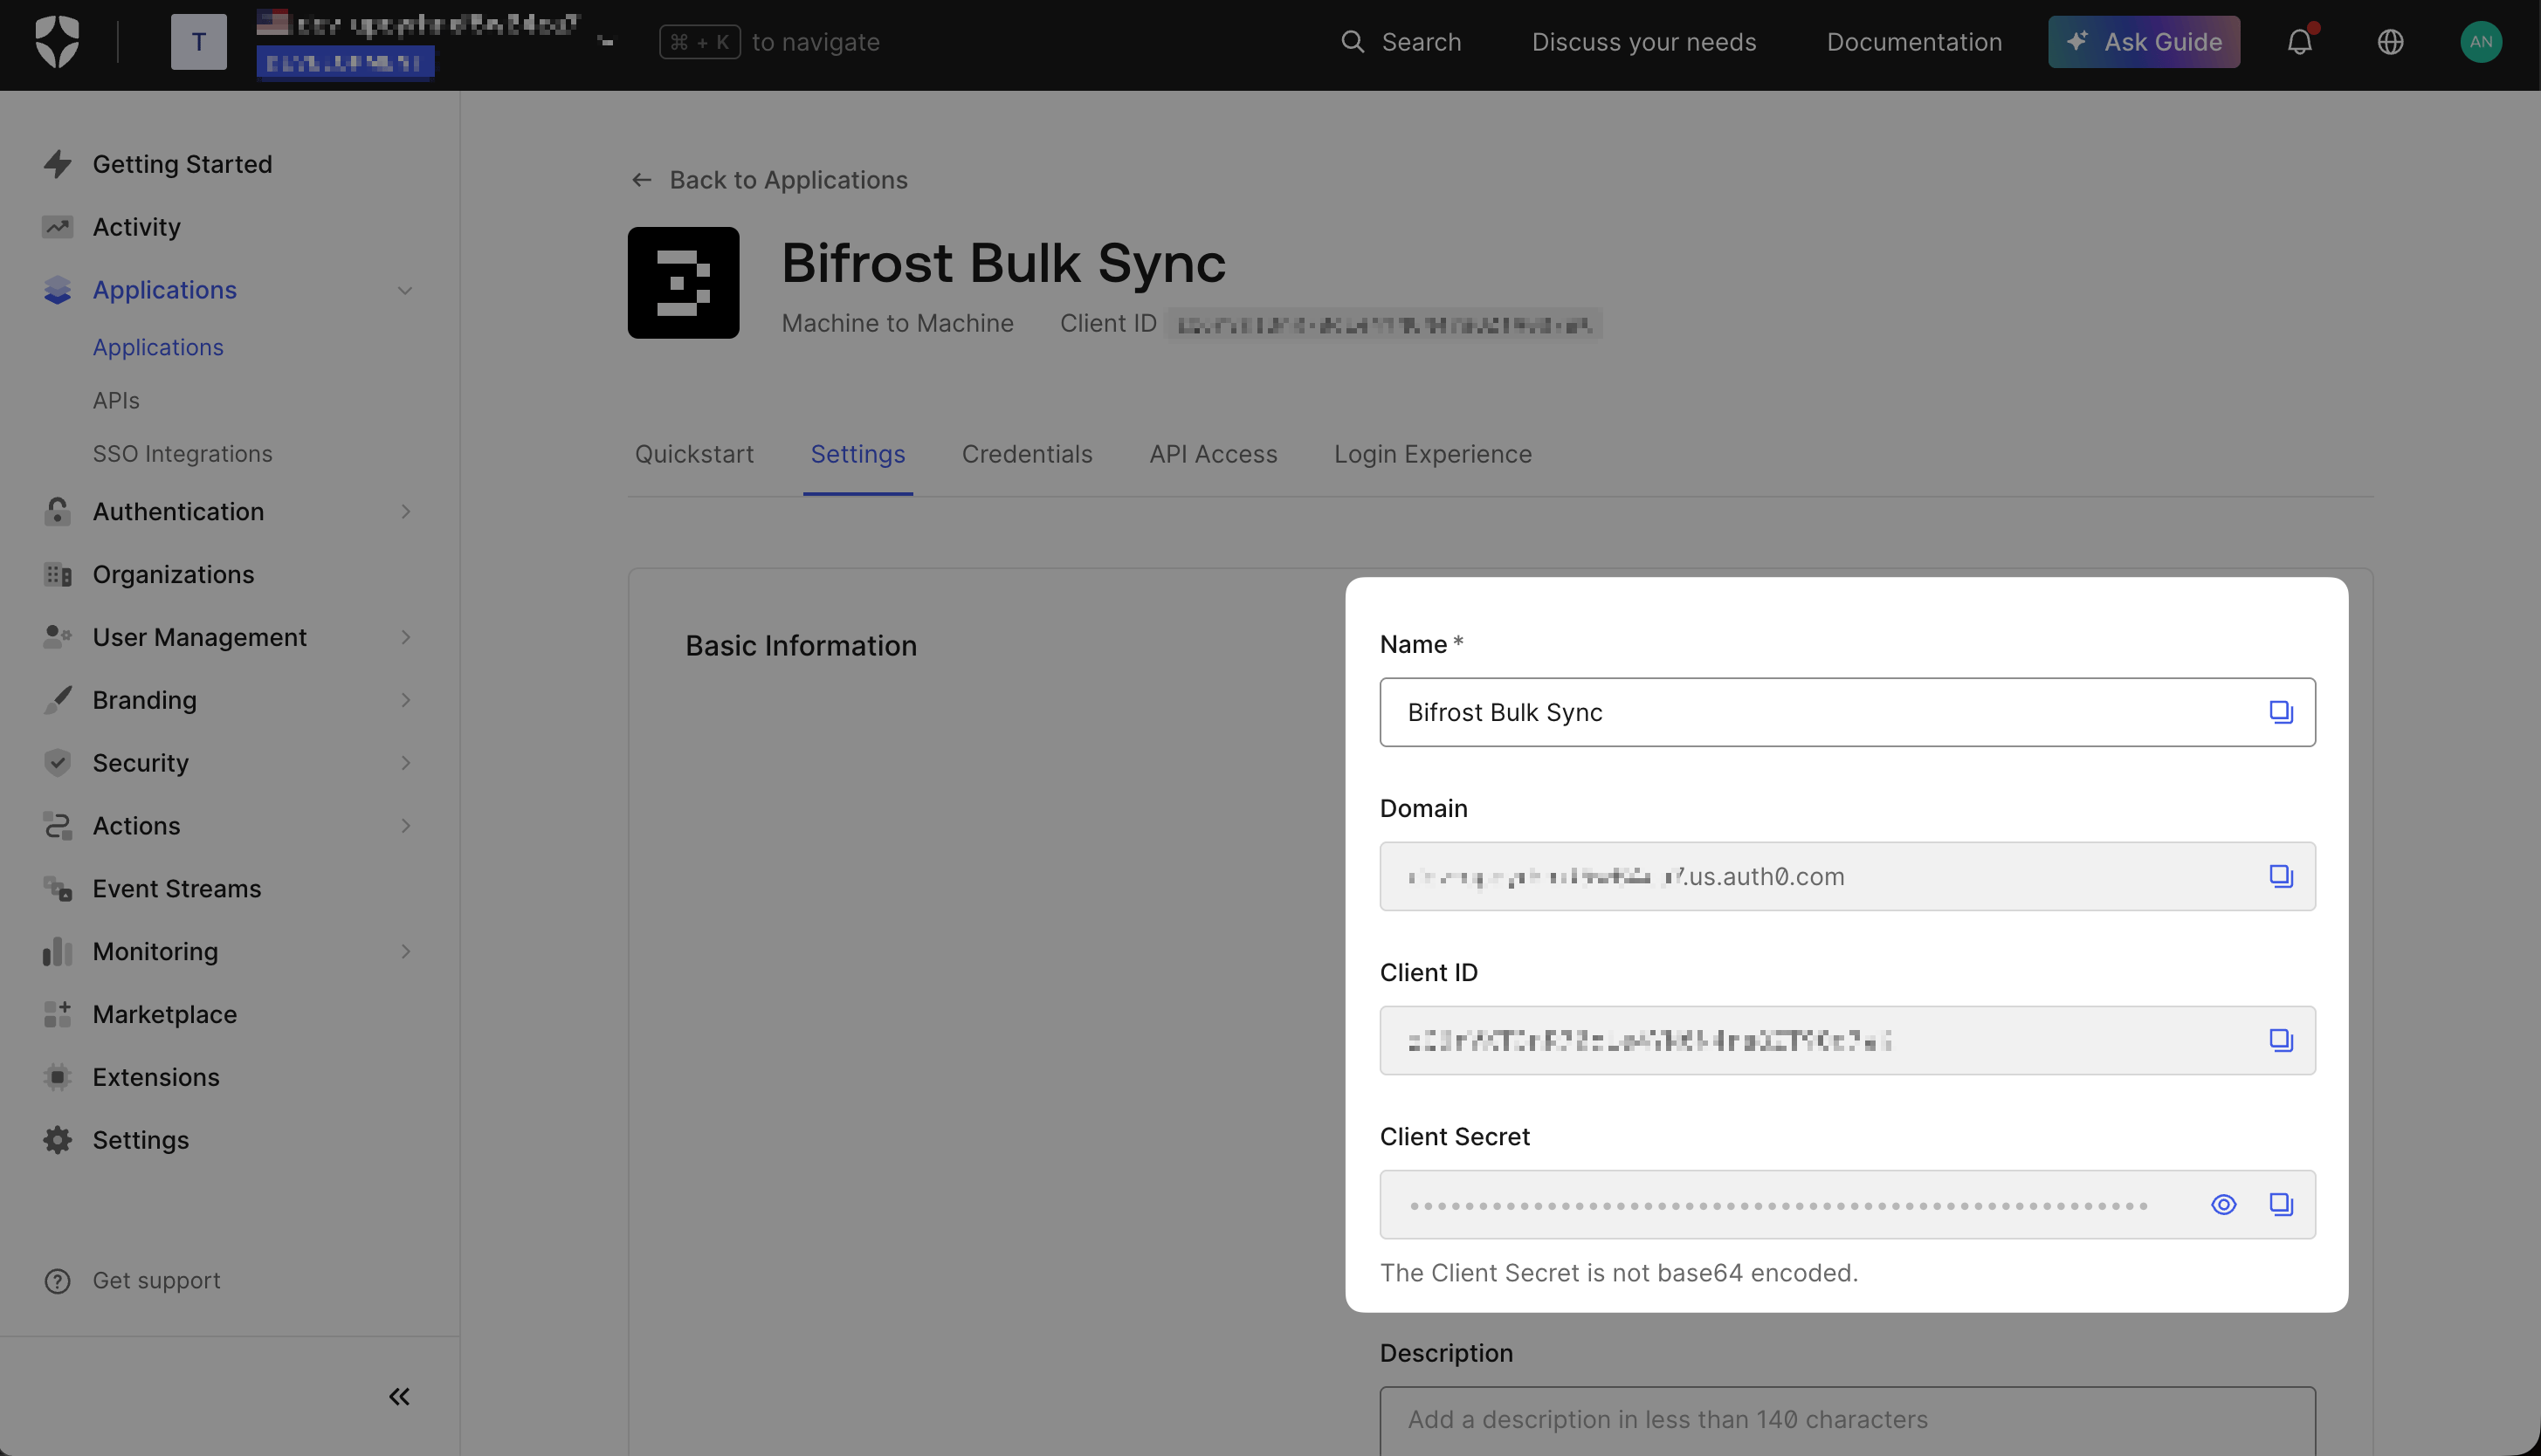
Machine-to-Machine app credentials - these are used in Vikat to authorize background user sync via the Auth0 Management API.
Step 4: Configure Vikat
Open User Provisioning and choose Auth0
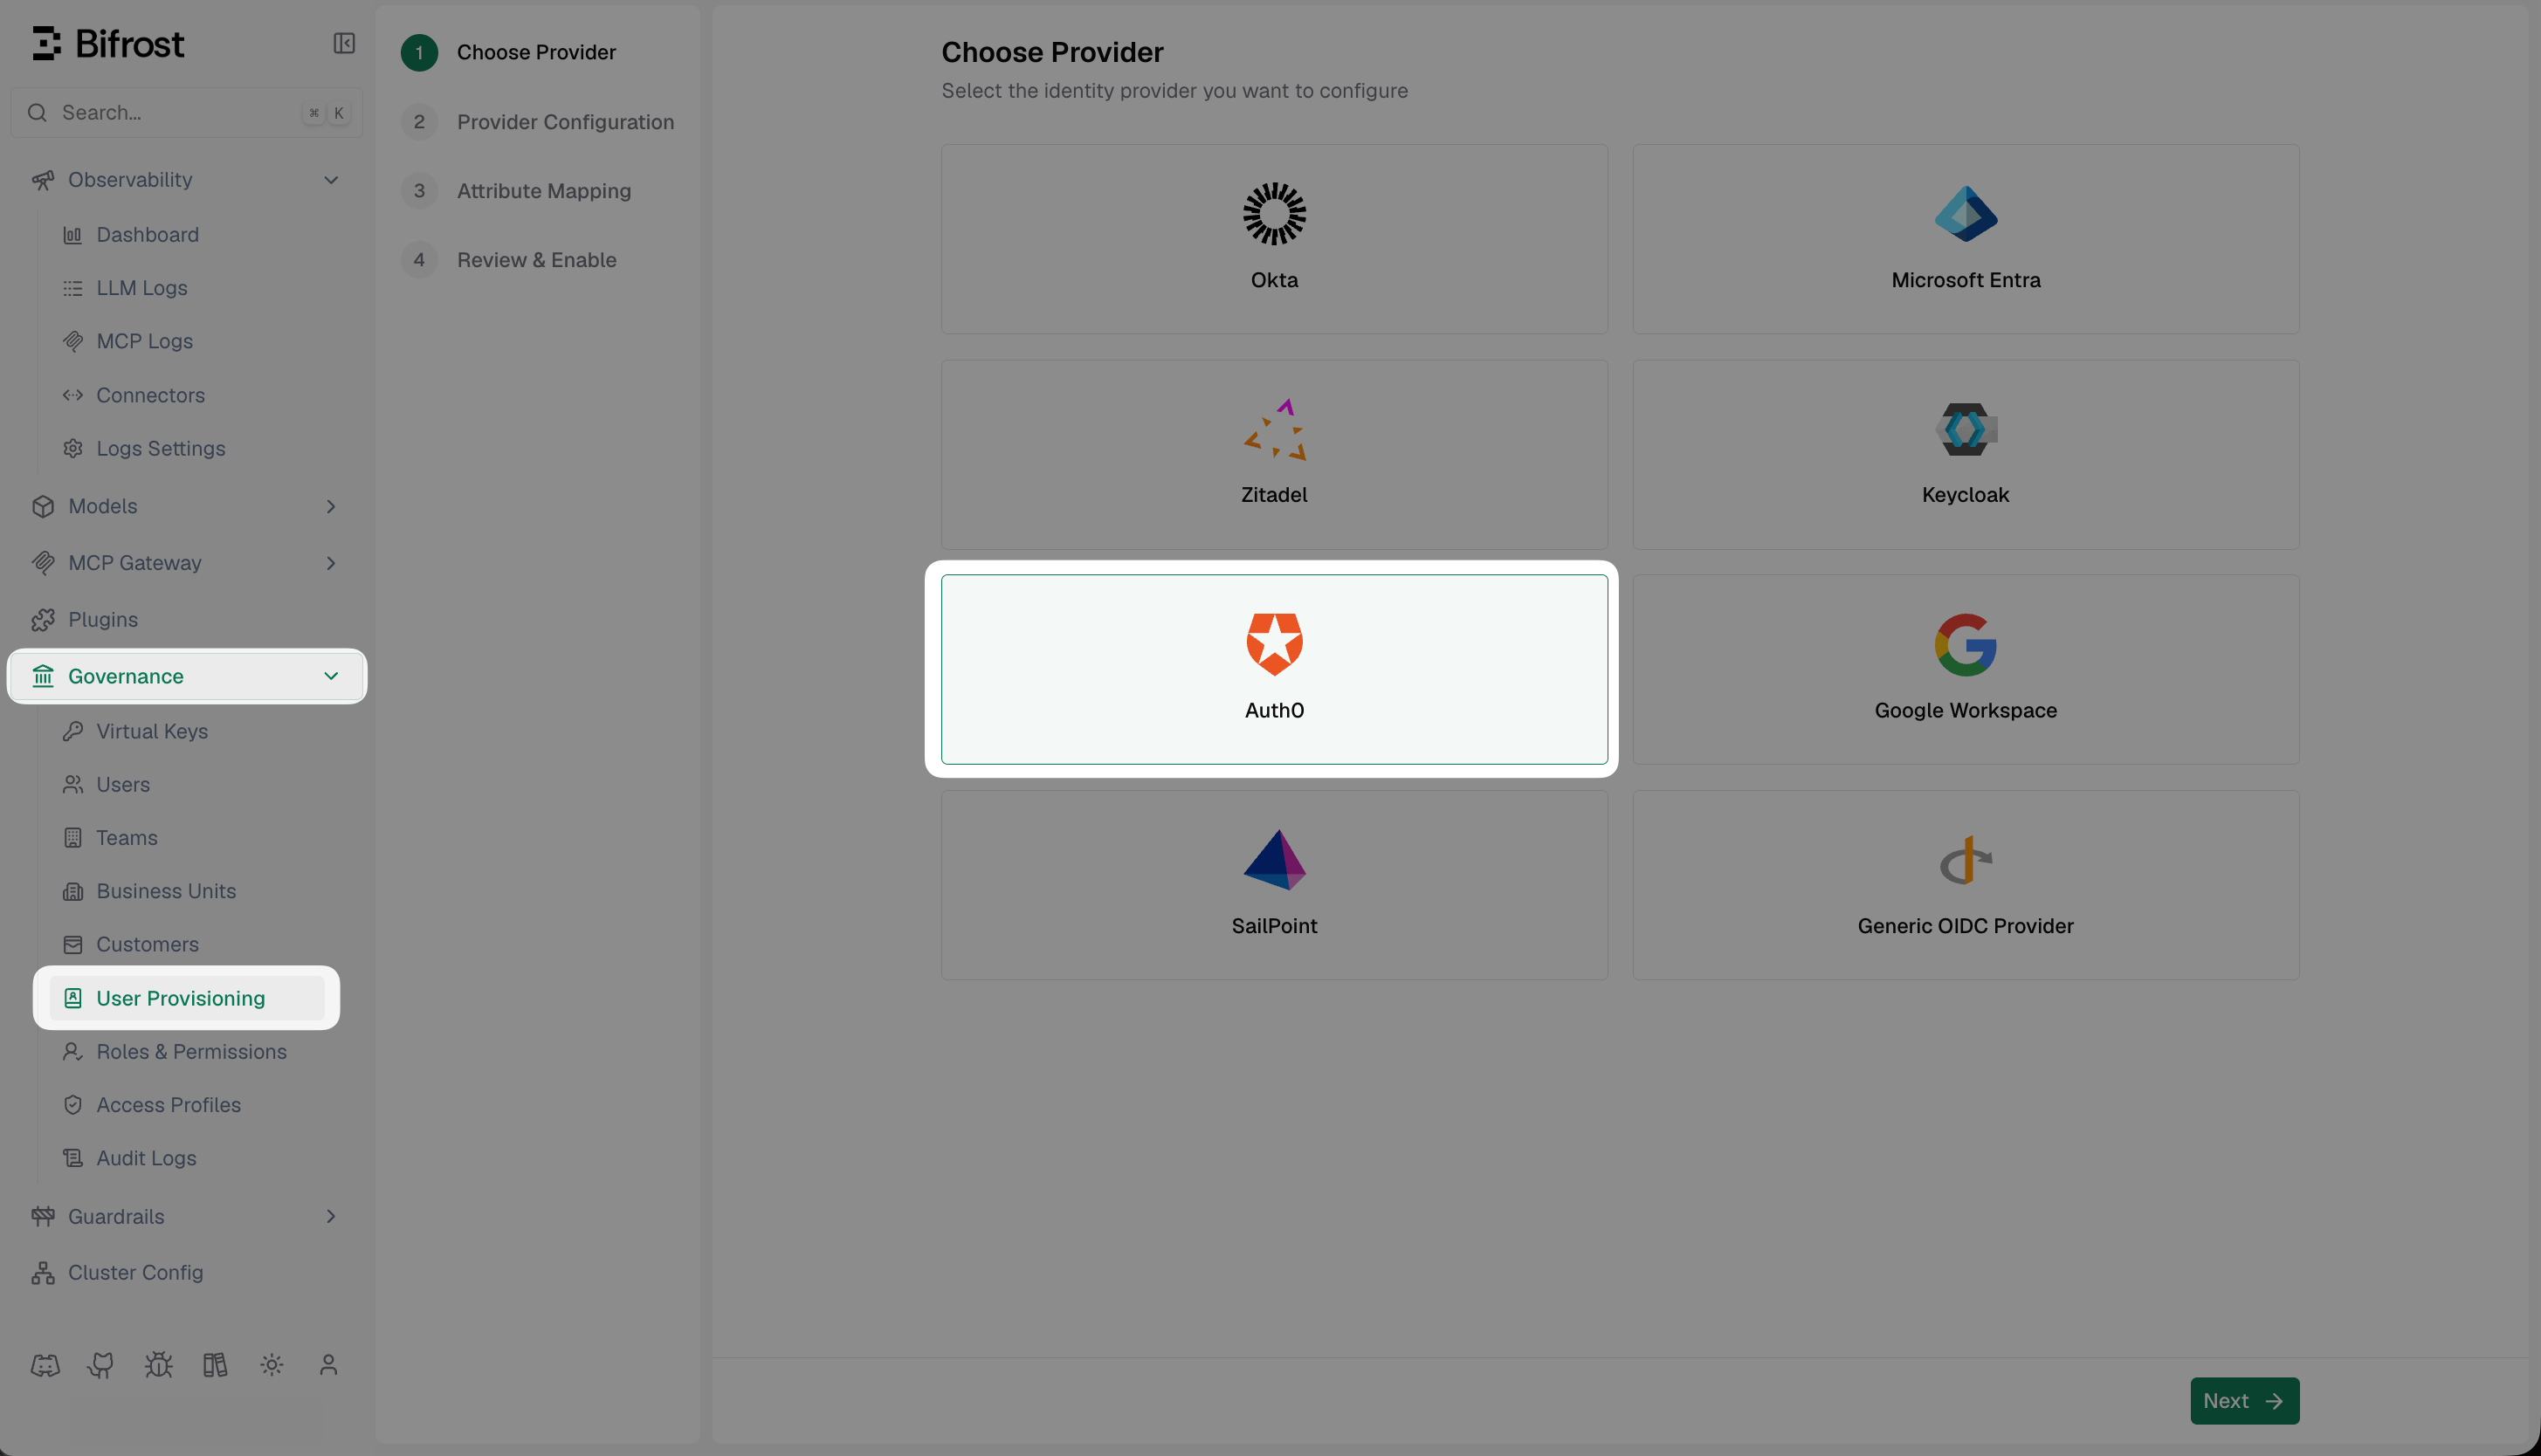
Choose Provider - select Auth0 from the list of supported identity providers.
Fill in the provider configuration
Discover claims
roles claim is present and contains the expected values before building your mappings.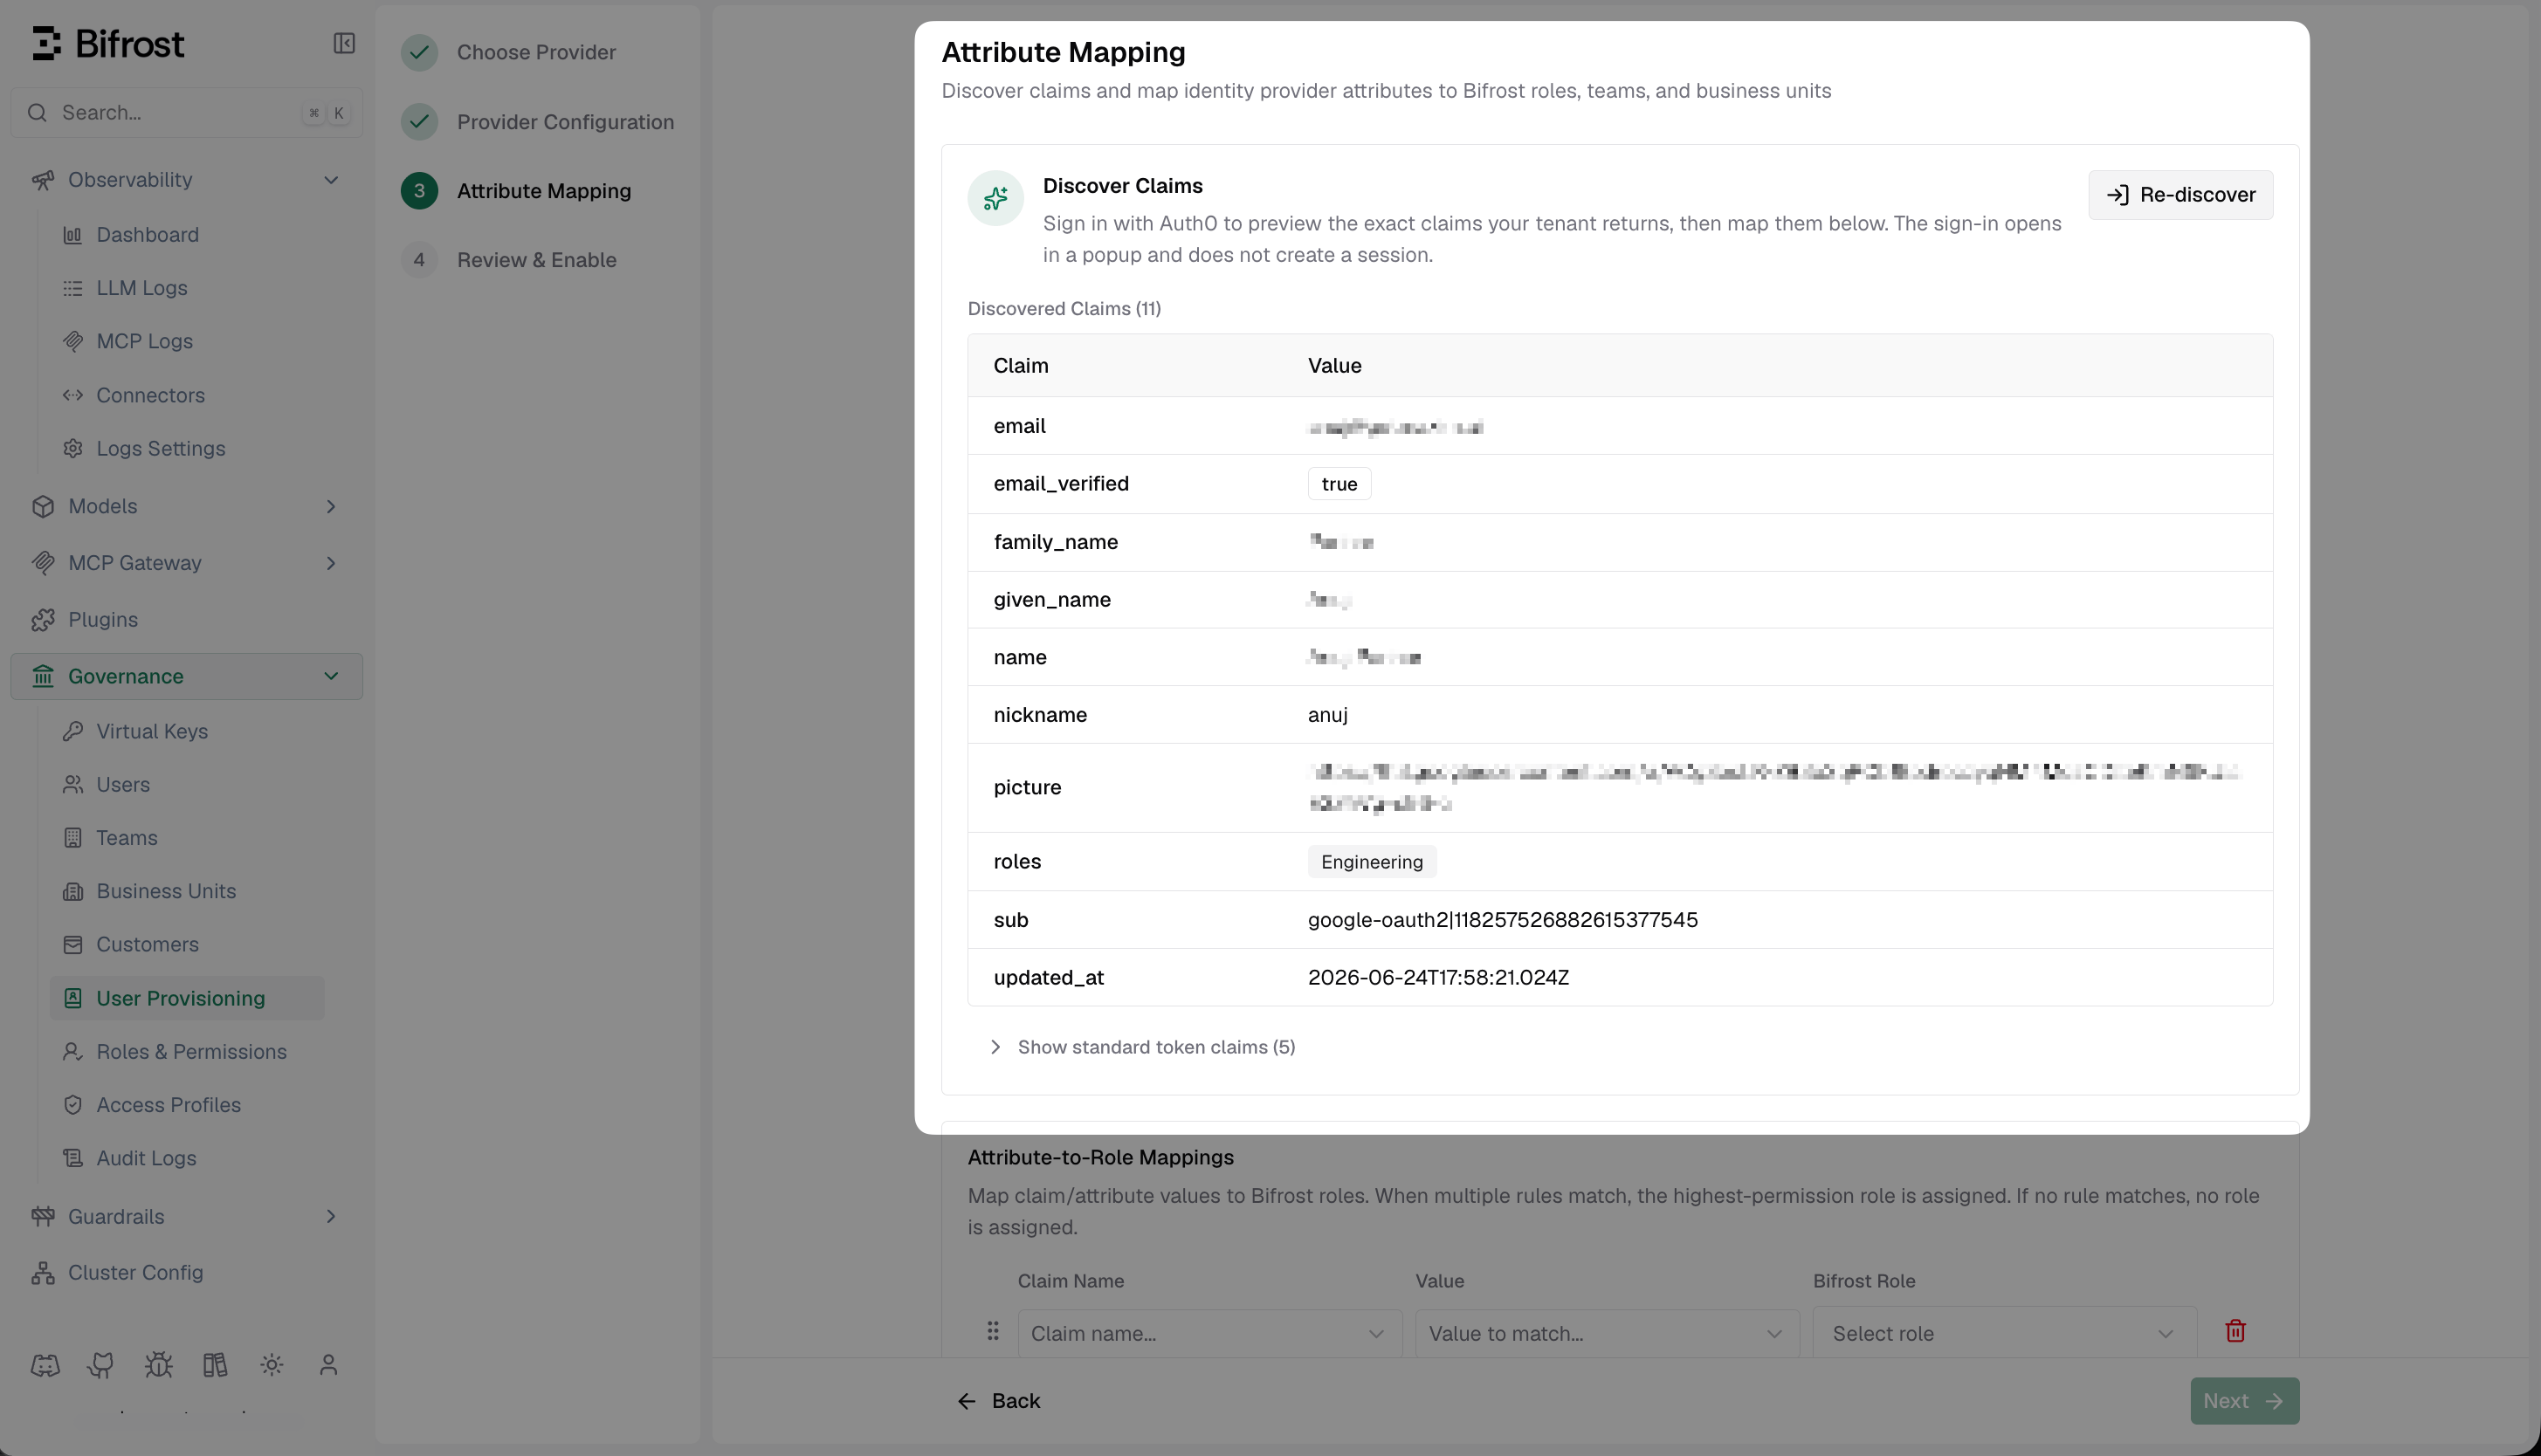
Discover Claims - authenticate once to see the exact JWT claims Auth0 sends, including the roles claim added by your Post Login Action.
Set up attribute mappings
- All matching rules are evaluated - if multiple rules match, the role with the highest permissions is assigned
- If no rule matches, the user is not assigned a role and login is denied
- Use a specific value (e.g.
engineering) to map that exact claim value to a named Vikat team - Use
*as the value to sync the claim value directly as the team name - Use
${*}to extract part of the string - e.g.Vikat Playground: ${*} TeammatchesVikat Playground: Alpha Teamand creates team Alpha
- Use a specific value (e.g.
platform) to map that exact claim value to a named Vikat business unit - Use
${*}to extract a substring as the business unit name - e.g.Vikat Playground: ${*} BUmatchesVikat Playground: Alpha BUand creates business unit Alpha - When a rule matches, the resolved business unit is assigned to all of that user’s teams
- Manually assigned teams are left unchanged
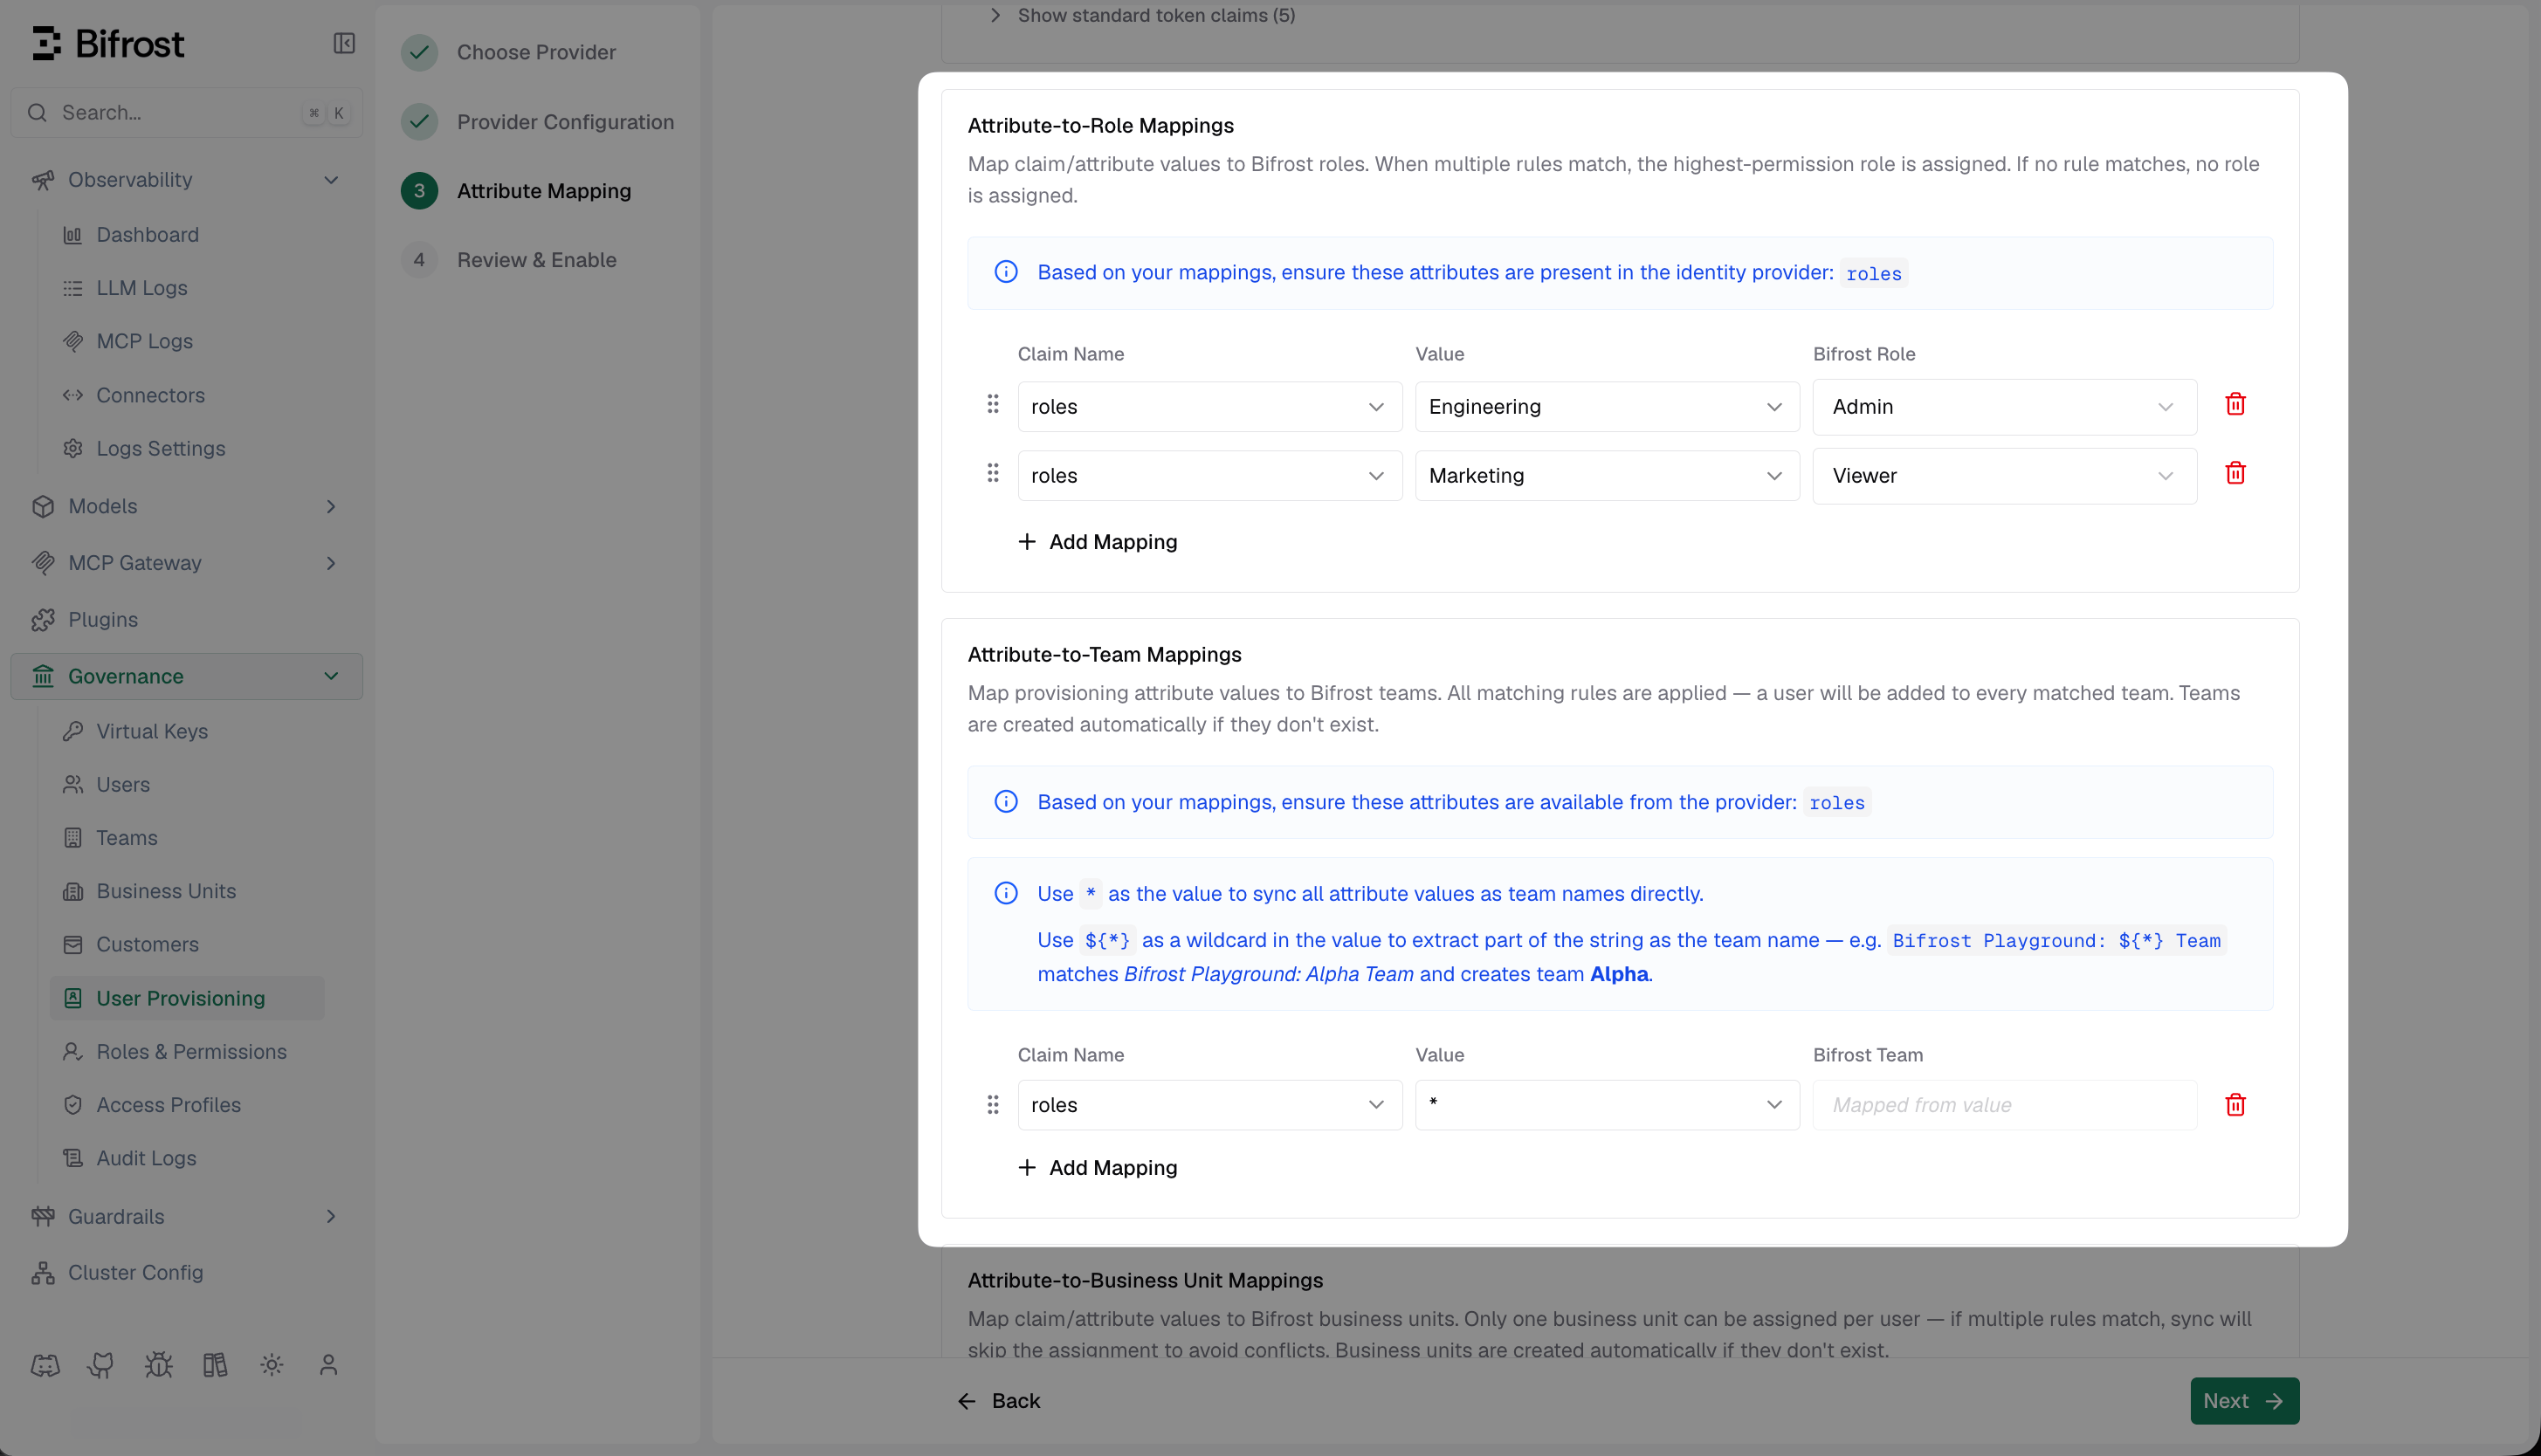
Attribute Mapping - map the roles claim values from Auth0 to Vikat roles, and optionally map groups to teams and business units.
Review and enable
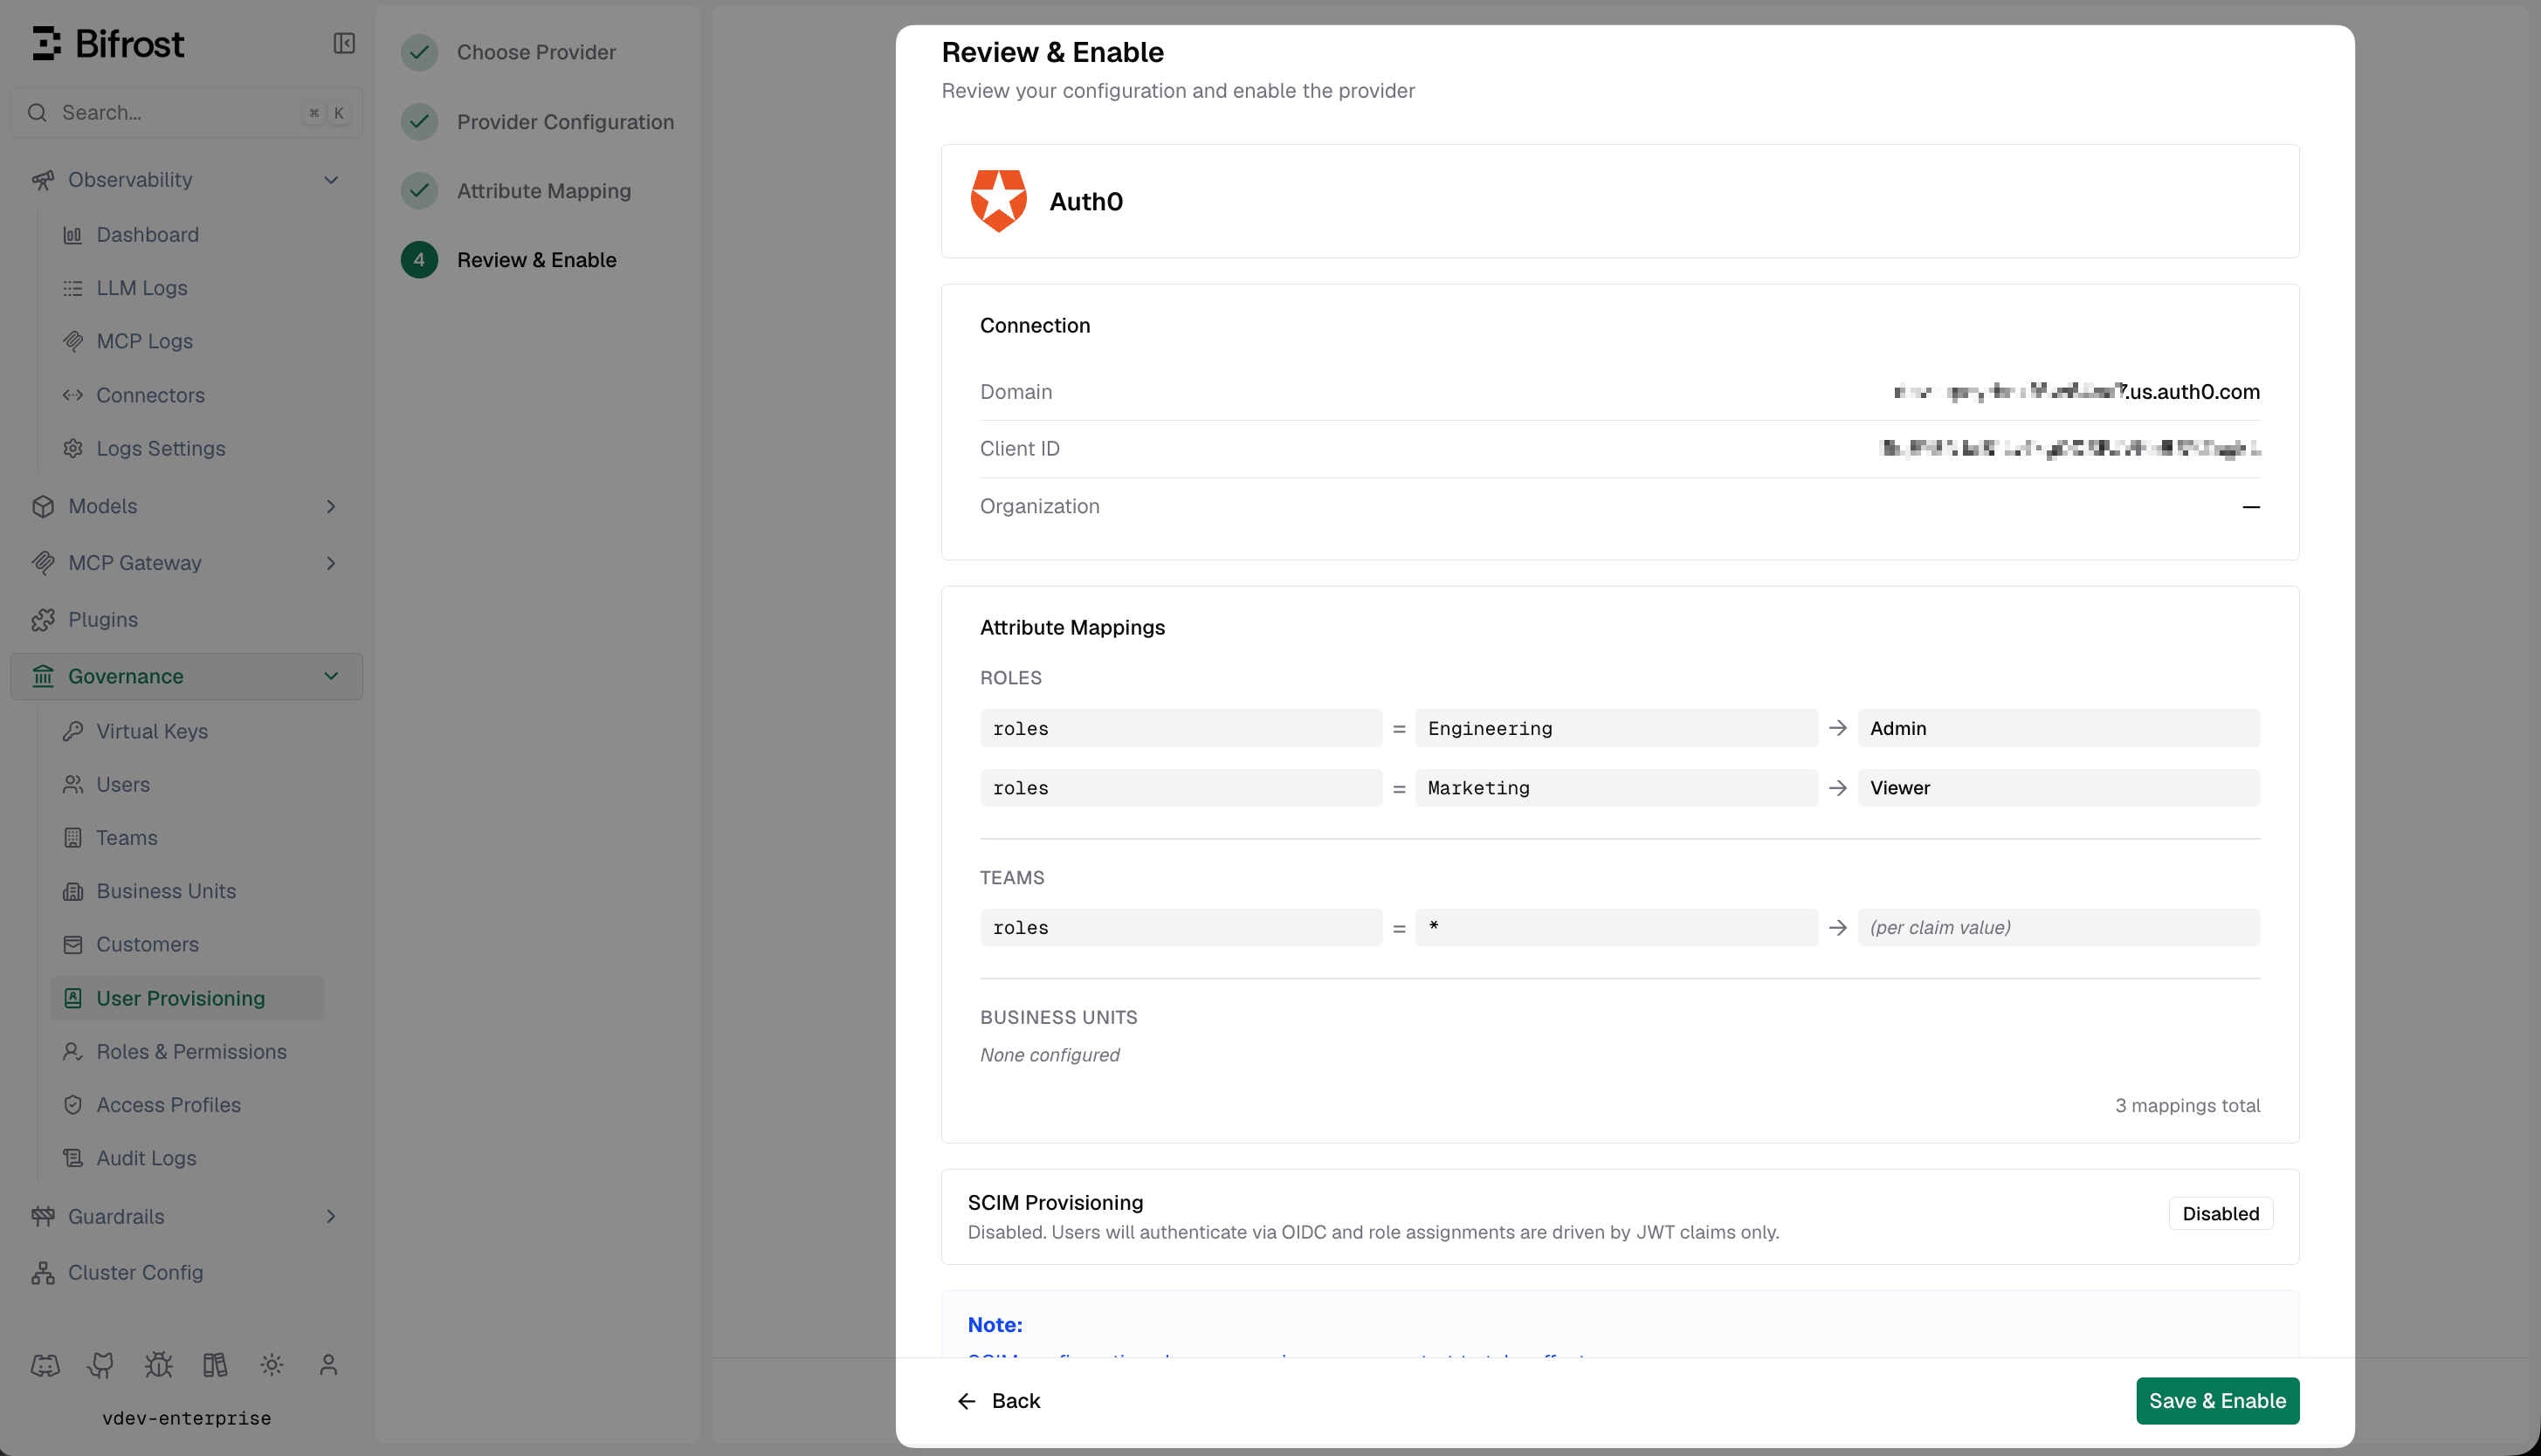
Review & Enable - confirm your Auth0 connection details and attribute mappings before activating the provider.
Troubleshooting
User is not redirected to Auth0 - verify the provider is enabled in Vikat and the server was restarted after saving. Confirm the Auth0 Domain has no trailing slash in the Vikat config.Callback URL mismatch - the redirect URI in Vikat must exactly match one of the Allowed Callback URLs in Auth0. Check for protocol, trailing slash, and path differences.
roles claim not appearing in Discover Claims - confirm the Post Login Action is deployed (not just saved as draft) and is connected to the Login flow. Open the Action editor and click Deploy if the status shows Draft.
Roles not assigned after login - confirm the user has an Auth0 role assigned under User Management → Users → Roles tab. Only roles from Auth0’s built-in role system are populated by the action code above - custom claims from other sources need a modified action.
invalid_token or audience mismatch - leave the Audience field blank in Vikat, or set it to match the aud claim in the JWT (typically the Auth0 Client ID).